Getting Started
SMSpro Gateway: Transform Your Android Phone into a Cloud SMS/MMS Gateways
- Uploaded Date: 21-September-2025
- Project: SMSpro Gateway
- Author: Acnoo
- Email: acnooteam@gmail.com
Thank you for purchasing our product. If you have any questions that are beyond the scope of this documentation file, please feel free to email us via our user page contact form or directly to email at acnooteam@gmail.com
Requirements
- PHP >= 8.2
- Ctype PHP Extension
- cURL PHP Extension
- DOM PHP Extension
- Fileinfo PHP Extension
- Filter PHP Extension
- Hash PHP Extension
- Mbstring PHP Extension
- OpenSSL PHP Extension
- PCRE PHP Extension
- PDO PHP Extension
- Session PHP Extension
- Tokenizer PHP Extension
- XML PHP Extension
For more information about deployment see the Laravel documentation here https://laravel.com/docs/10.x/deployment
Download Project from Envato
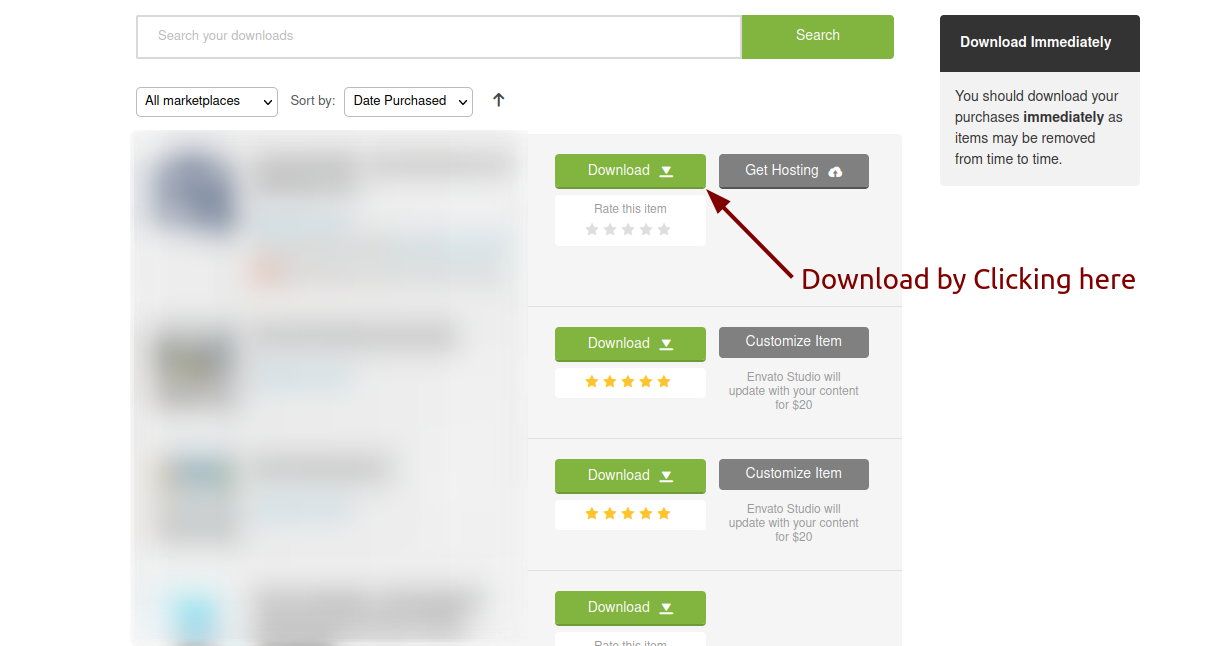
After successfully purchase SMSpro Gateway download the project from Envato download page
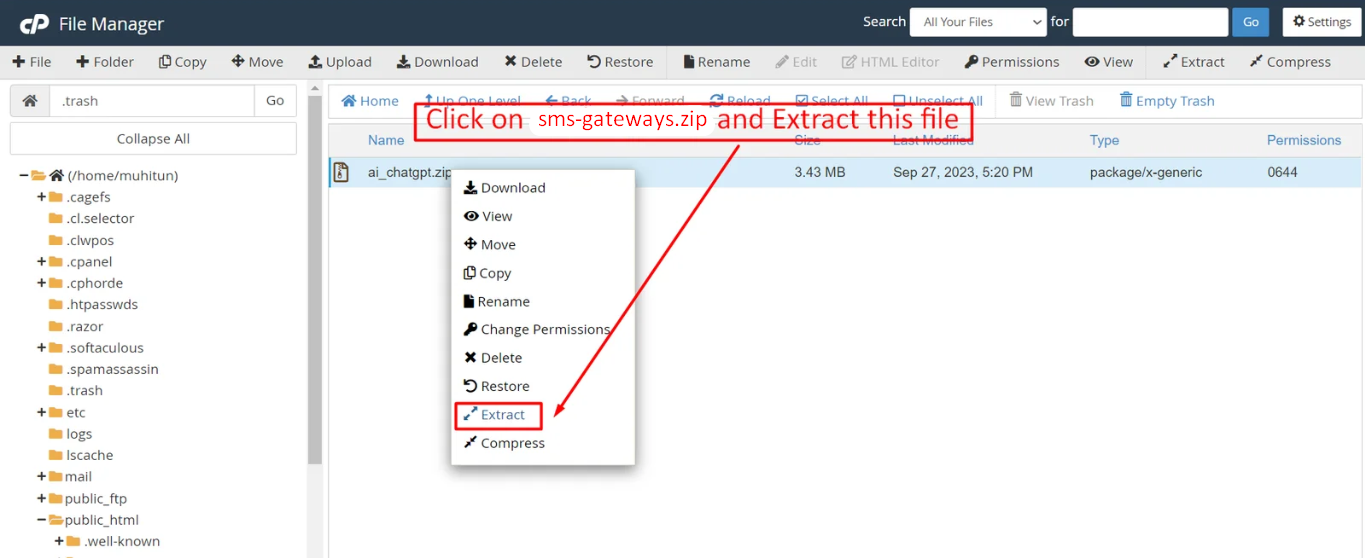
Extract the downloaded file. You will have another zip file named Main-File.zip containing the main project's files and a documentation folder. You are reading this documentation, that means you already have theme both.
Creating Database
Before installing, you will need to create a new database. If you already know how to do this or have already created one, skip to the next step.
Note: Please use empty database. In most cases you should be able to create a database from your cpanel.
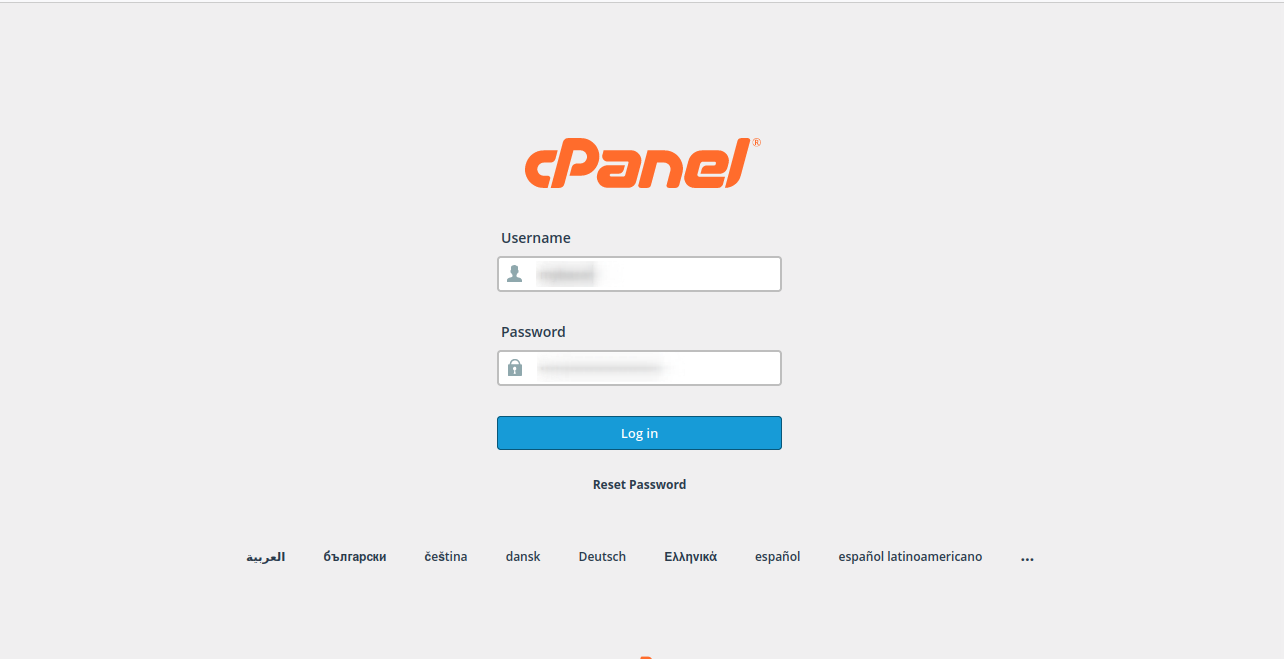
Login to your cPanel by entering this in your browser url
yourdomian.com/cpanel
Step: 1

Step: 2

Step: 3
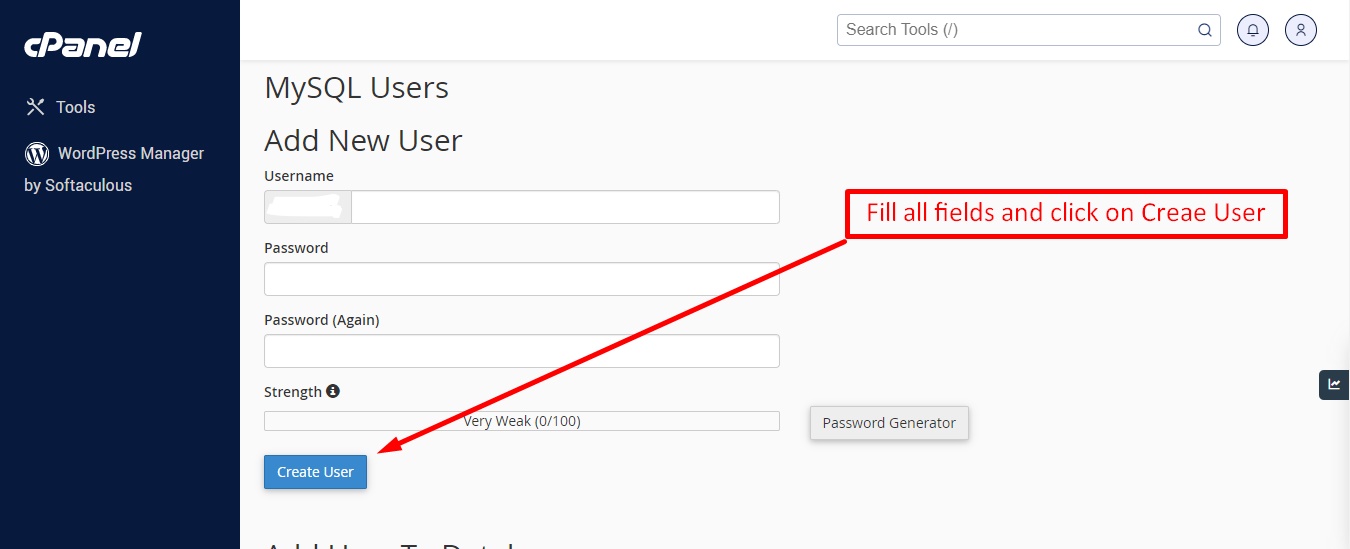
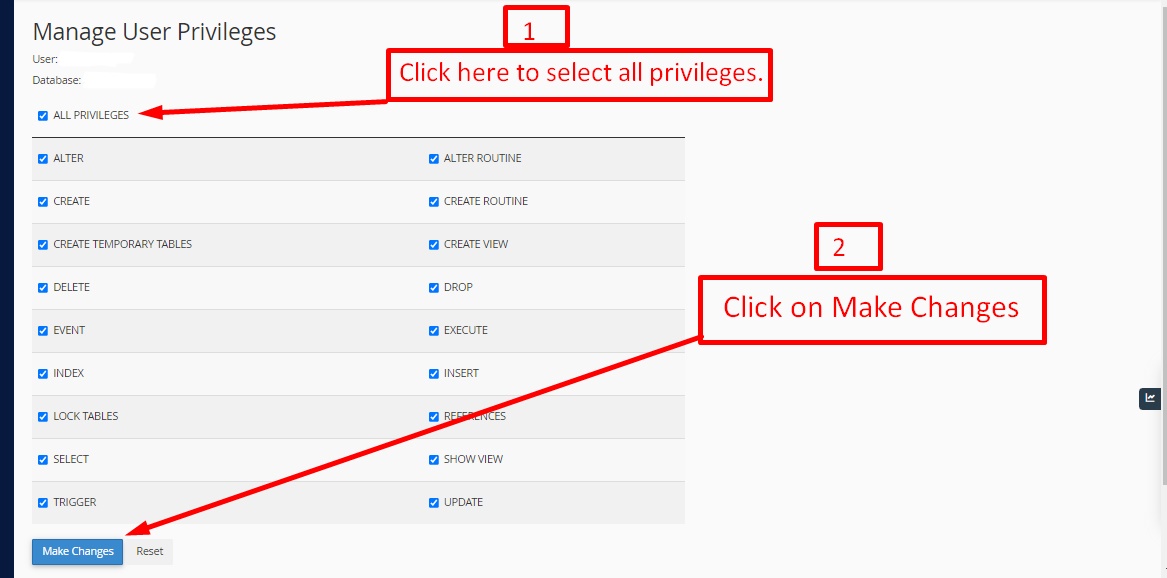
Now you need to create a new user. On the same page go to create a new database user
Step: 4
Now add the user to the database
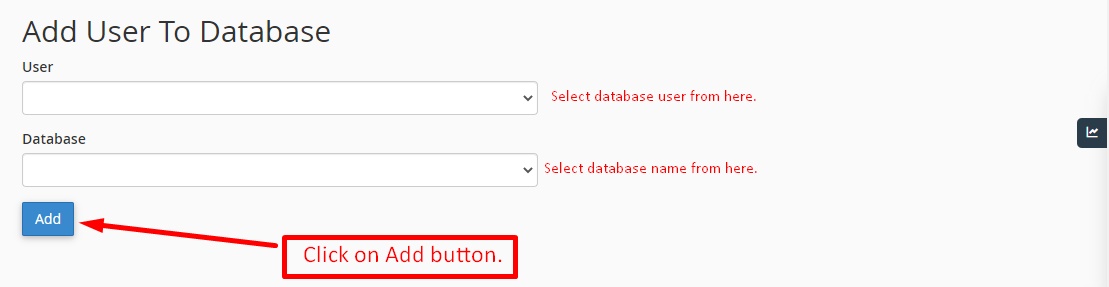
Step: 5
And select full permissions on the database to that user
Uploading Files
On some operating systems, the dotfiles are hidden by default. Before starting to upload the files, please make sure your file explorer has the option to view hidden files turned on.
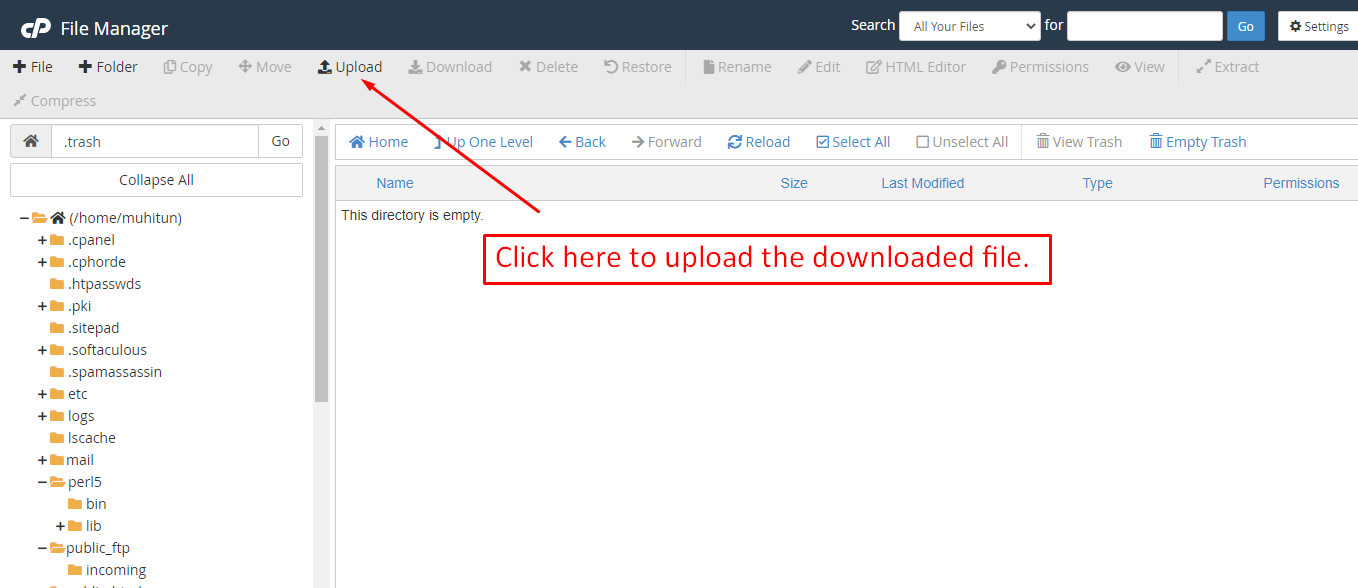
After creating a database, Upload the Main-File.zip file on the web root folder of your domain. This folder is generally called public_html, html, or example.com, but depending on your server's configuration, it might be named differently.


After that in the public_html directory upload the downloaded file.
Note: Important Make sure that you have .env file in your folder.
Note: Make sure that .htaccess file got copied properly from the download to your server.
Installation Wizard
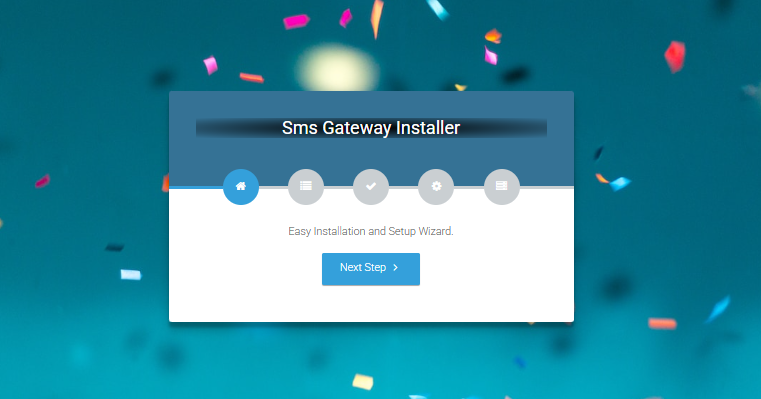
Go to your website address, then you'll see an installation wizard. To open the installer. Visit
yourdomain.com/install
Now the installer will show up.The First screen will be Welcome Screen
Note : If you are not able to access the website by accessing yourdomain.com/install, but you are able to access it via yourdomain.com/index.php/install, this means that you probably don't have Apache mod_rewrite installed and enabled.
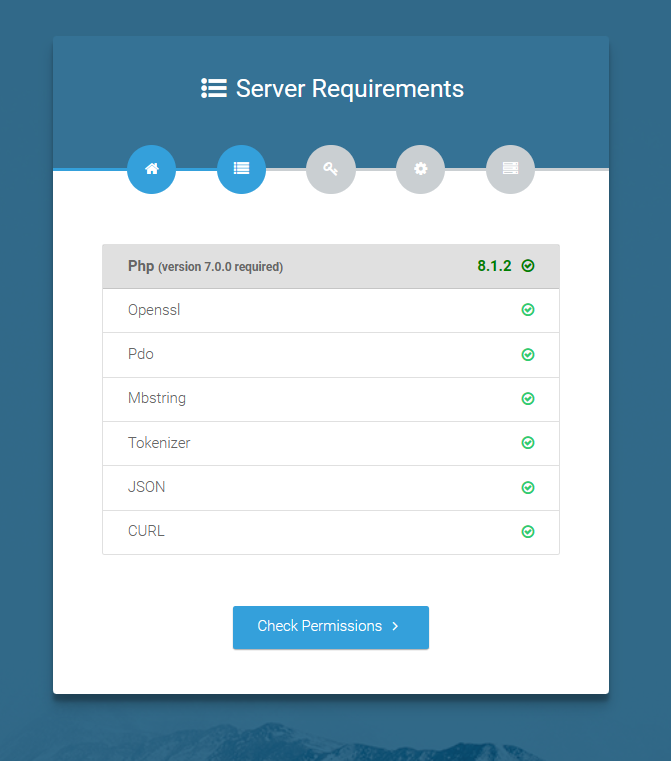
Server Requirements
After clicking on "Check requirement" button, you will be redirected to System Requirements step during the installation wizard, System Requirements.
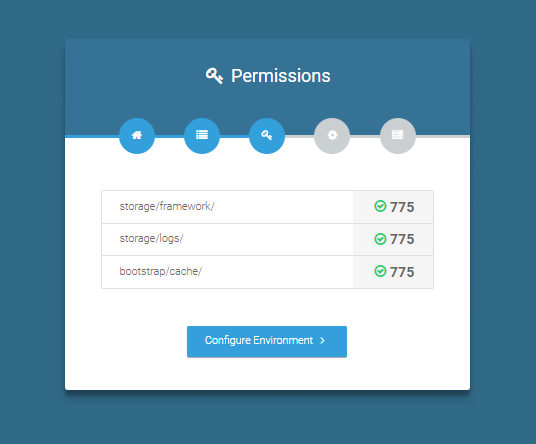
Directory Permissions
After successfully enabling and installing all required PHP extensions, next step is to set the appropriate permissions for some system folders that shows on below picture.
For giving permissions please open your terminal window. and type command sudo
chmod
777 directory_name for example sudo chmod 777 app
Note : If your control panel has no terminal window, then go to public_html or the directory where you have uploaded the project. now give permission for some system folders that show on Installer. For example, we have demonstrated storage/framework directory permission in the below image.
Open required directory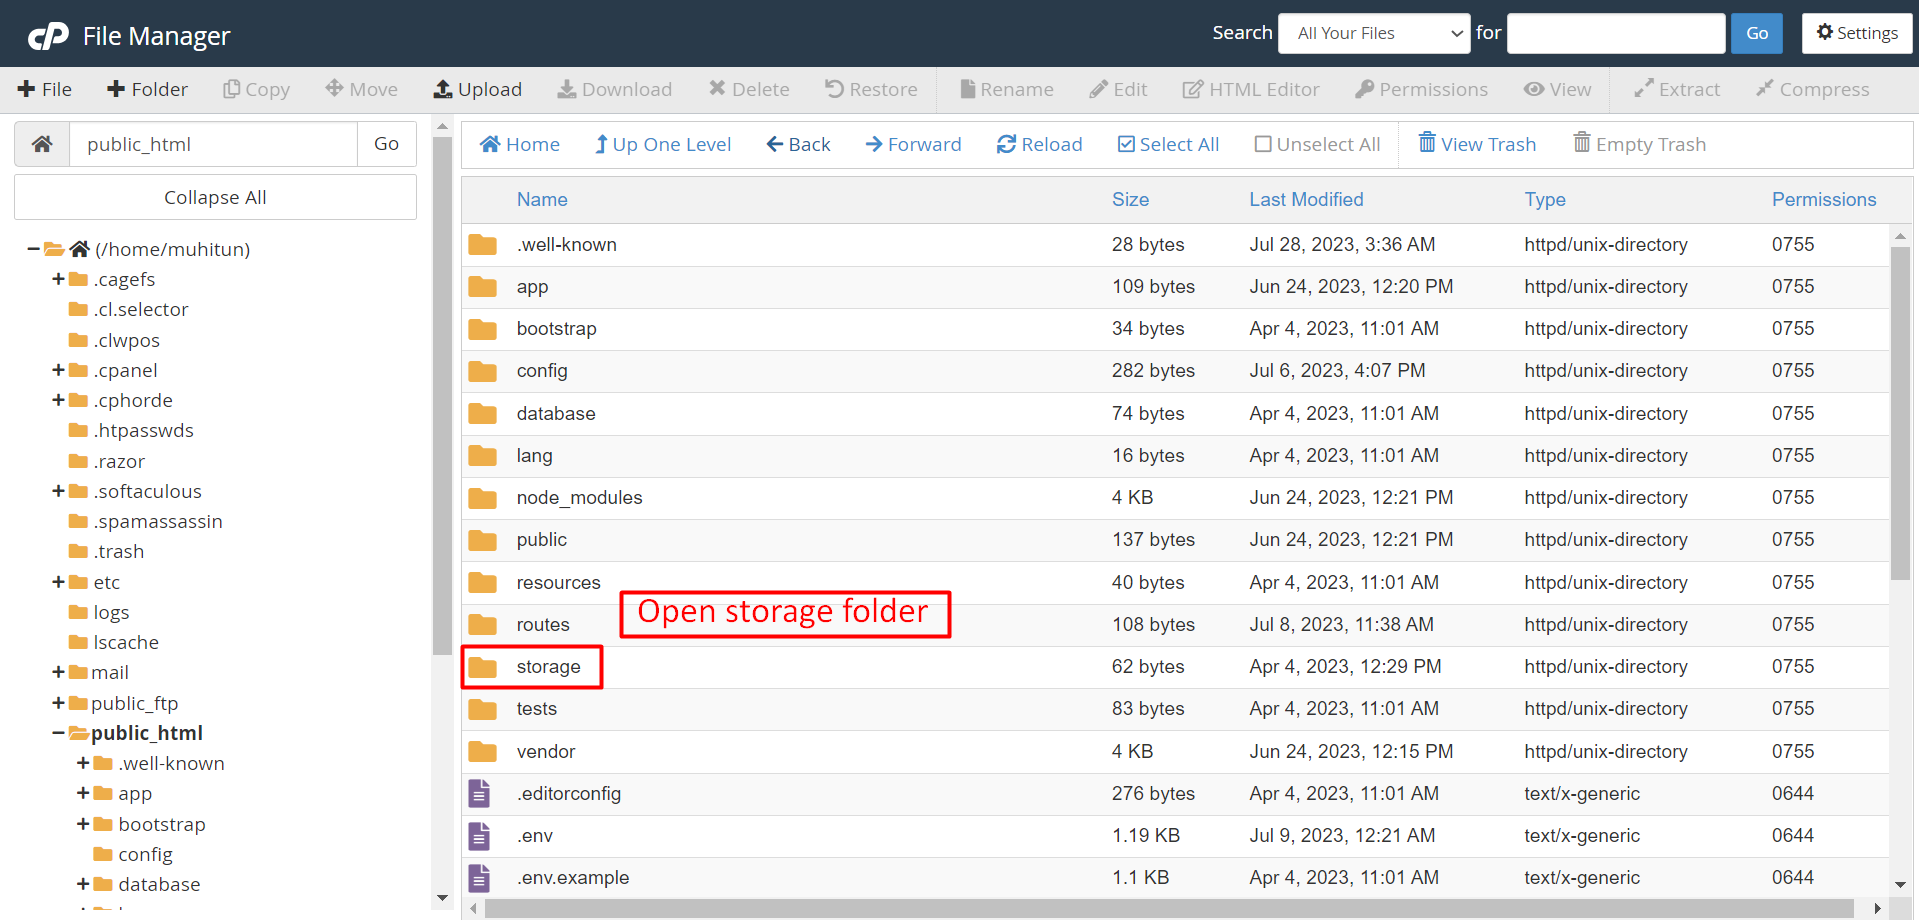 Change permissions for specific directory
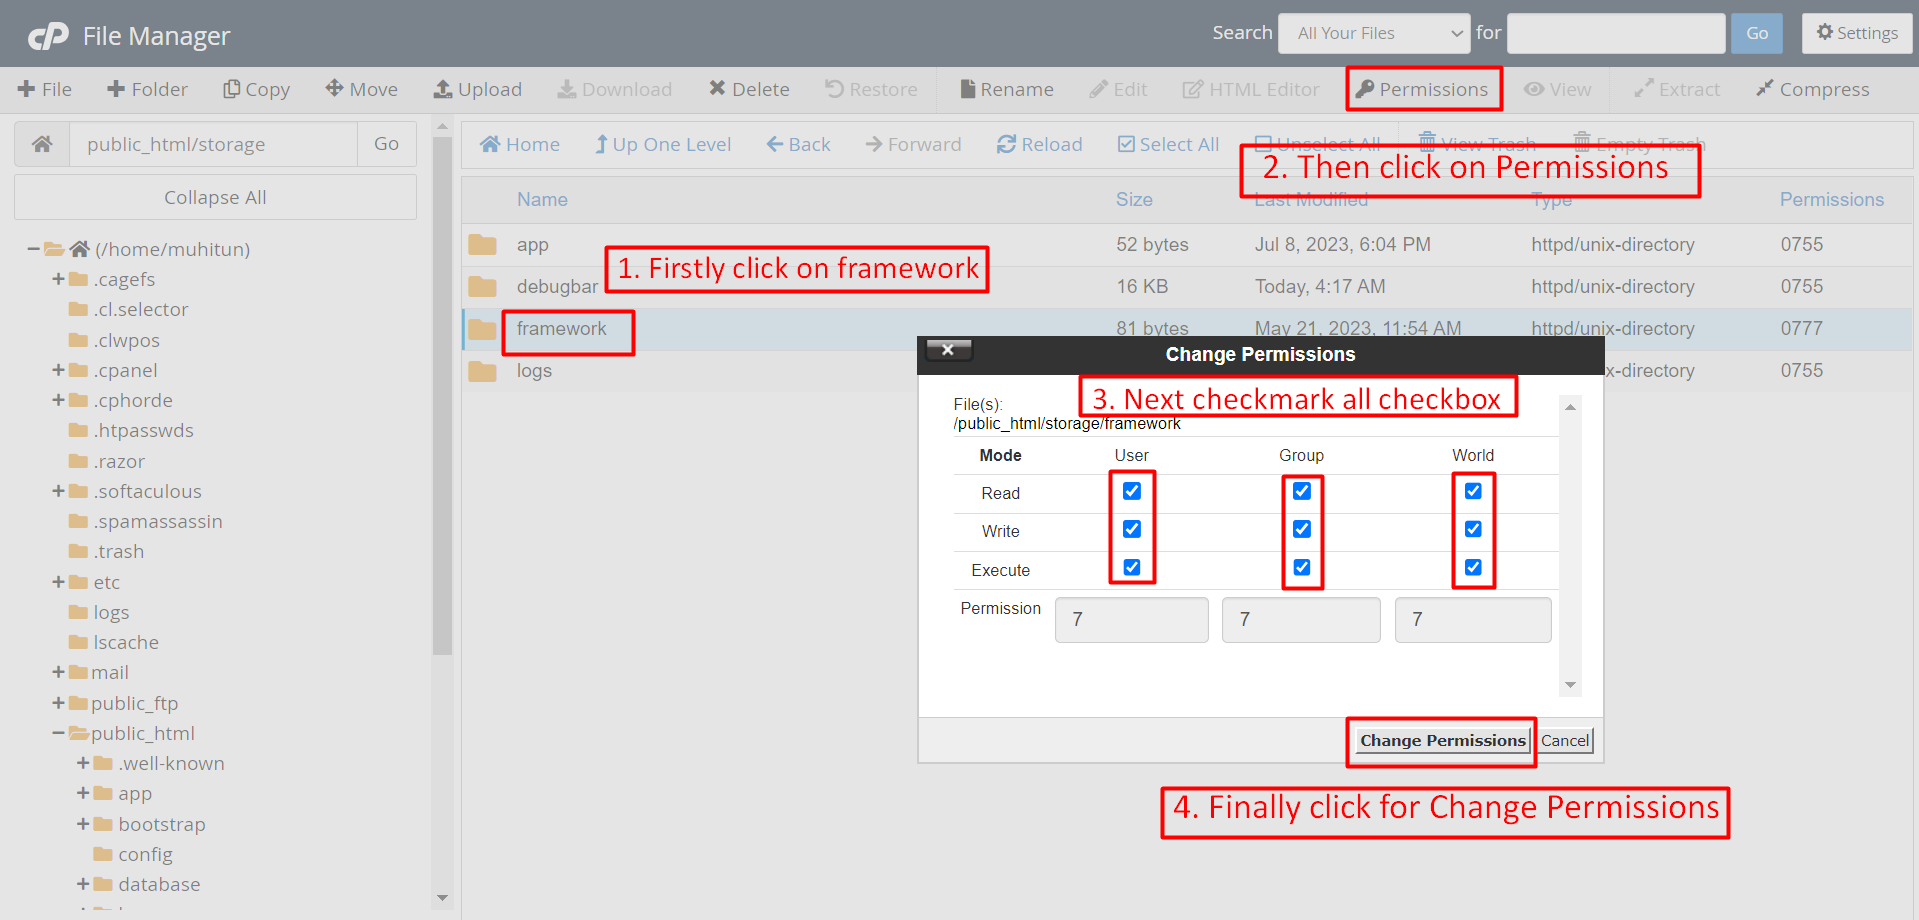
Note: You have to change the directory permissions for the storage/logs and bootstrap/cache folders as shown in the image. If these folders do not have the correct permissions, please adjust them accordingly.
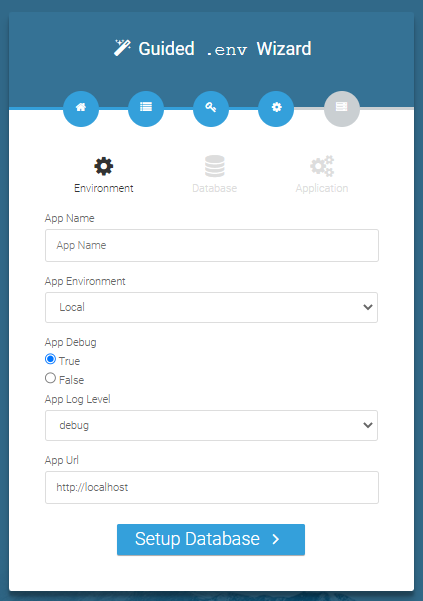
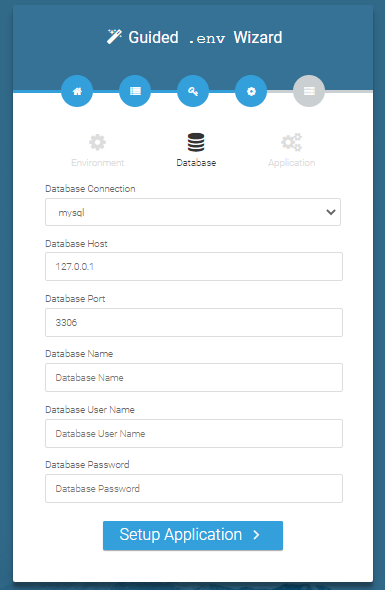
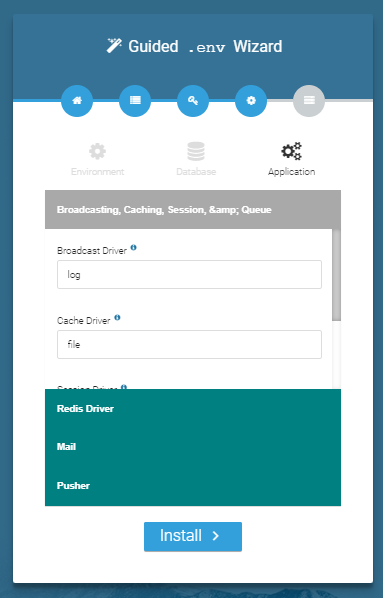
Database/Environment Setting
You have to fill in your database credentials
Exit
The last step is exit step.
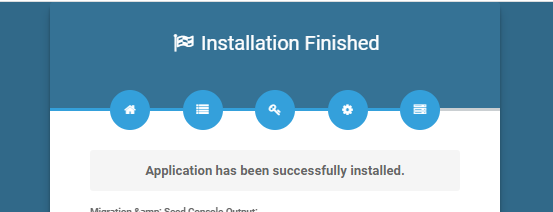
Congratulations you have successfully installed this project on your server. 😀
Default Password
You can login using several methods depending on your role.
Super Admin
superadmin@acnoo.com
superadmin
Admin
admin@acnoo.com
admin
User
user@acnoo.com
user
In this project, different modules are assigned based on user roles: Super Admin, Admin, and User. Each role has distinct responsibilities tailored to their specific tasks and permissions. Below, we will discuss how each user role operates within the system.
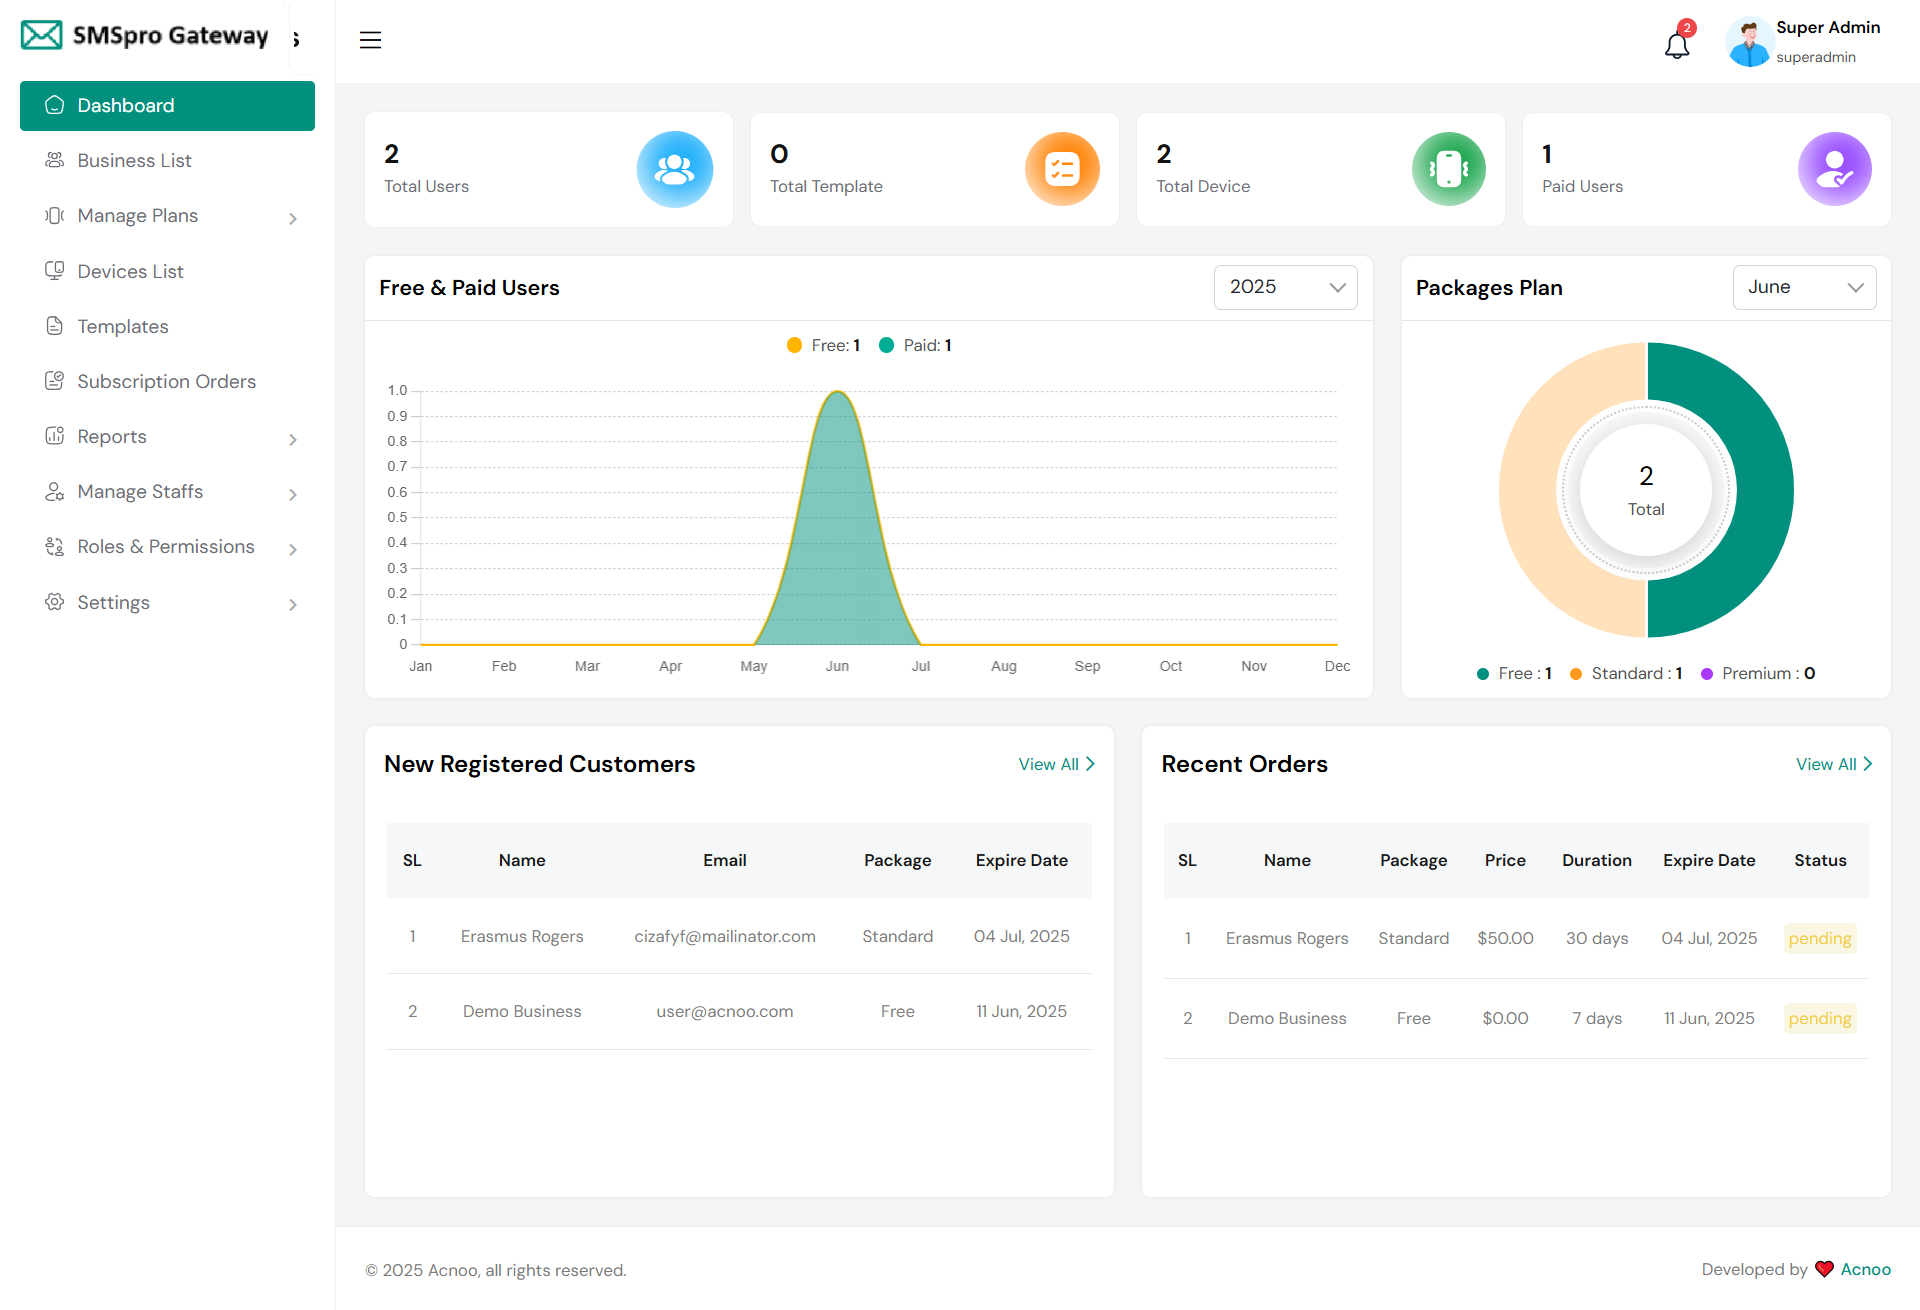
Dashboard
This is the admin dashboard page. The essential information regarding the project are displayed here.
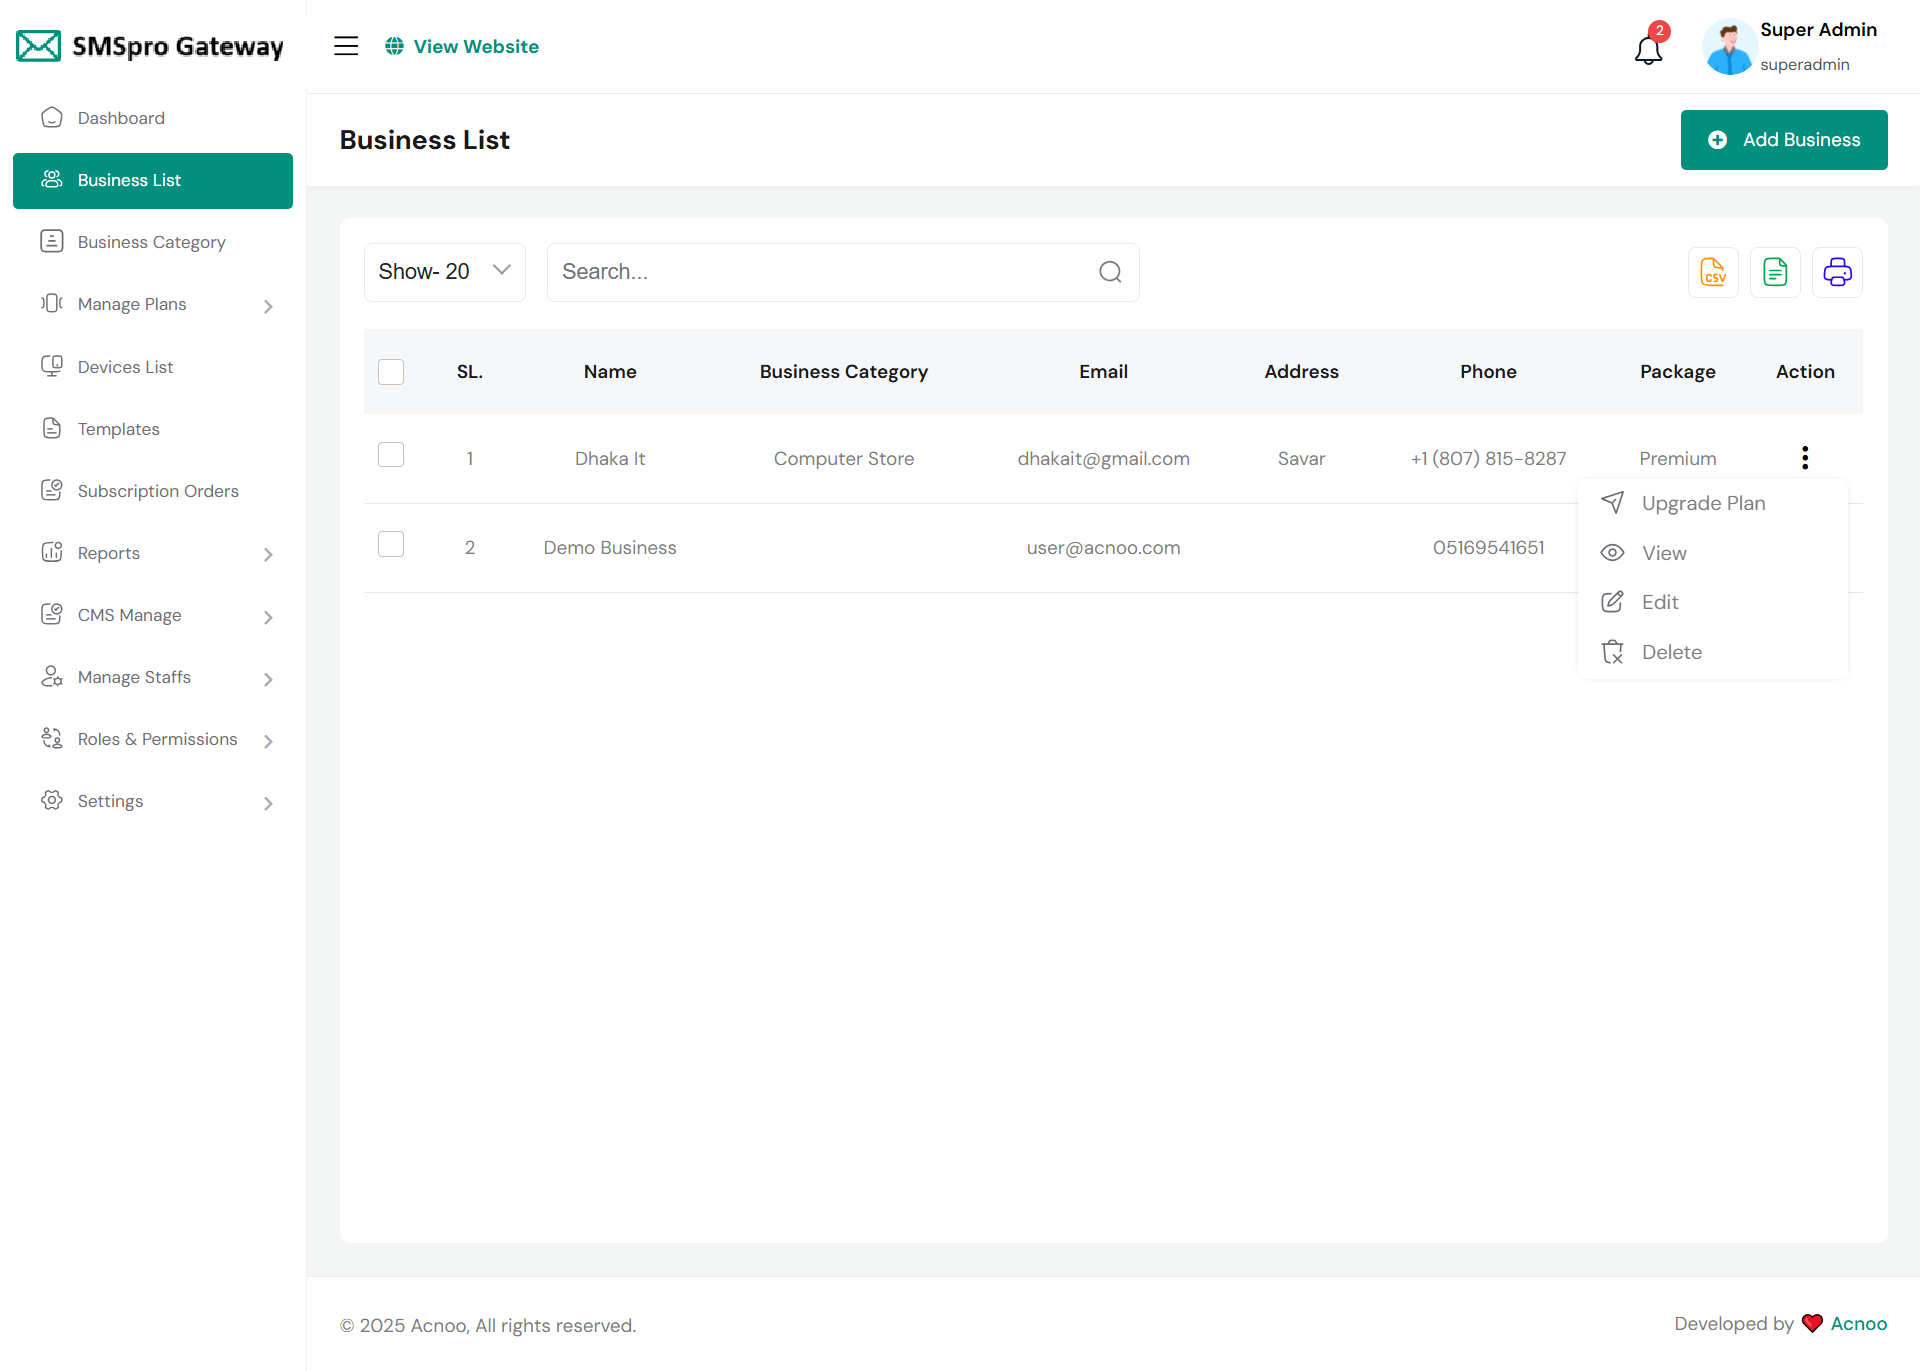
Business List
This appears to be a screenshot of a business list page. Business list functionalities typically allow users to collect and organize information about businesses. By clicking the "View" button, you can see the details of each business. You can also create a new business by clicking the "Add Business" button. Below, we'll describe how you can create a new business.
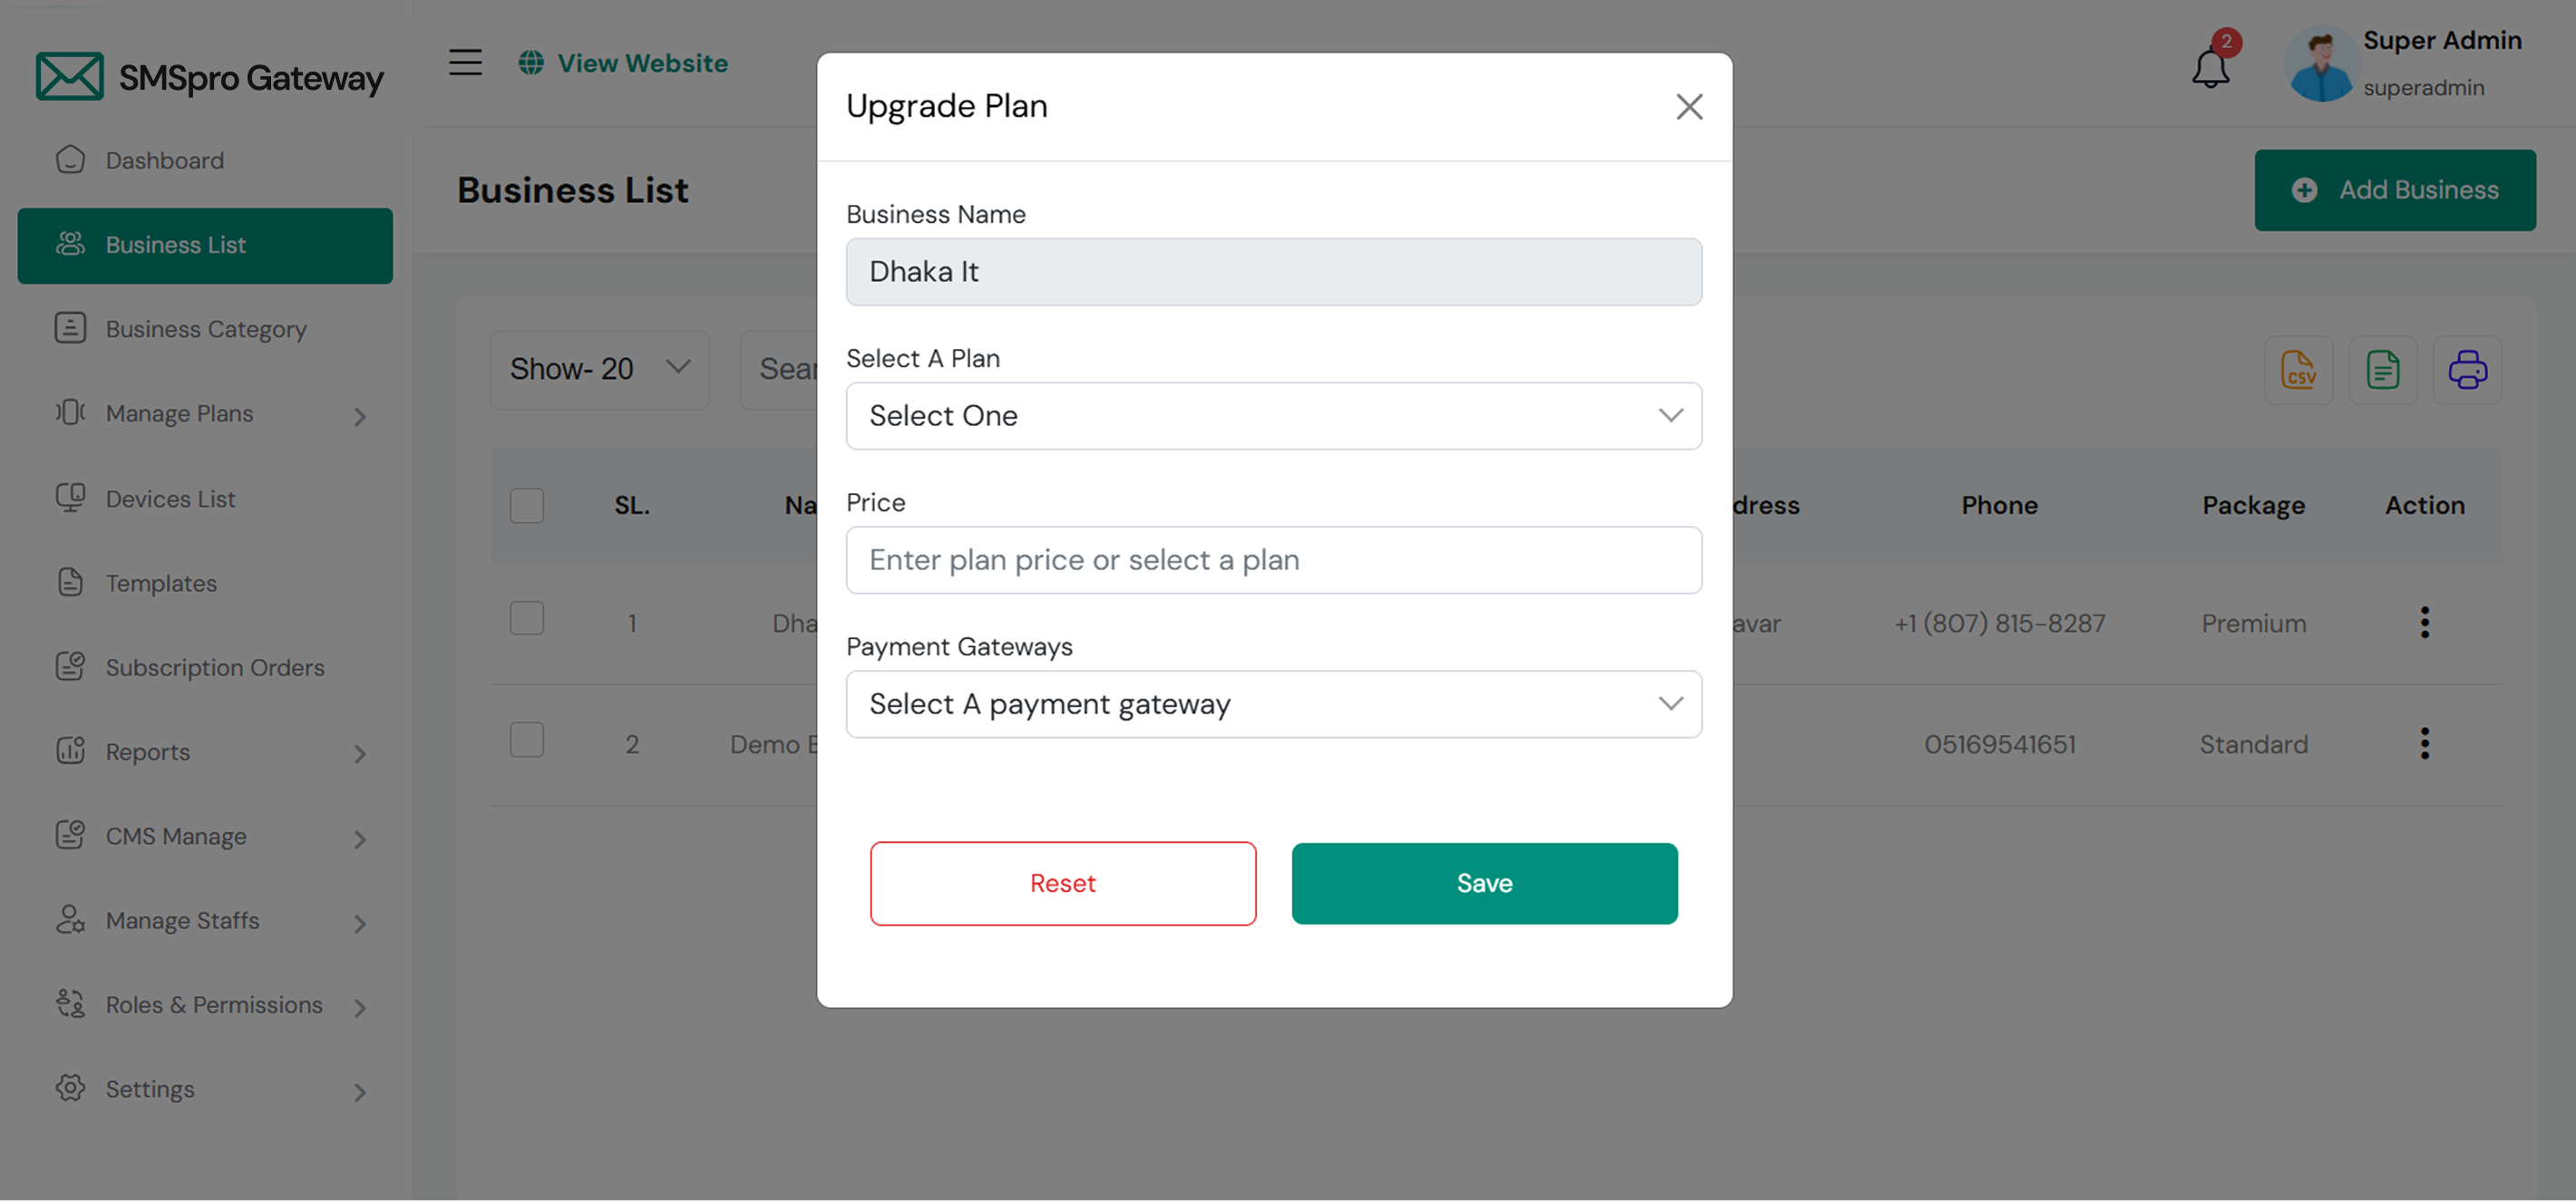
Upgrade Plan
If you need to upgrade the plan for any business, click on the "Upgrade Plan" button. You will likely see a popup for this. Here, you can update the plan, gateway and price. When you select a plan, the price input field will automatically fill in according to the selected plan, but you can also change the price manually.
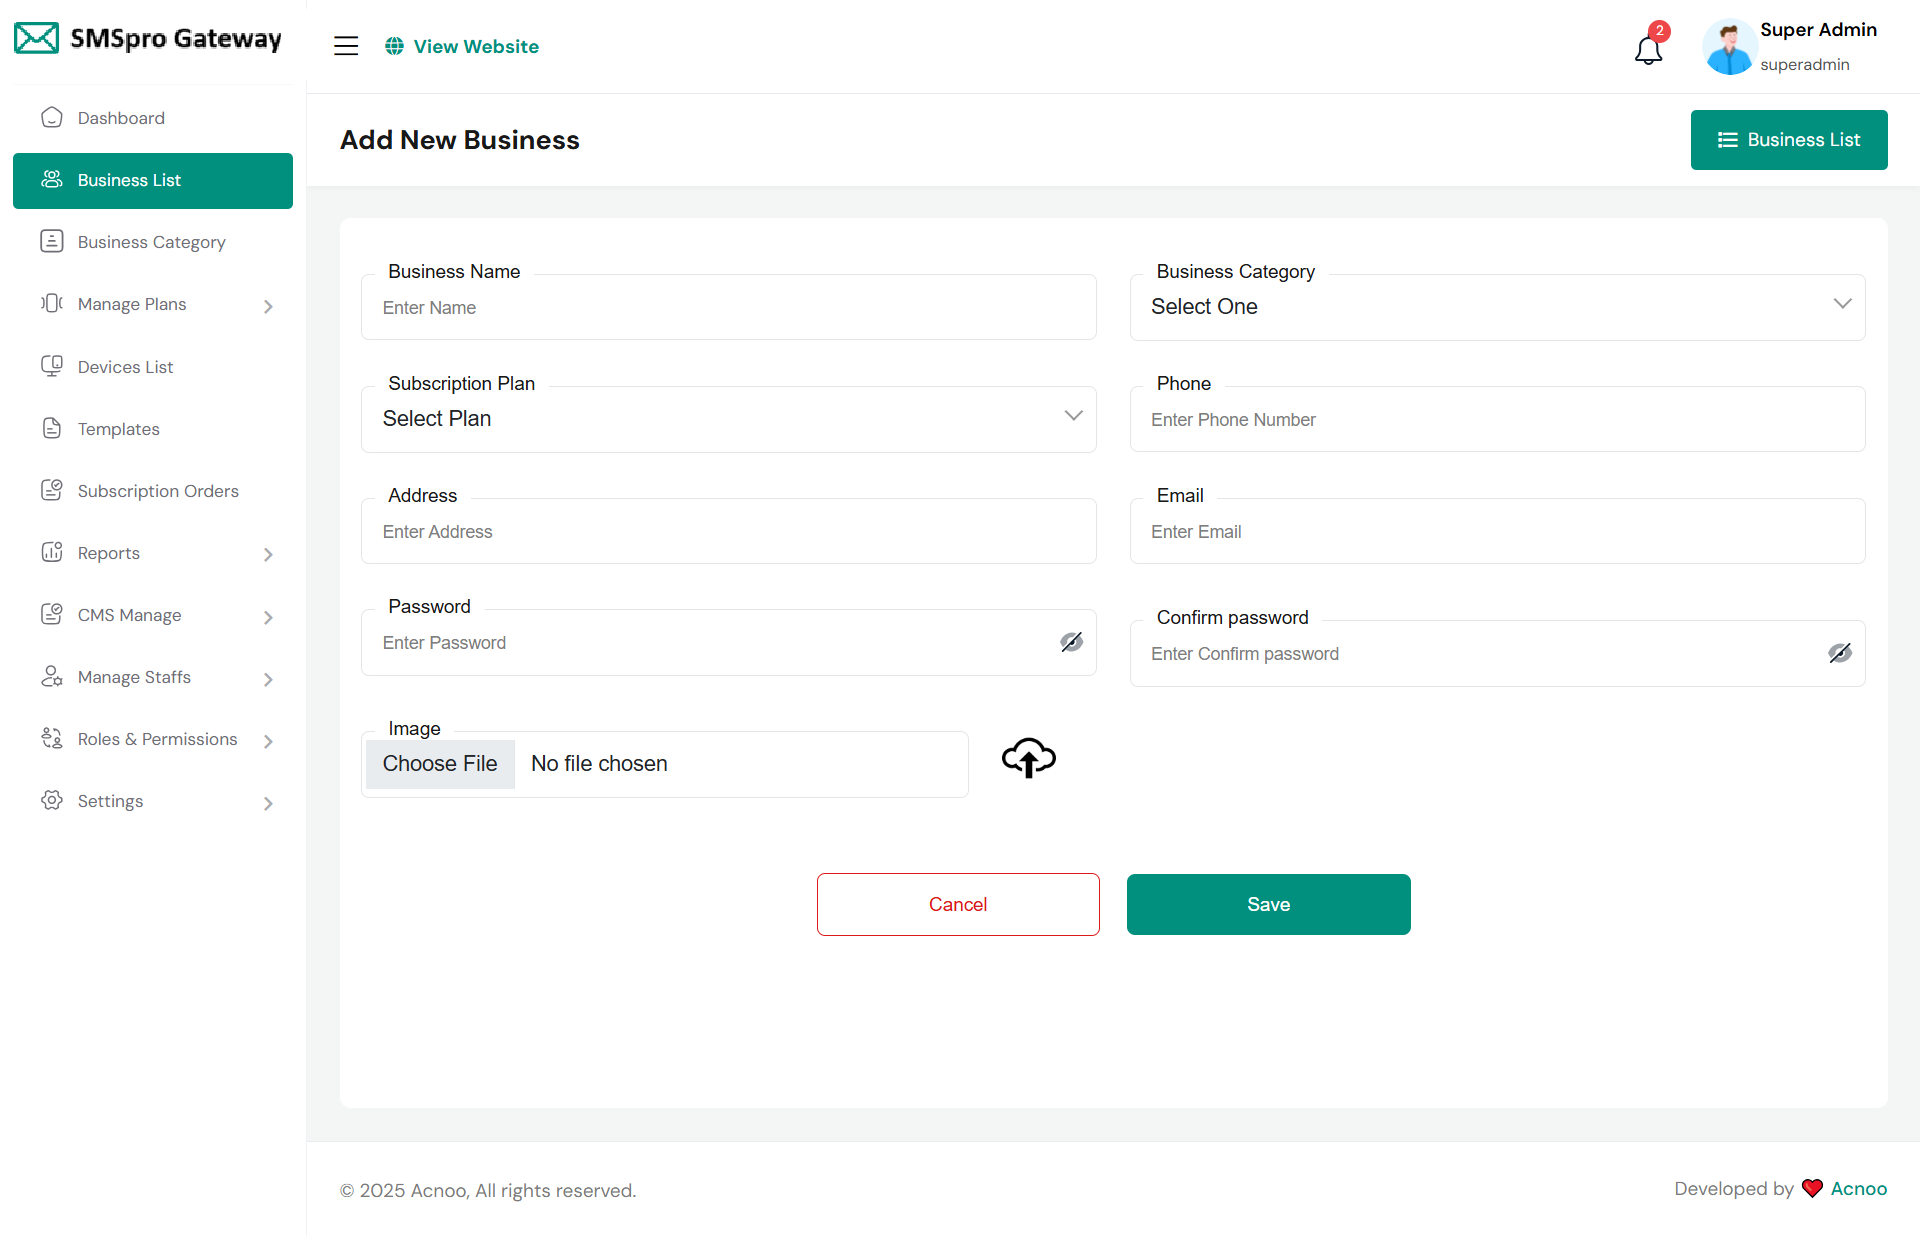
Add New Business
By clicking on the "Add Business" button, you can create a new business. You will need to fill in the necessary fields. Here is the screenshot of the create business page.
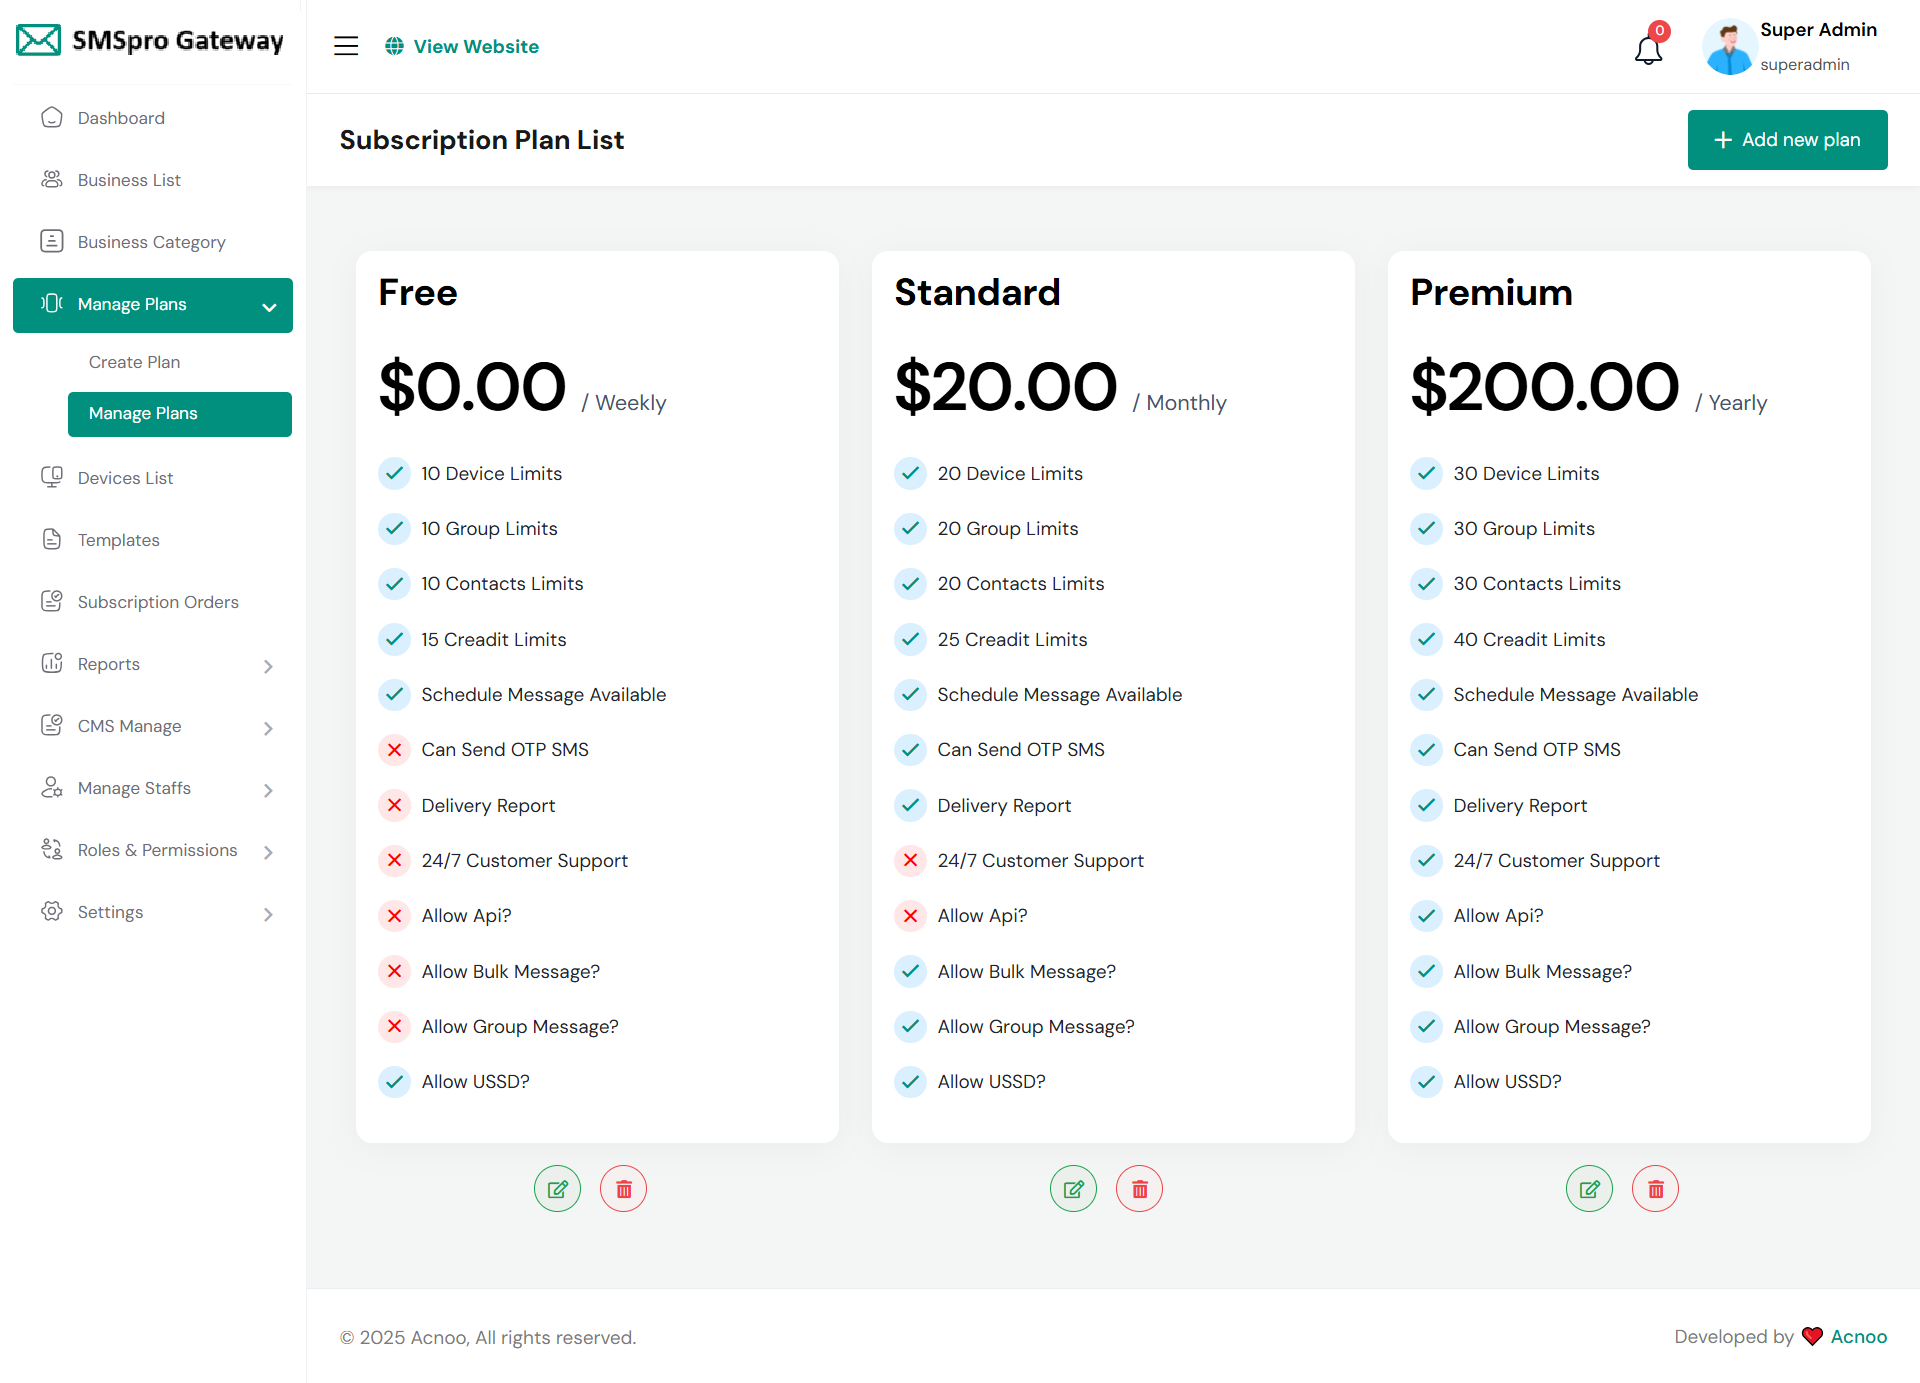
Plan List
Here, you can view a list of available plans and perform actions such as updating and deleting plans. Also you can edit and delete exesting plan from this list.
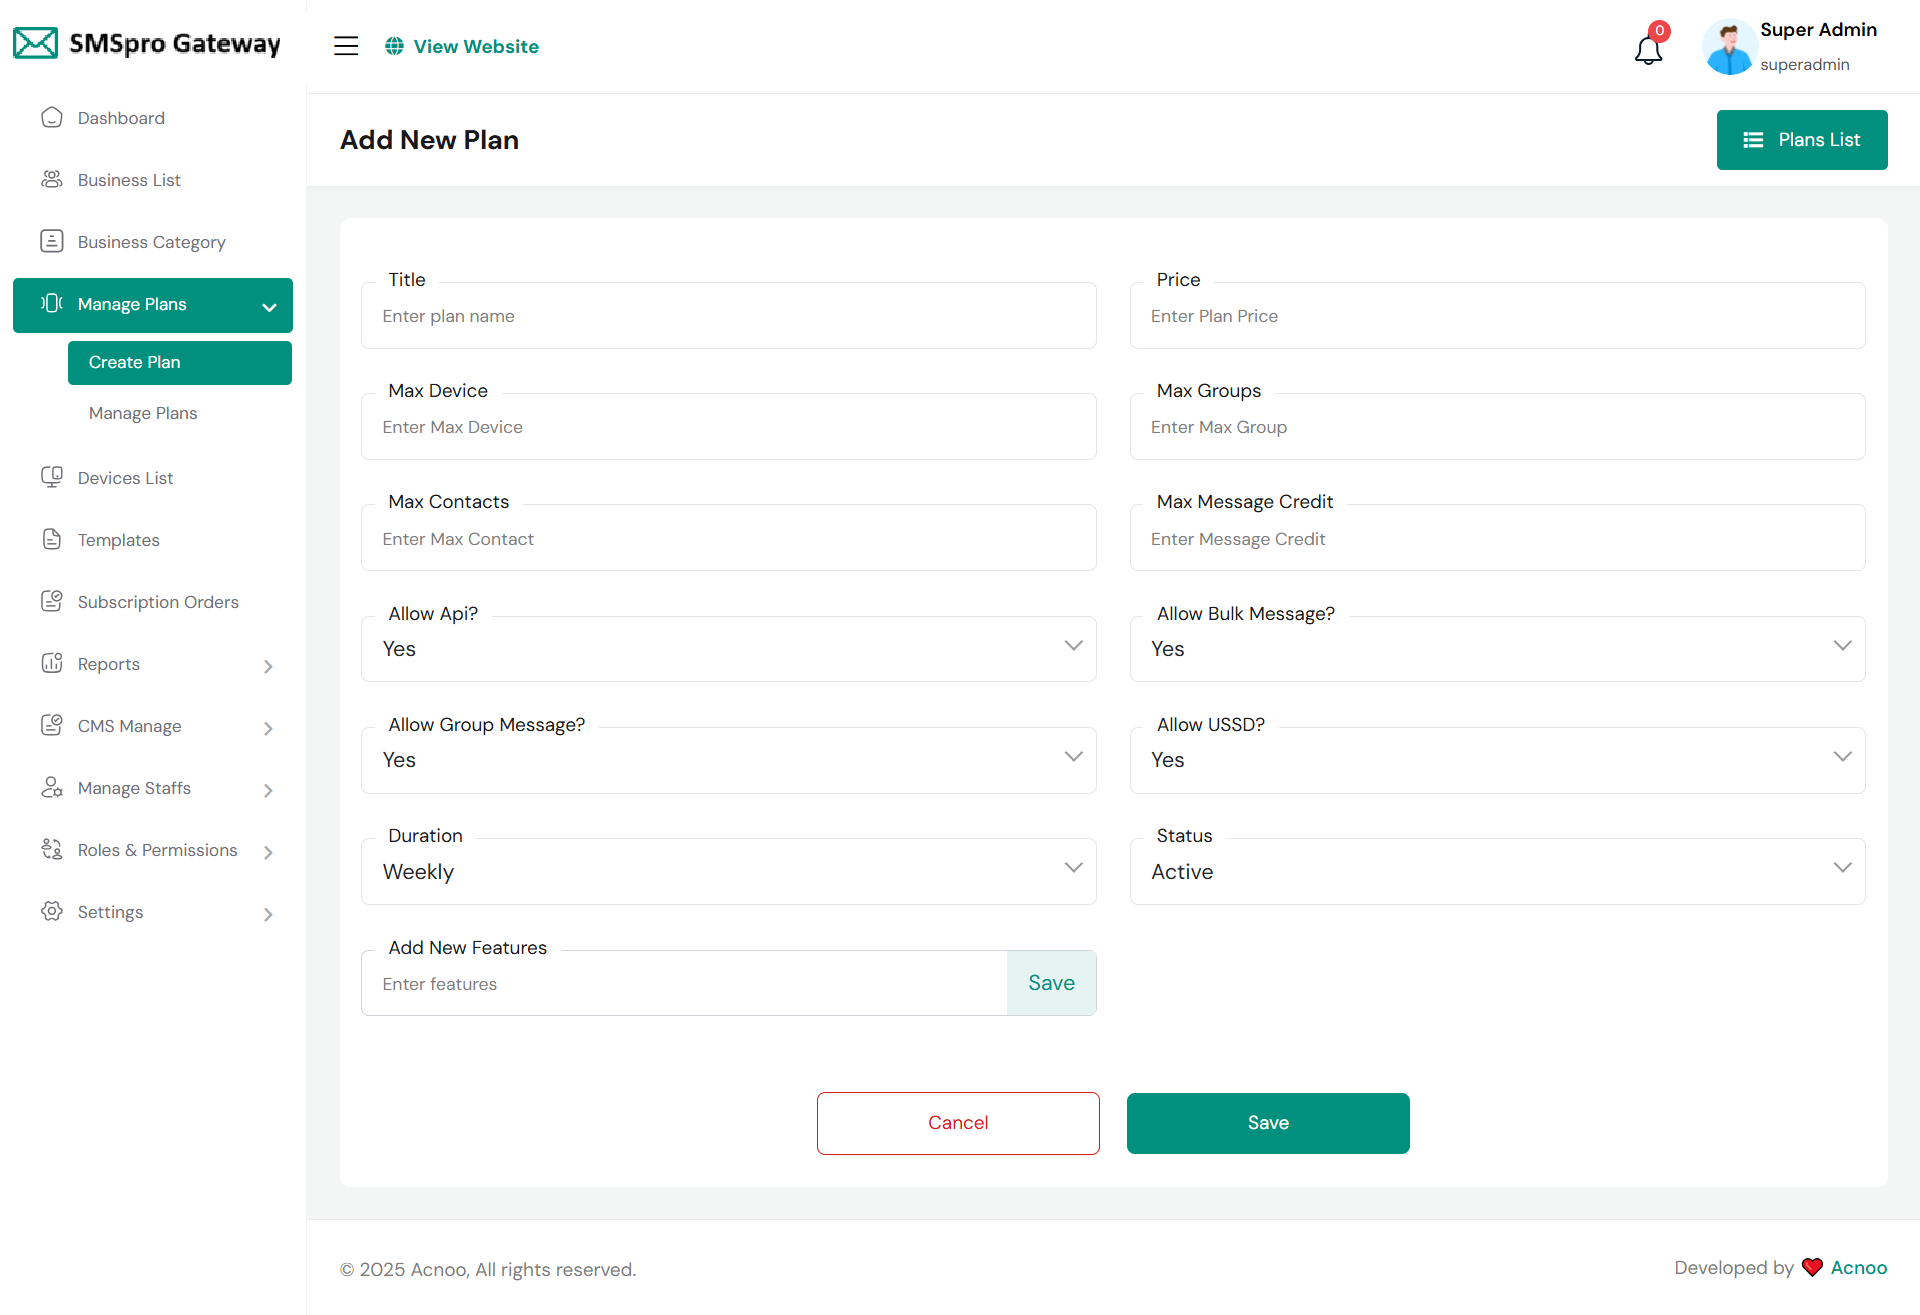
Create Plan
Here, you have the option to create a plan according to your preferences. Additionally, you can add multiple features by using the "Add New Feature" input field. Once you have completed filling out the form, simply click the save button. You can also review the activity of your entries. If you decide not to proceed with creating a plan, you can click on the cancel button.
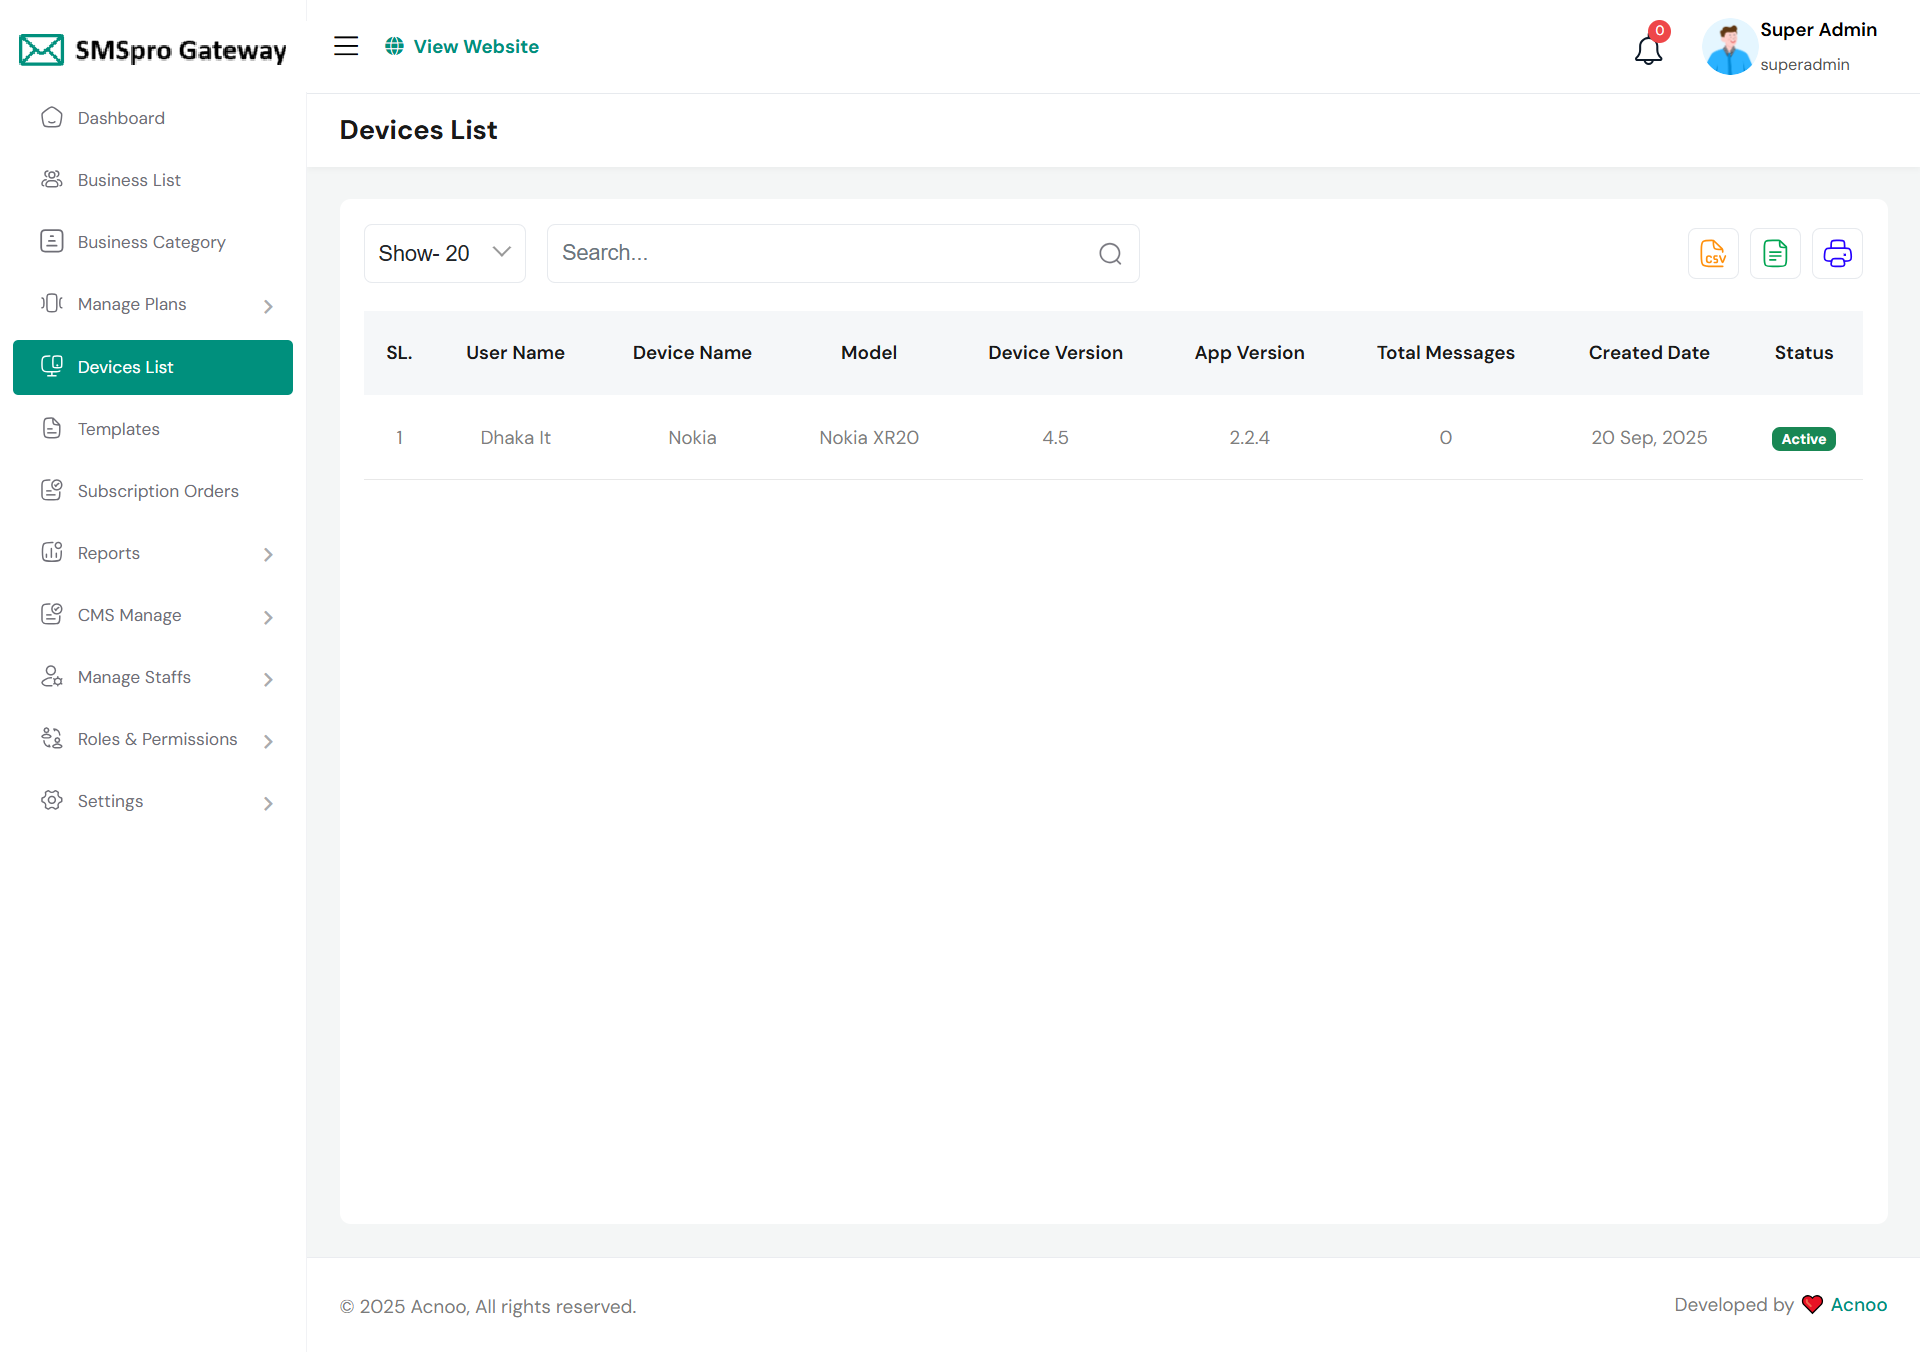
Device List
Here, you can view a list of available device. Also you can filter by user name, device name, model etc. From here you can also export excel, csv and print.
Template List
The 'Templates List' allows you to view available SMS templates. You can filter by template name, content, and more. The table displays each template's name, content, creation date, and status (Active/Deactive). Users can also export the list to PDF, Excel, or print it, streamlining the use of pre-defined messages.

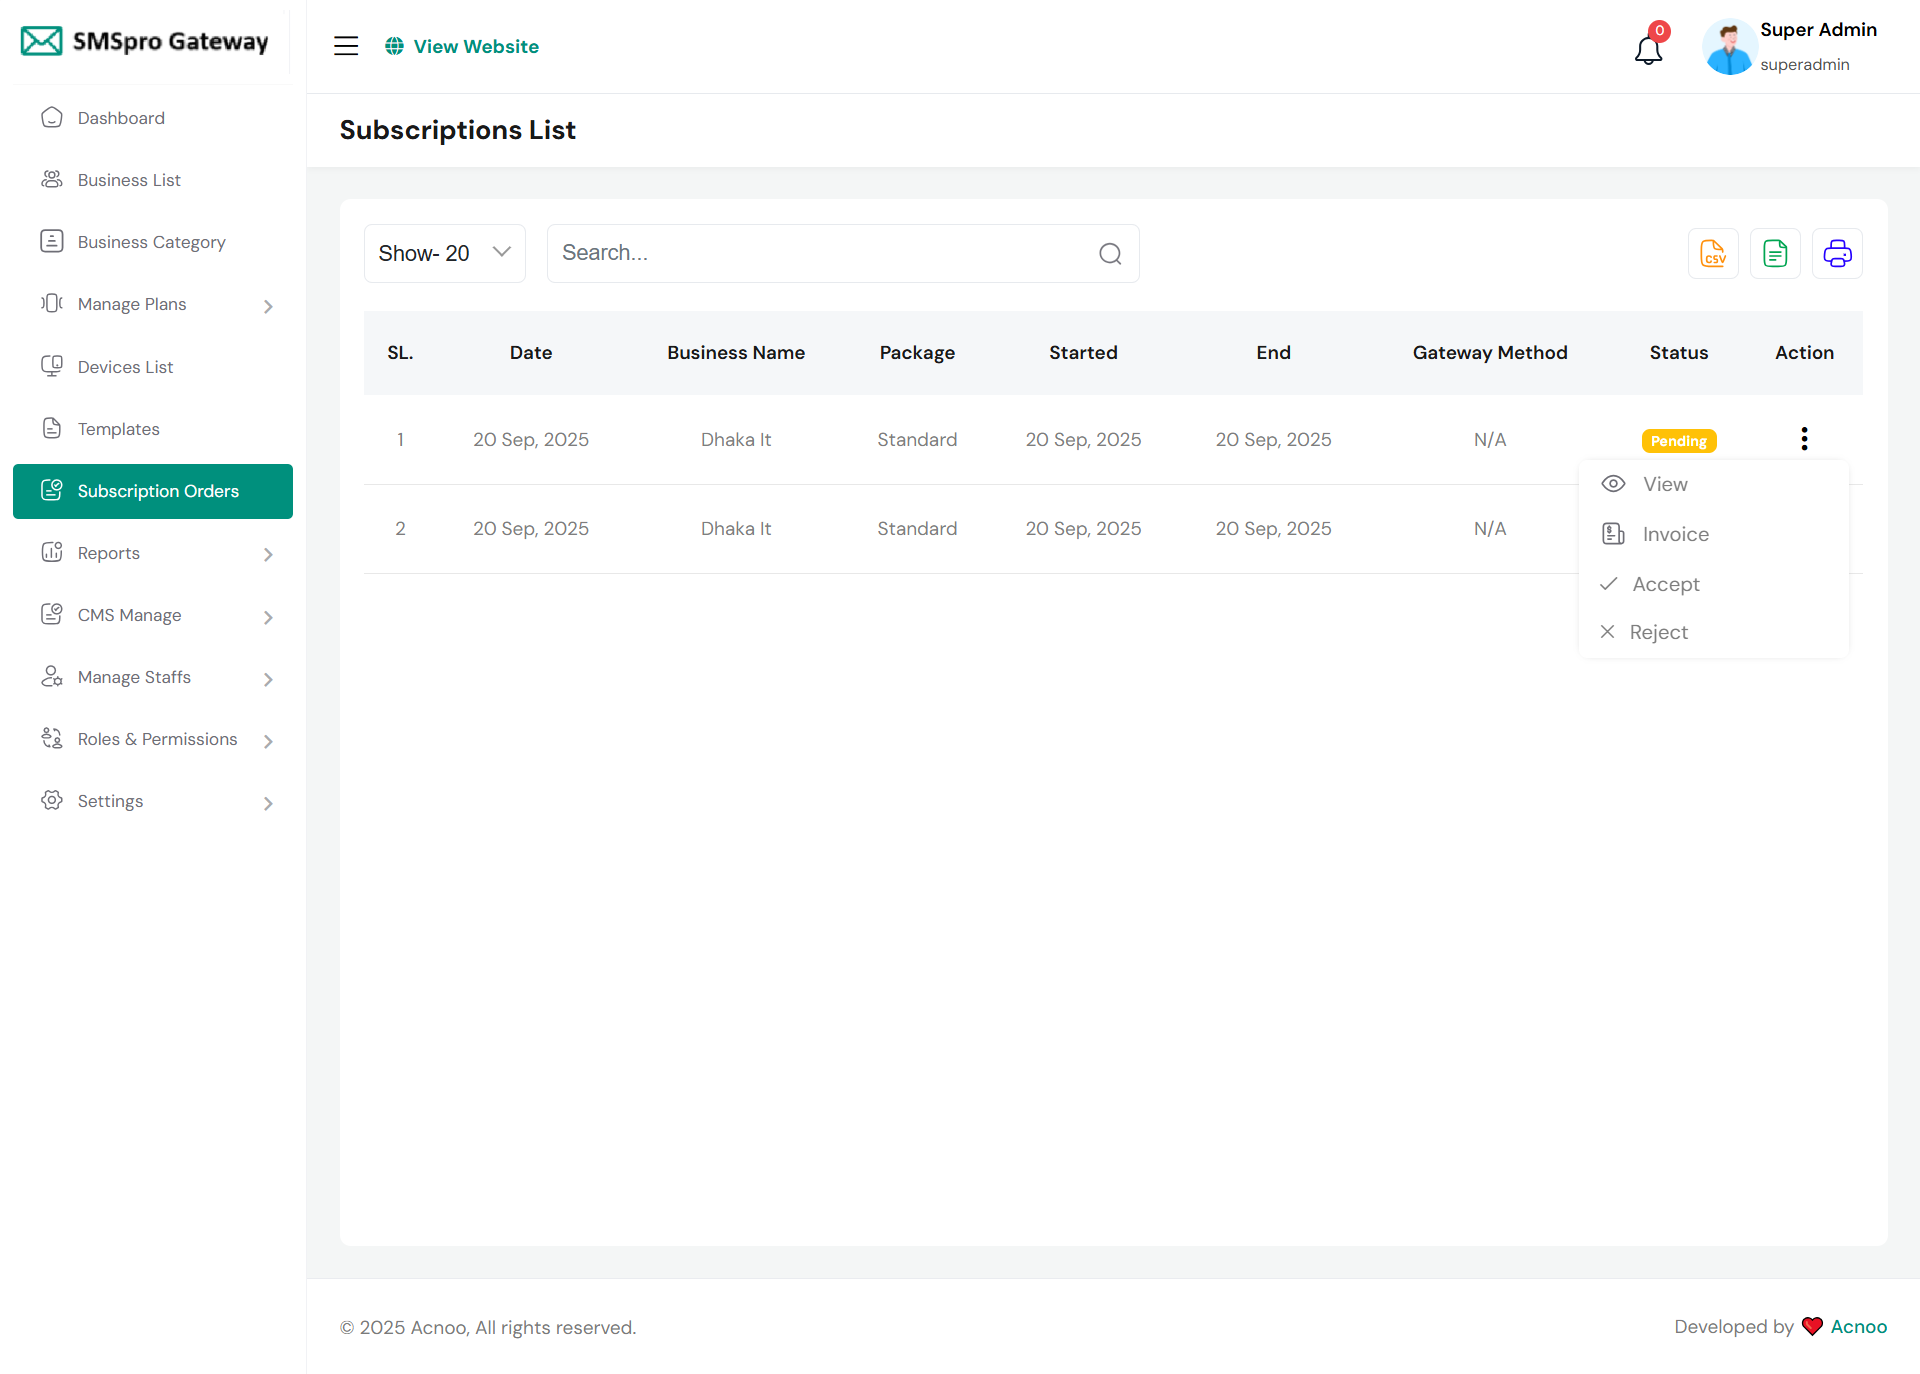
Subscription Order List
You can view all subscribed orders and search them. You can also create invoices for printing. The page also allows you to export the list as an Excel file, a CSV file, or print it directly.
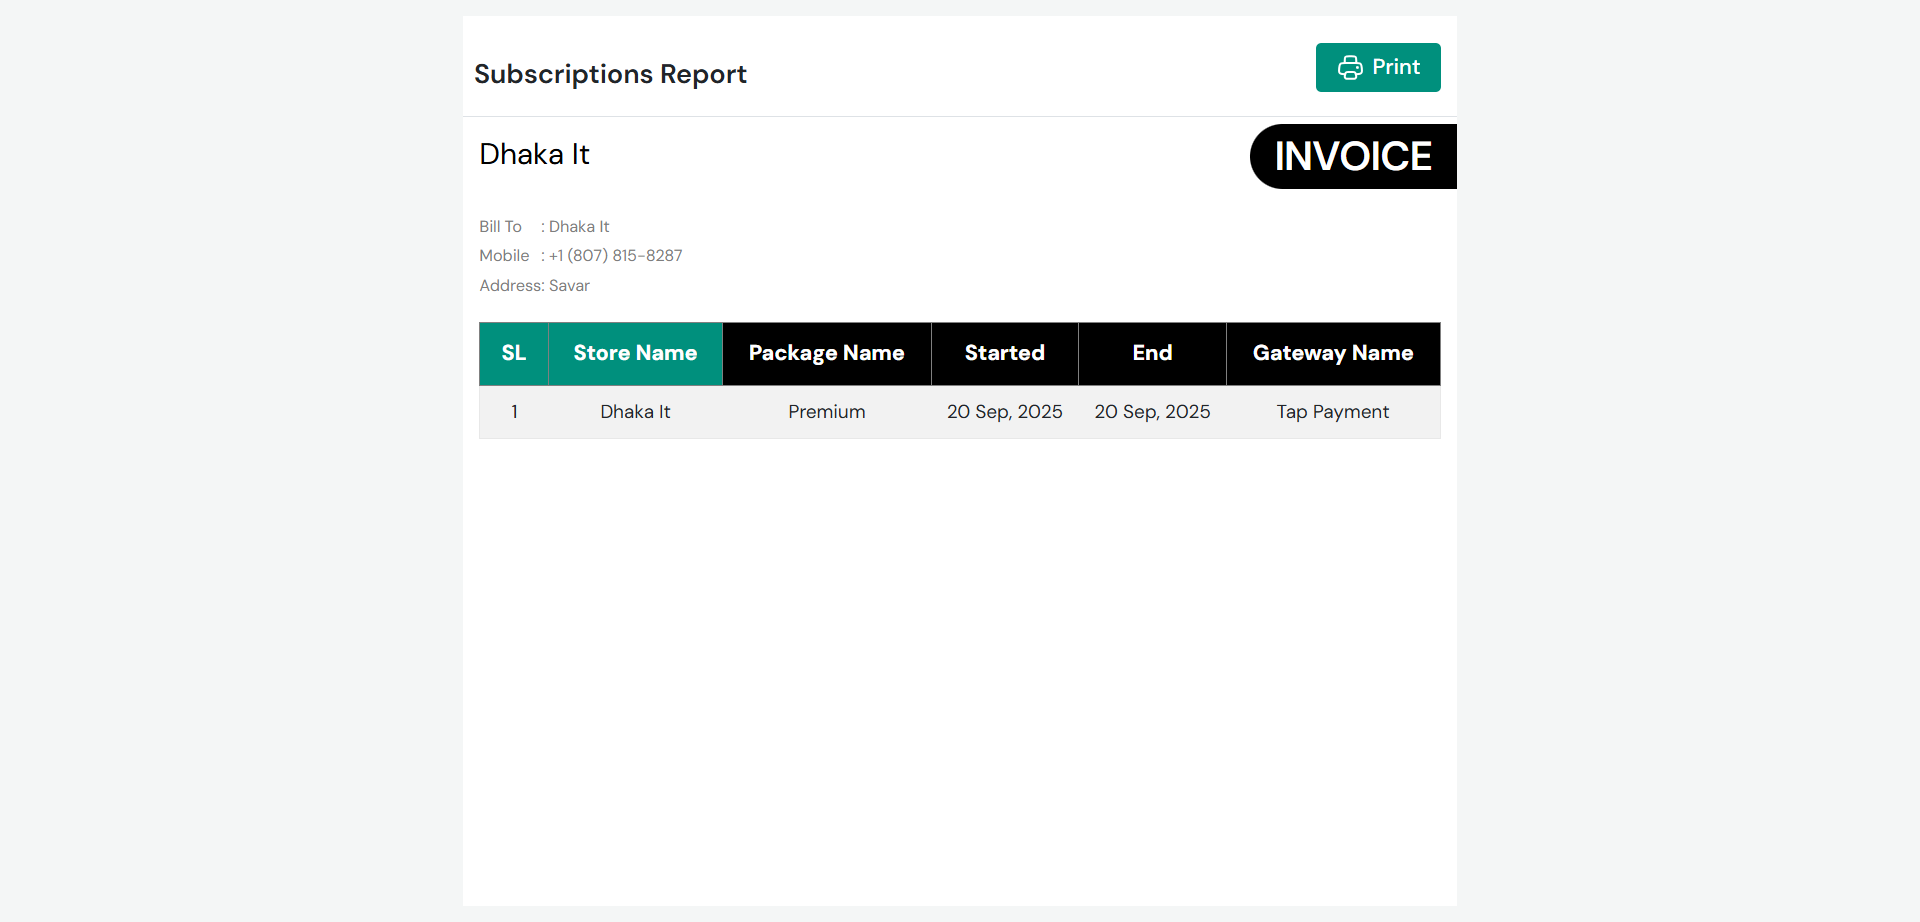
Subscription Invoice
You can print and save this invoice here.
Reports
Here you can access various reports along with a search filter.
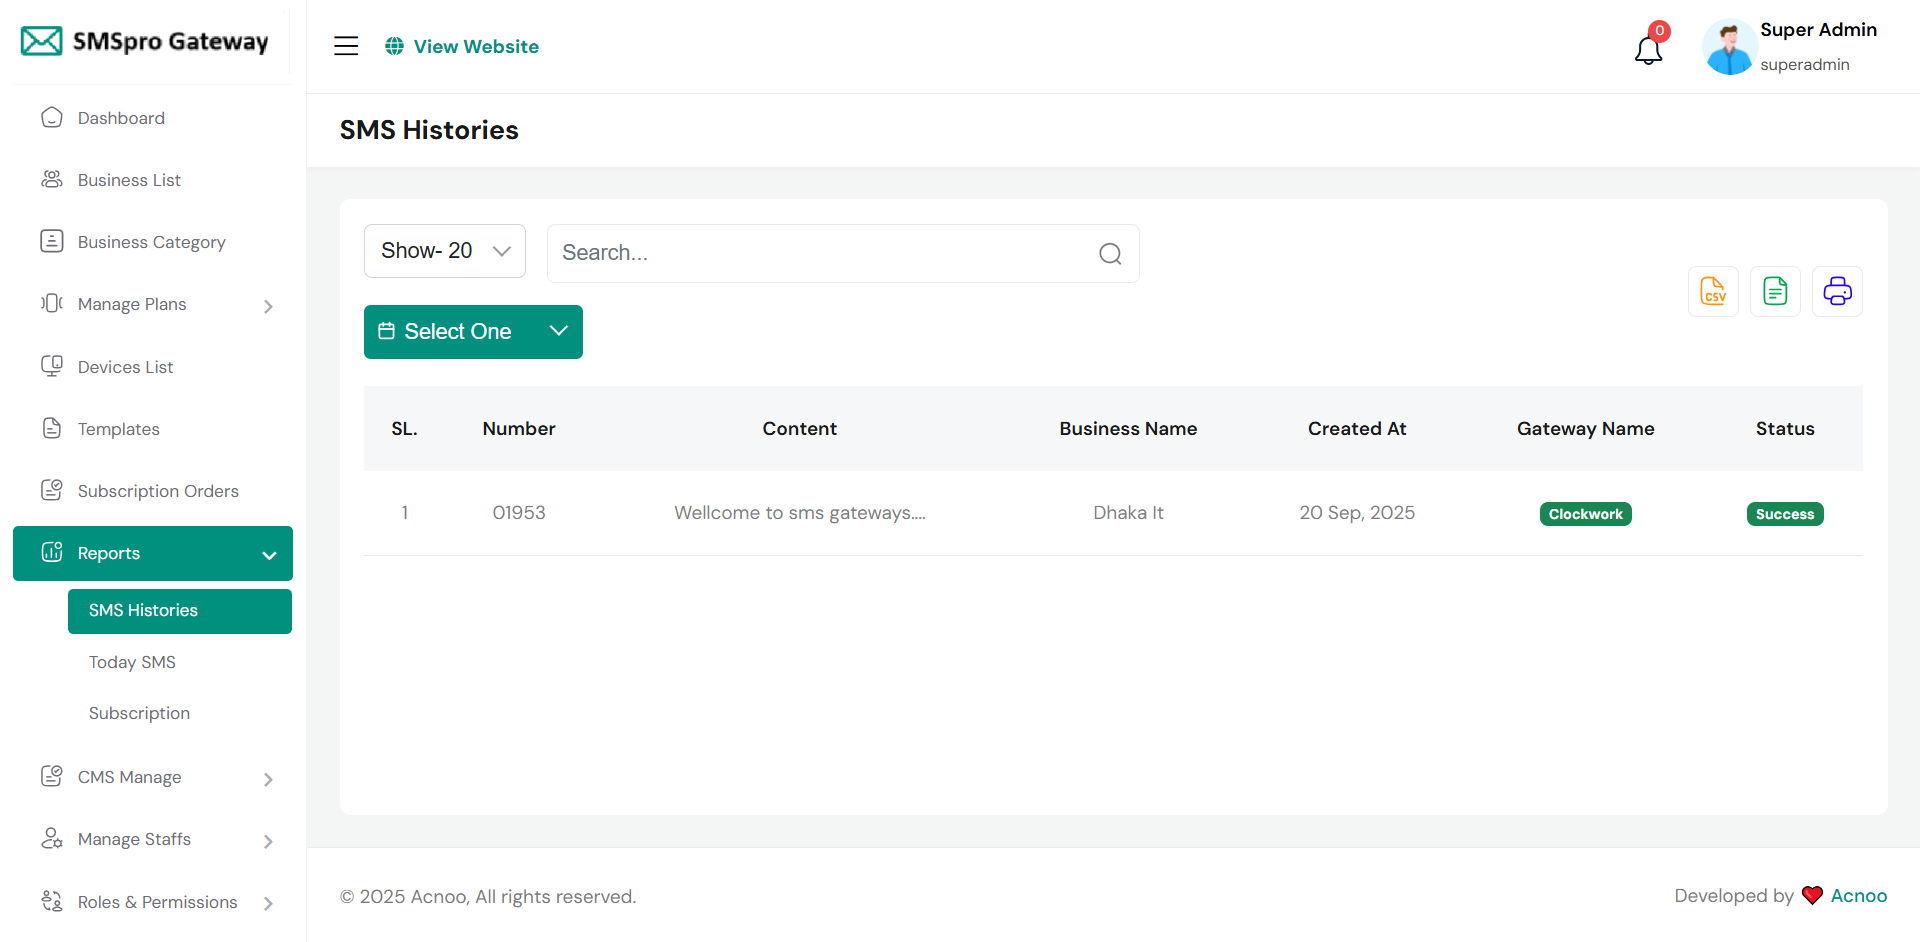
SMS Histories Report
Here, you can view a list of all past SMS activities. You can control how many entries are shown per page, search for specific messages, or filter by a selected date. The table includes details such as the SMS number, content, associated business name, creation date, device name, and message status. Additionally, you can export the data to Excel, CSV, or print the report.
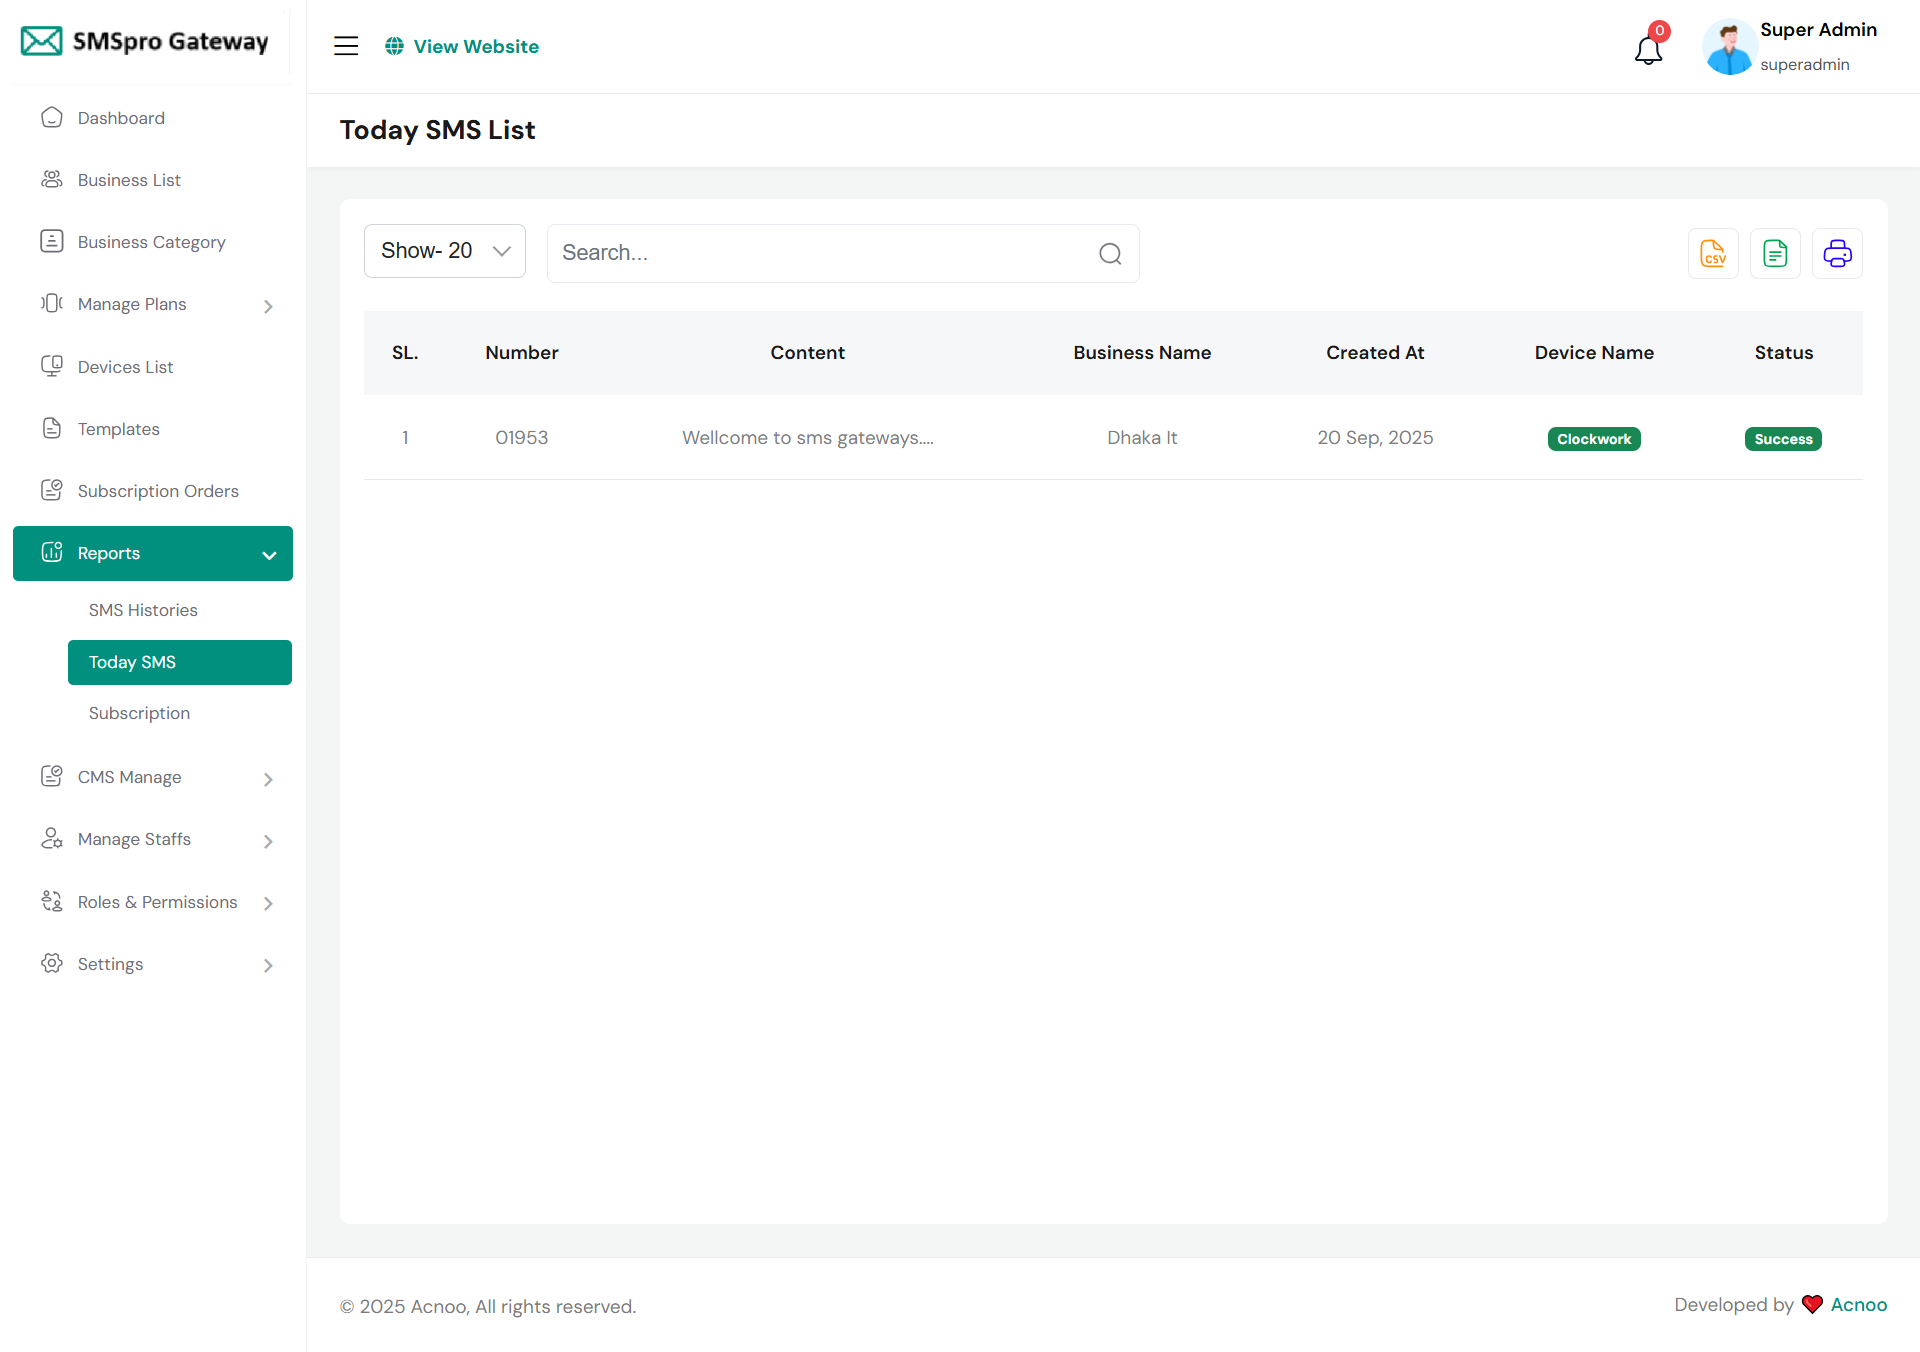
Today SMS Report
Here, you can view all SMS activities for the current day. The interface allows you to adjust the number of entries shown per page, search for specific messages, and export the report to Excel, CSV, or print it. The table lists each SMS with details like the number, content, associated business, creation time, device name, and its delivery status.
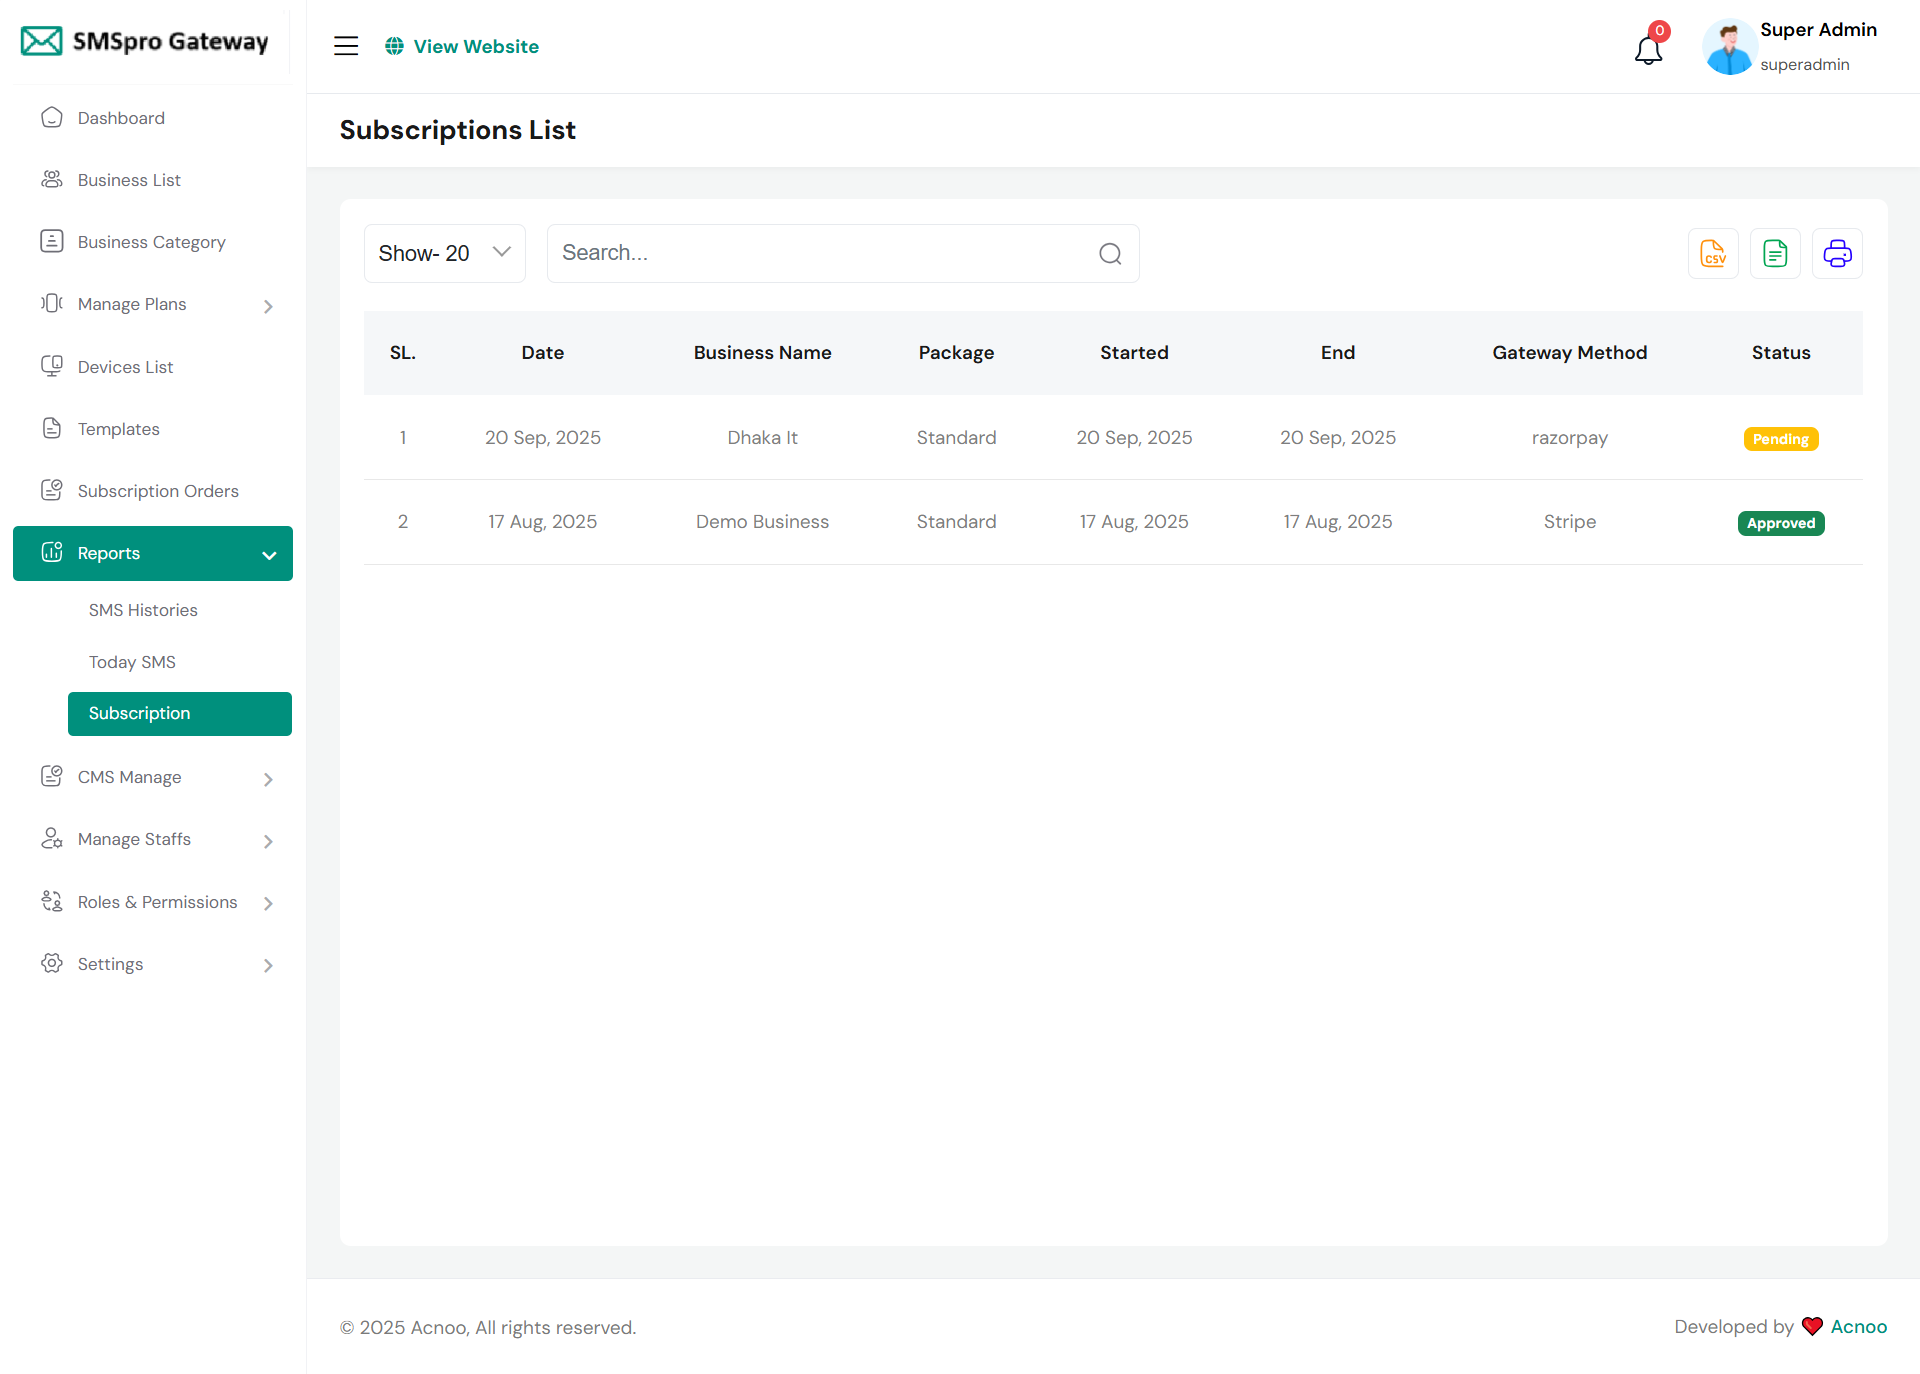
Subscription Report
Here, you'll find a list of all subscription reports. Users can control the number of entries shown per page and utilize a search bar to filter the list. The report table includes columns for serial number (SL.), date, business name, package details, subscription start and end dates, gateway method, and status. Additionally, the page provides options to export the data to Excel, CSV, or print the report.
Website Settings
Here you have the ability to perform various actions including handling pages, FAQs, testimonials, and services.
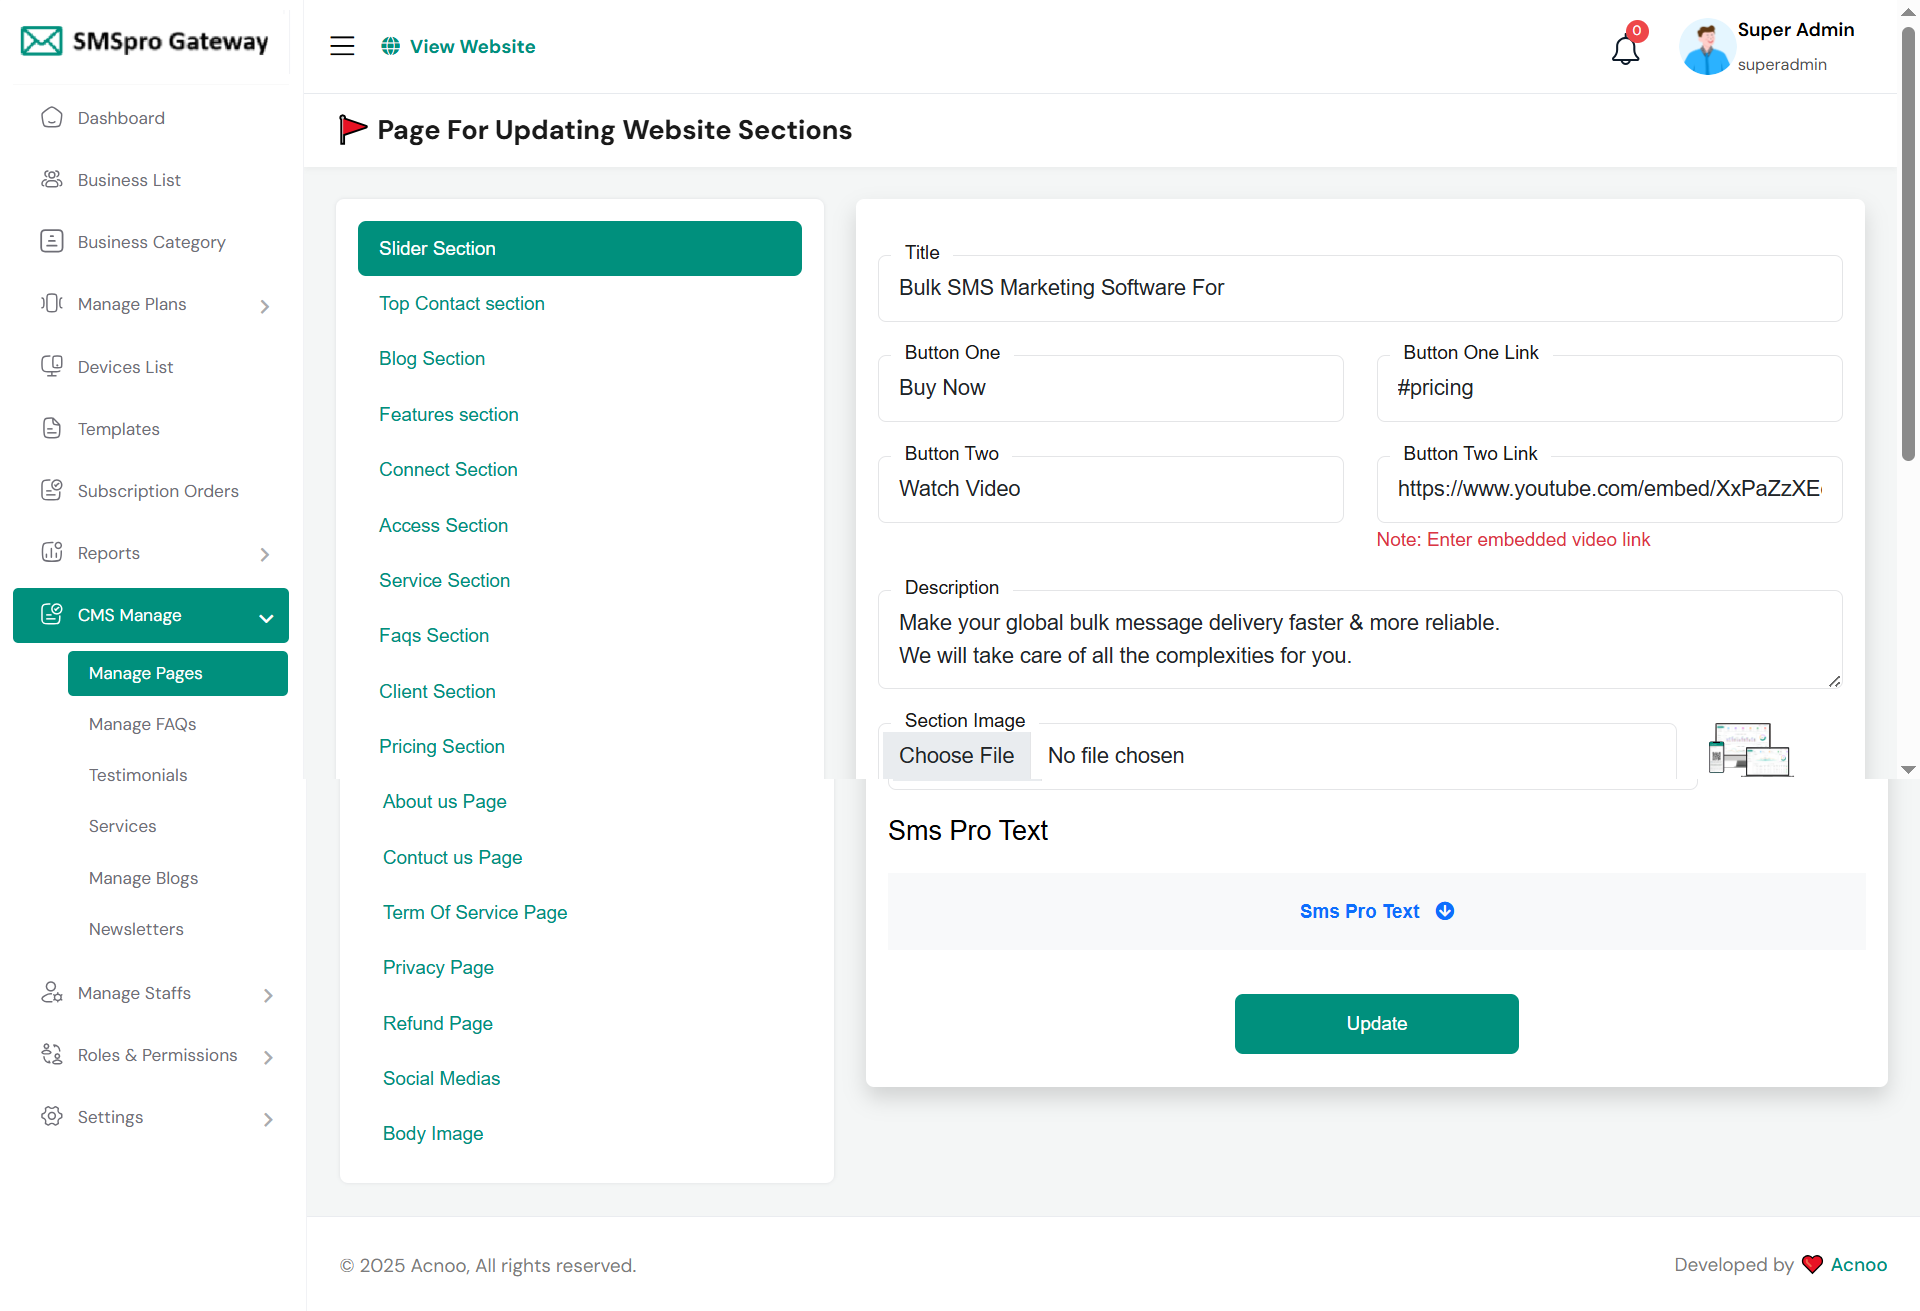
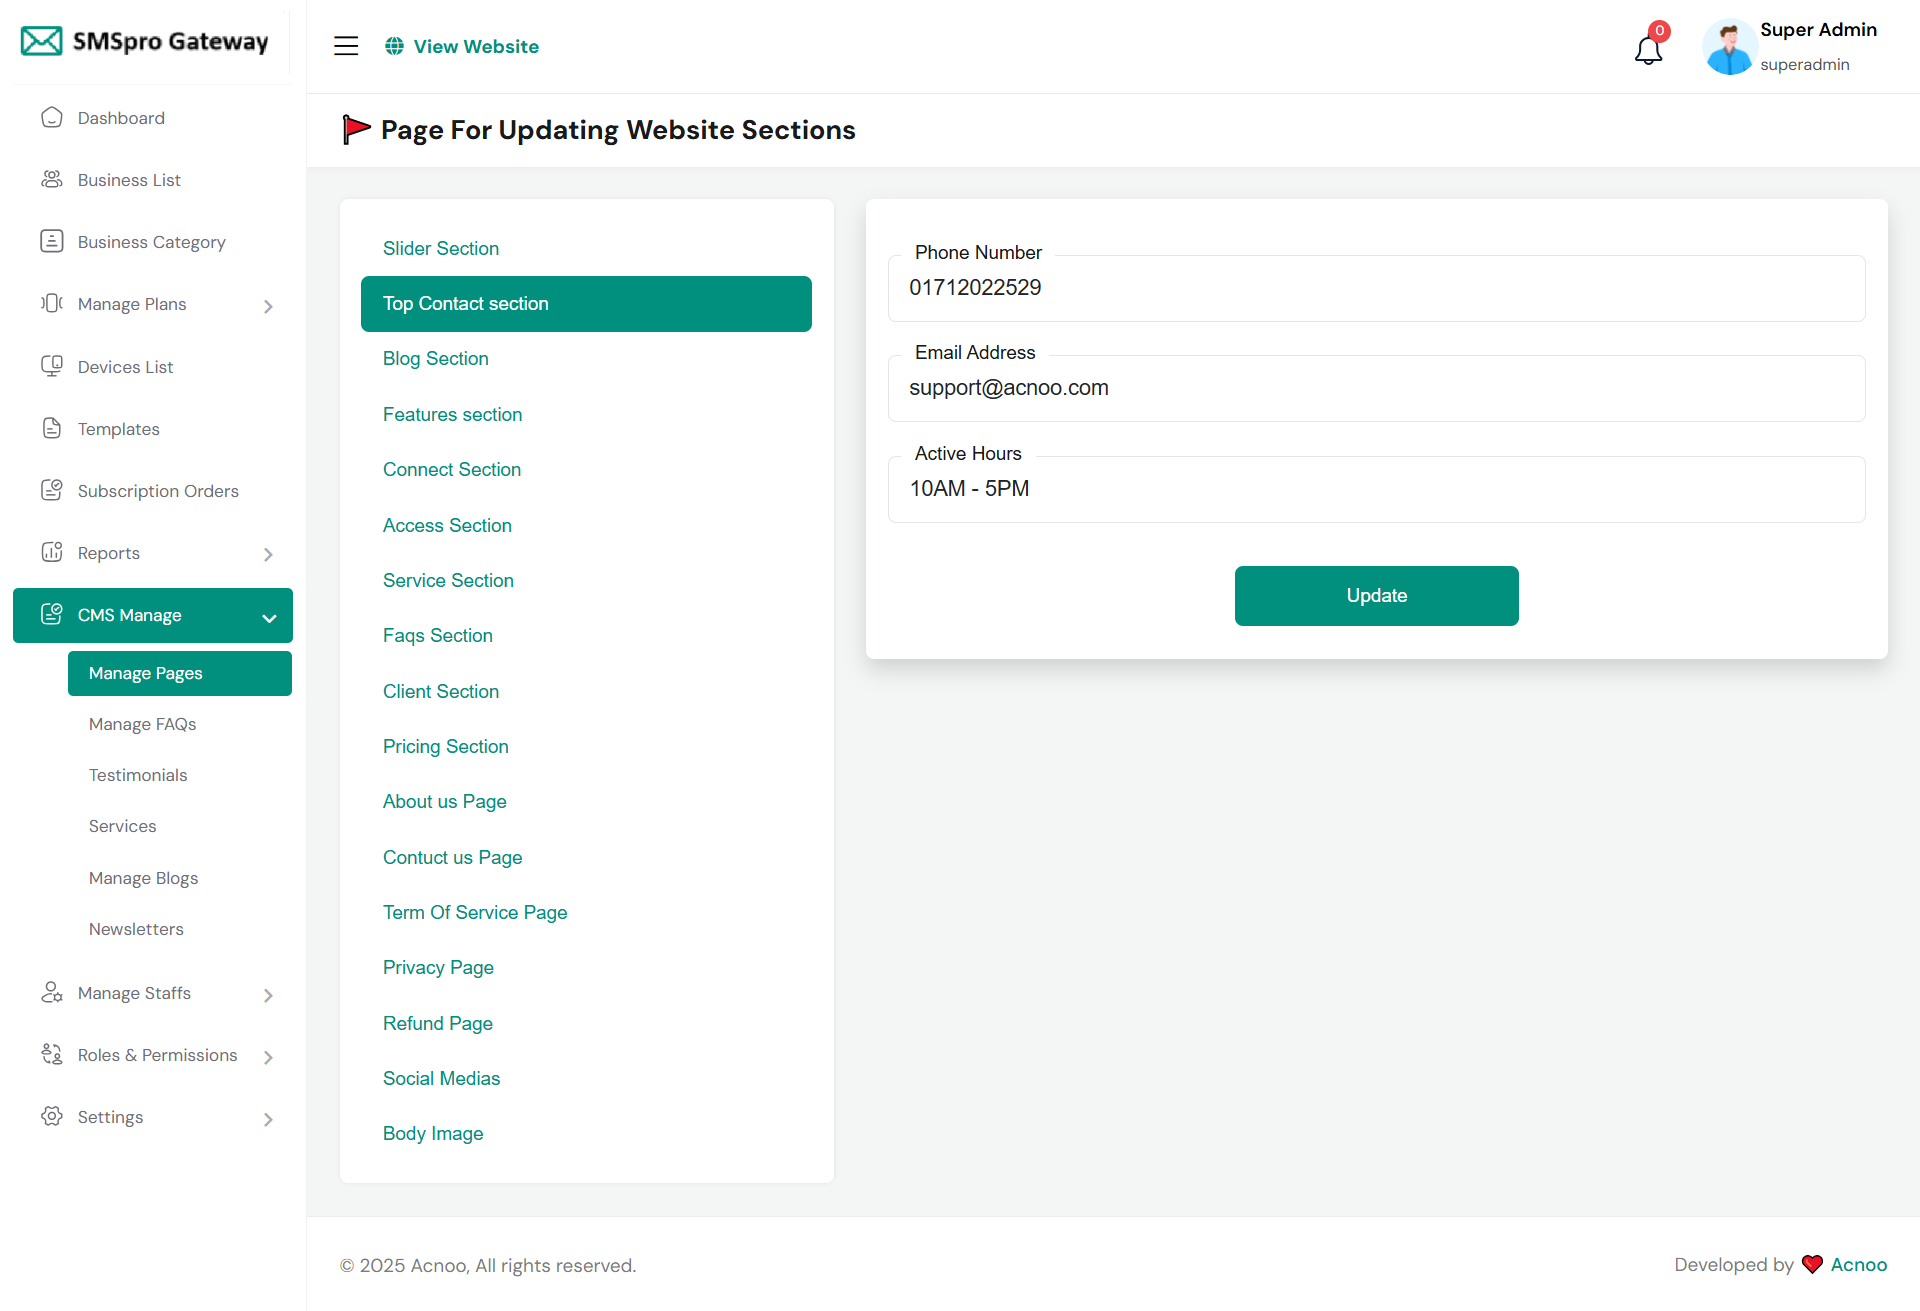
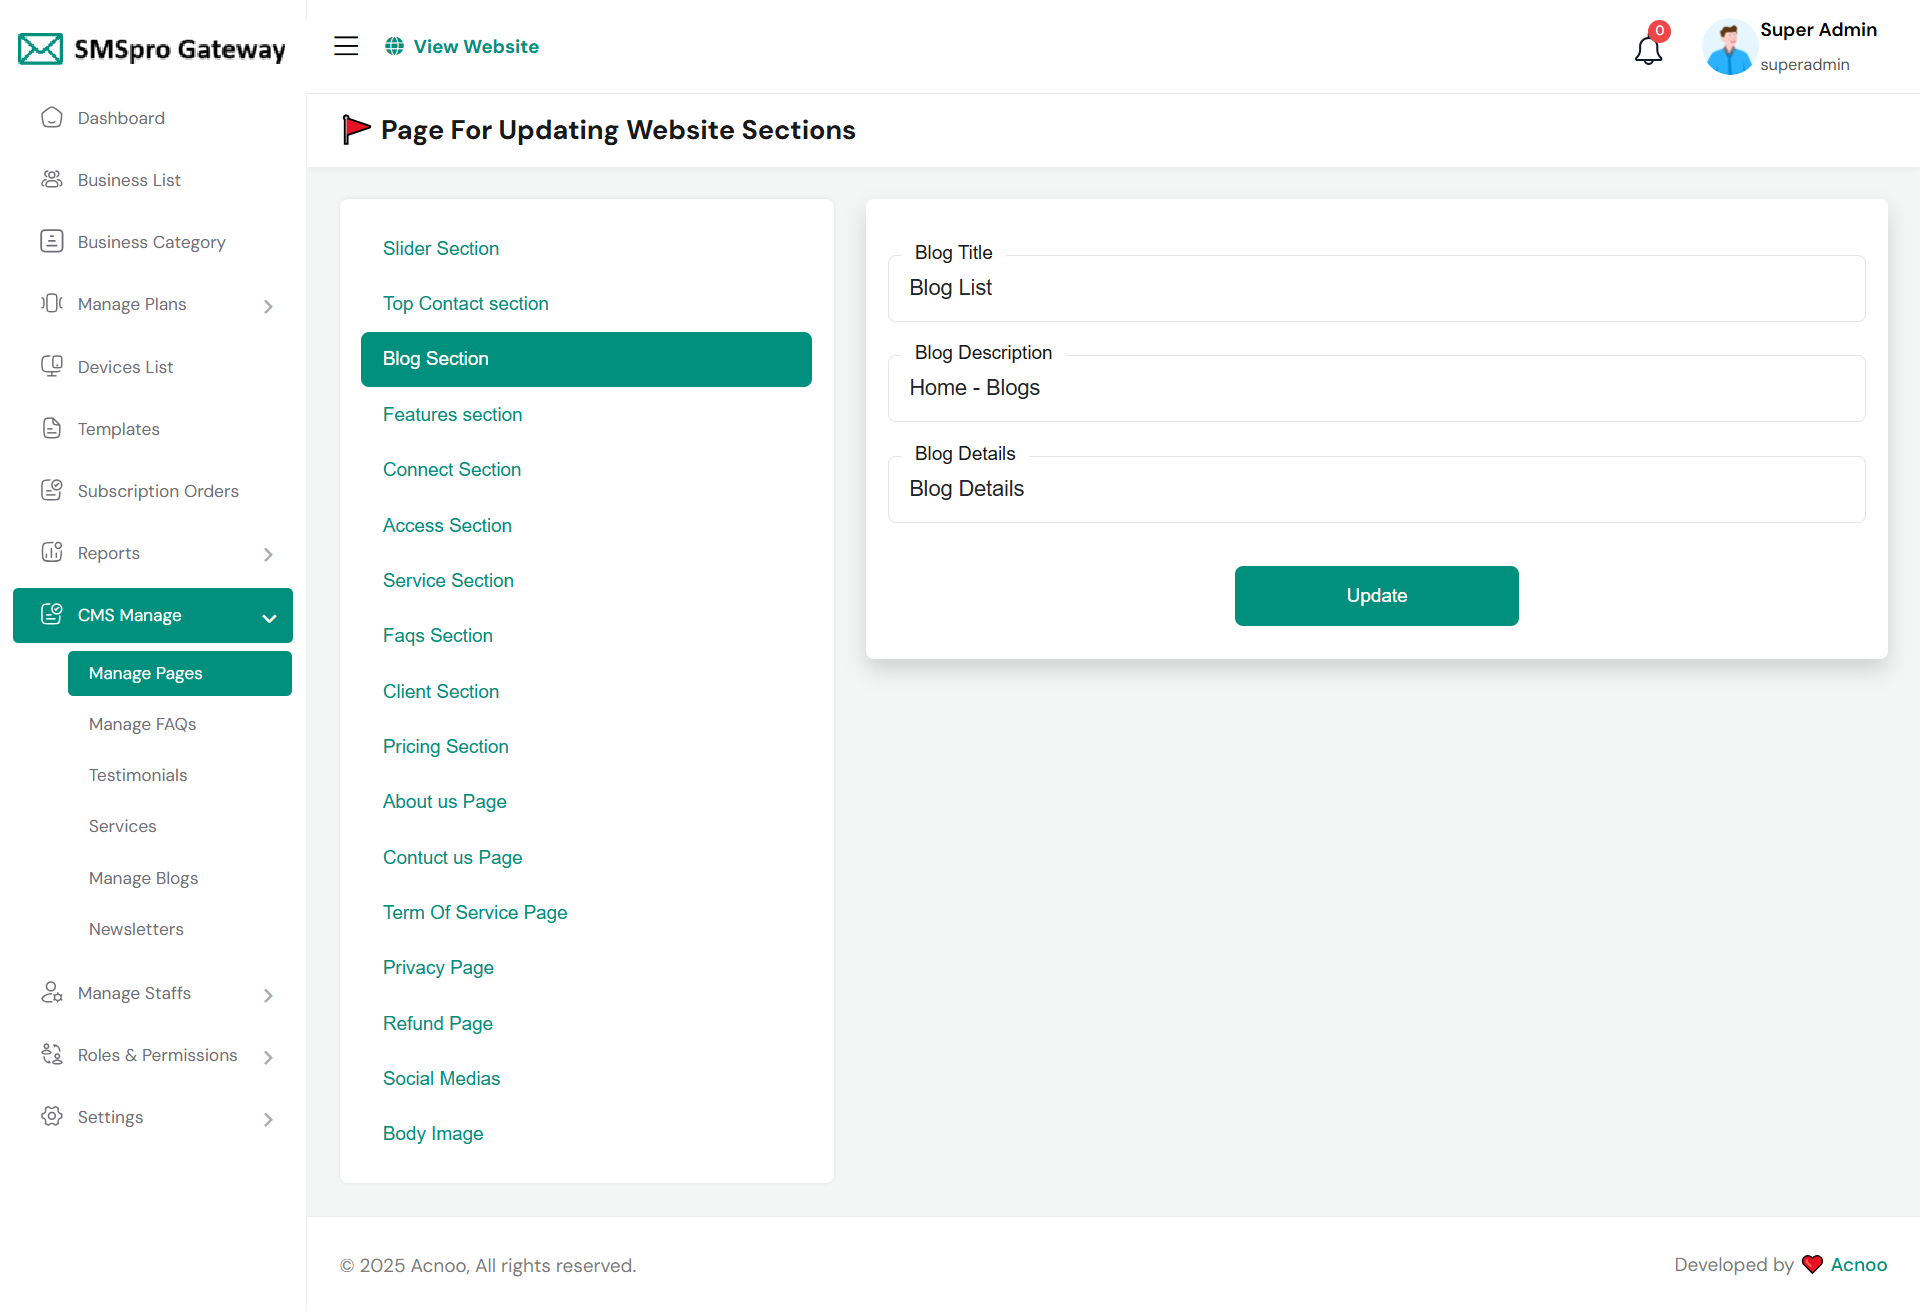
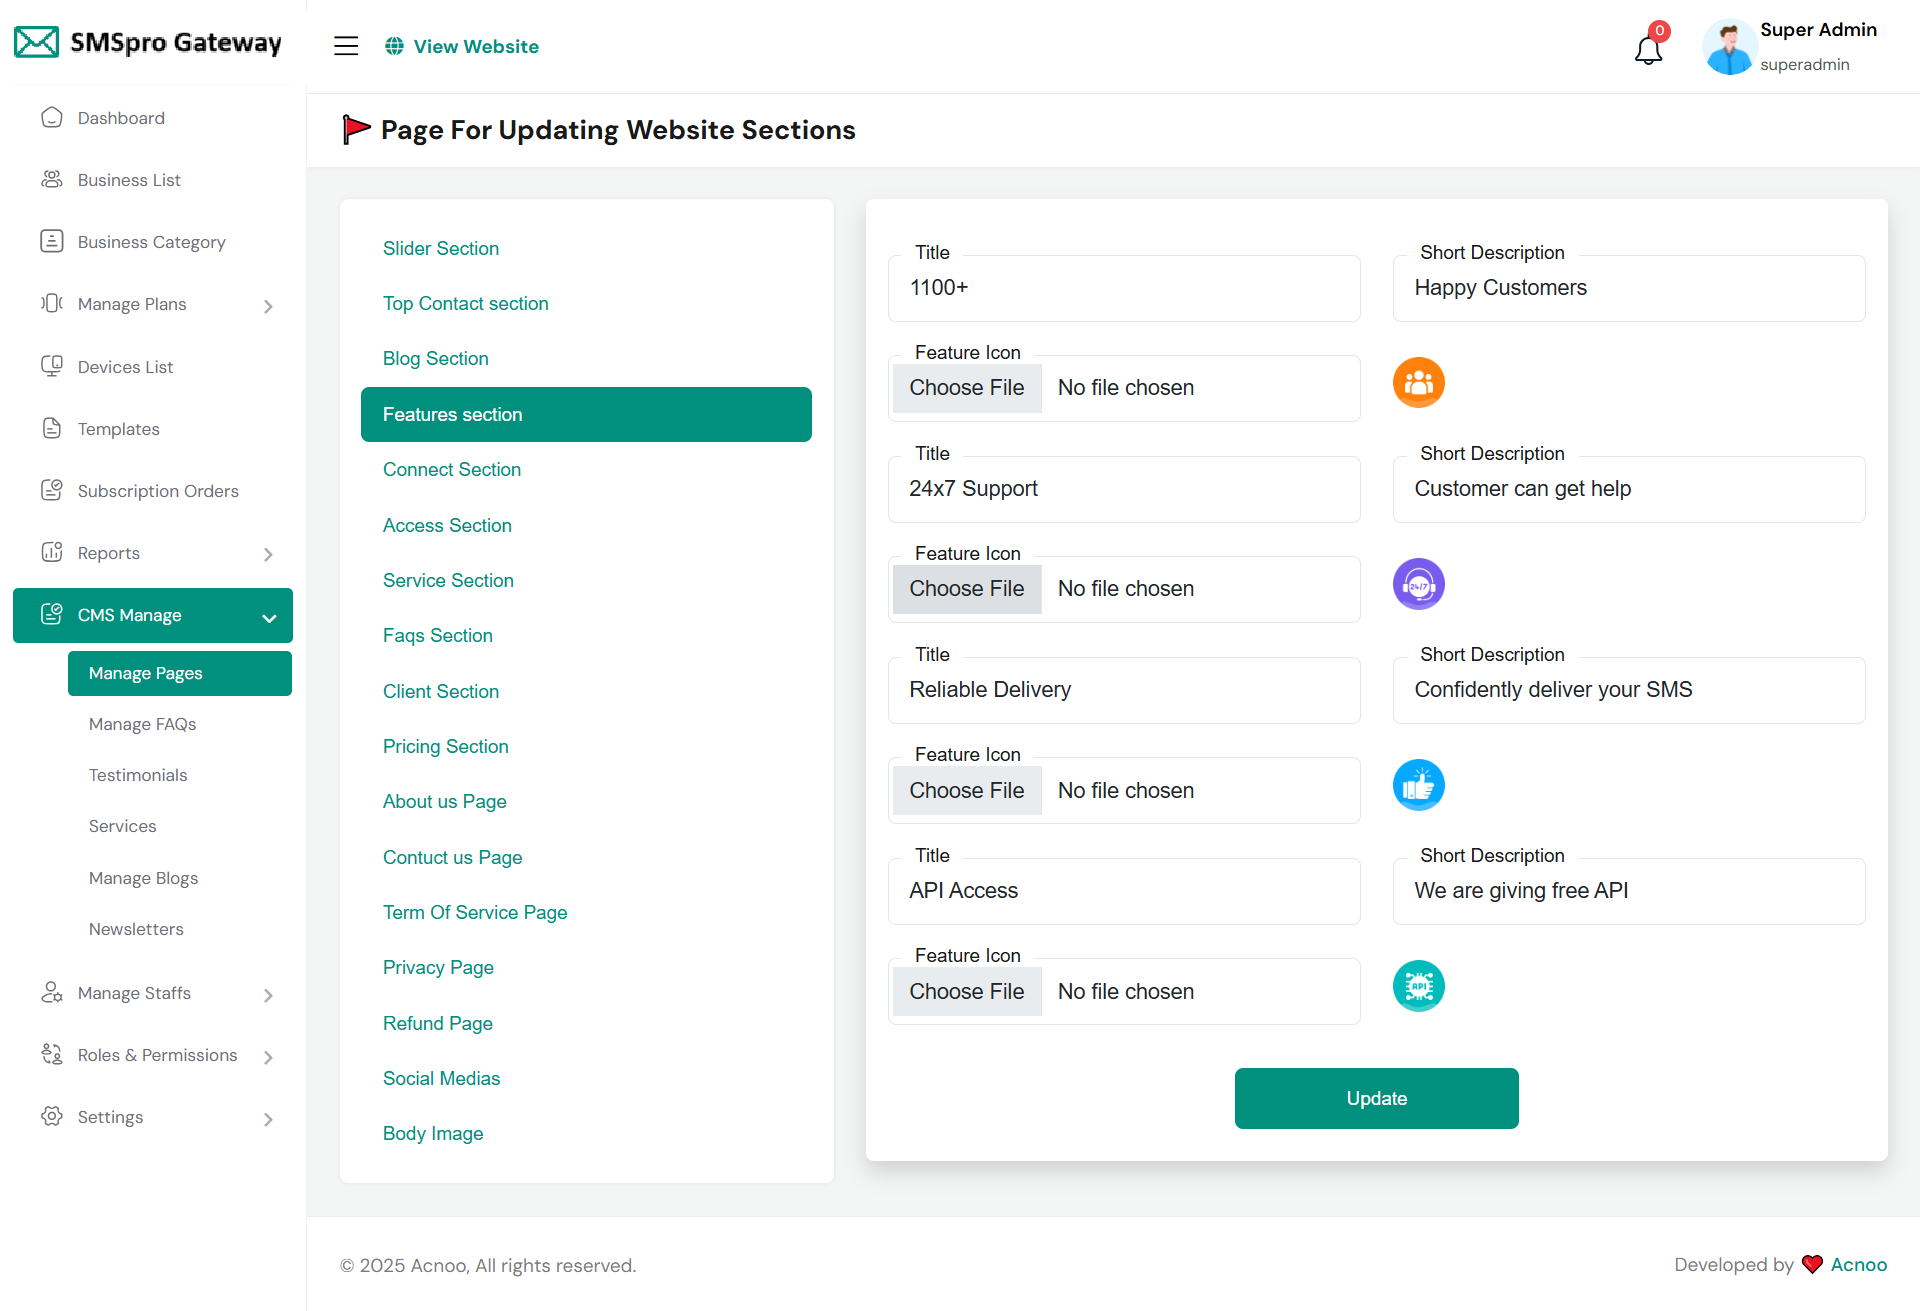
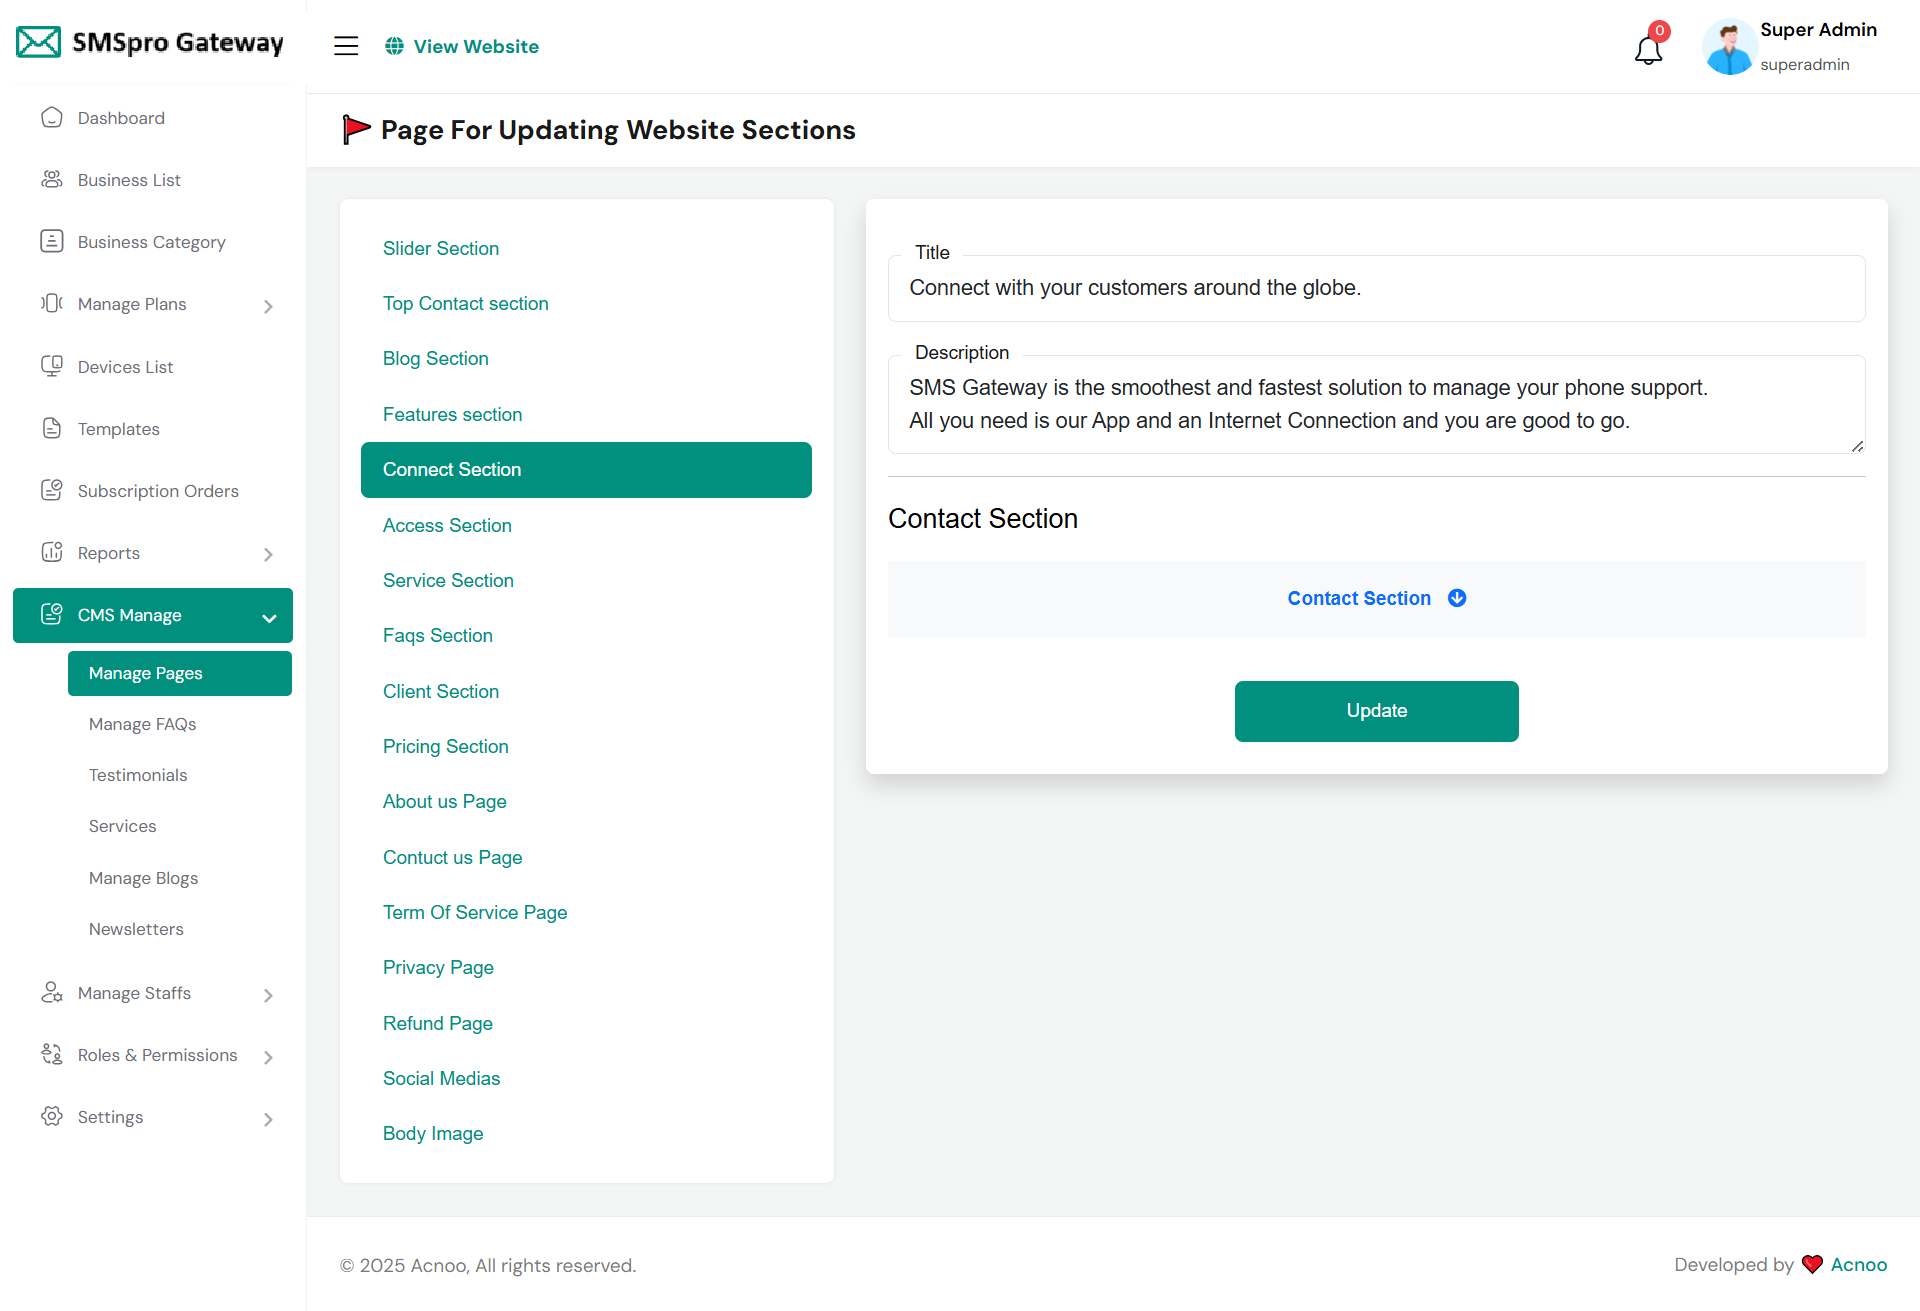
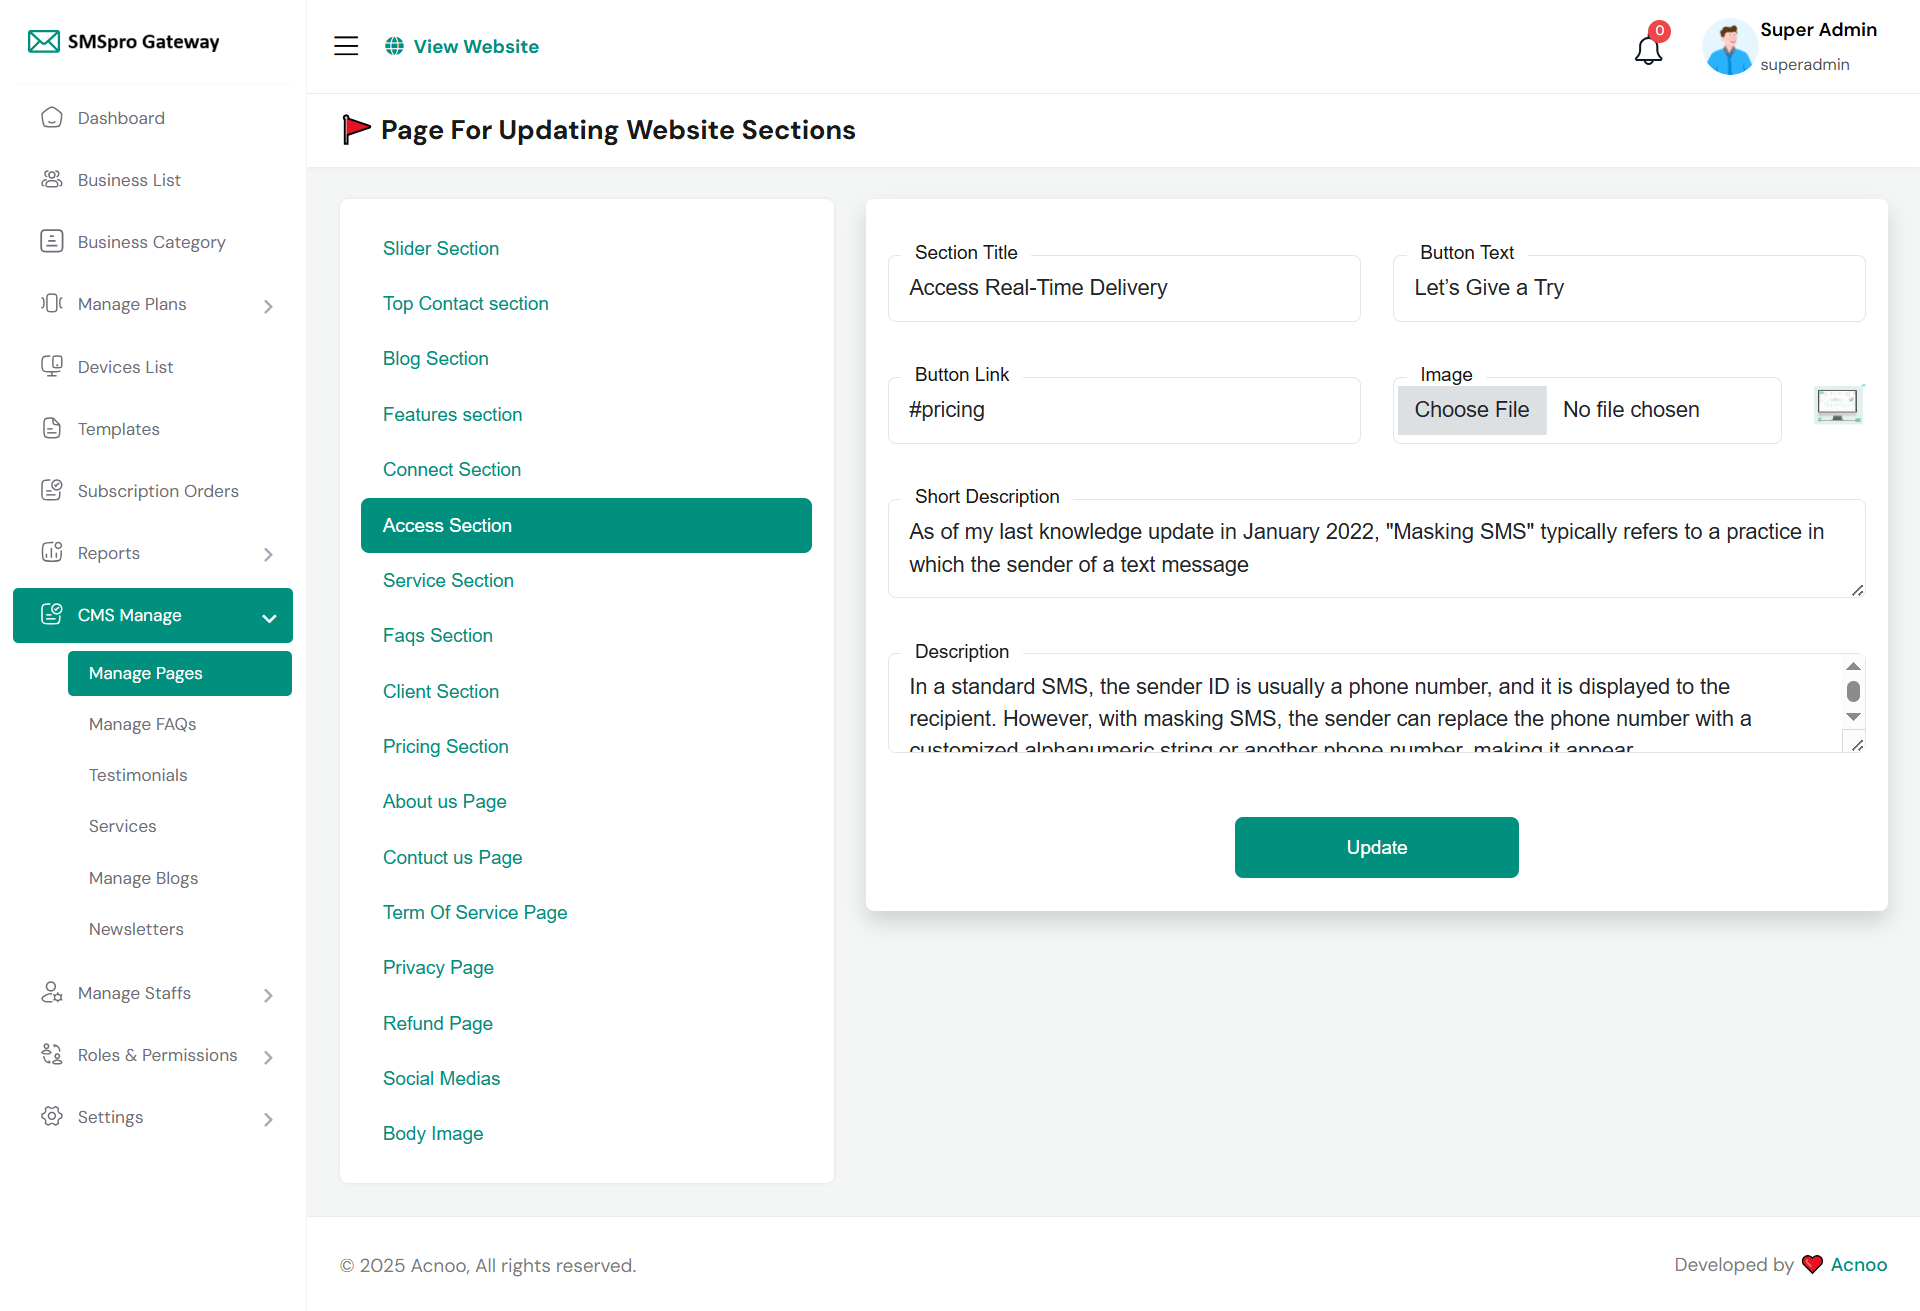
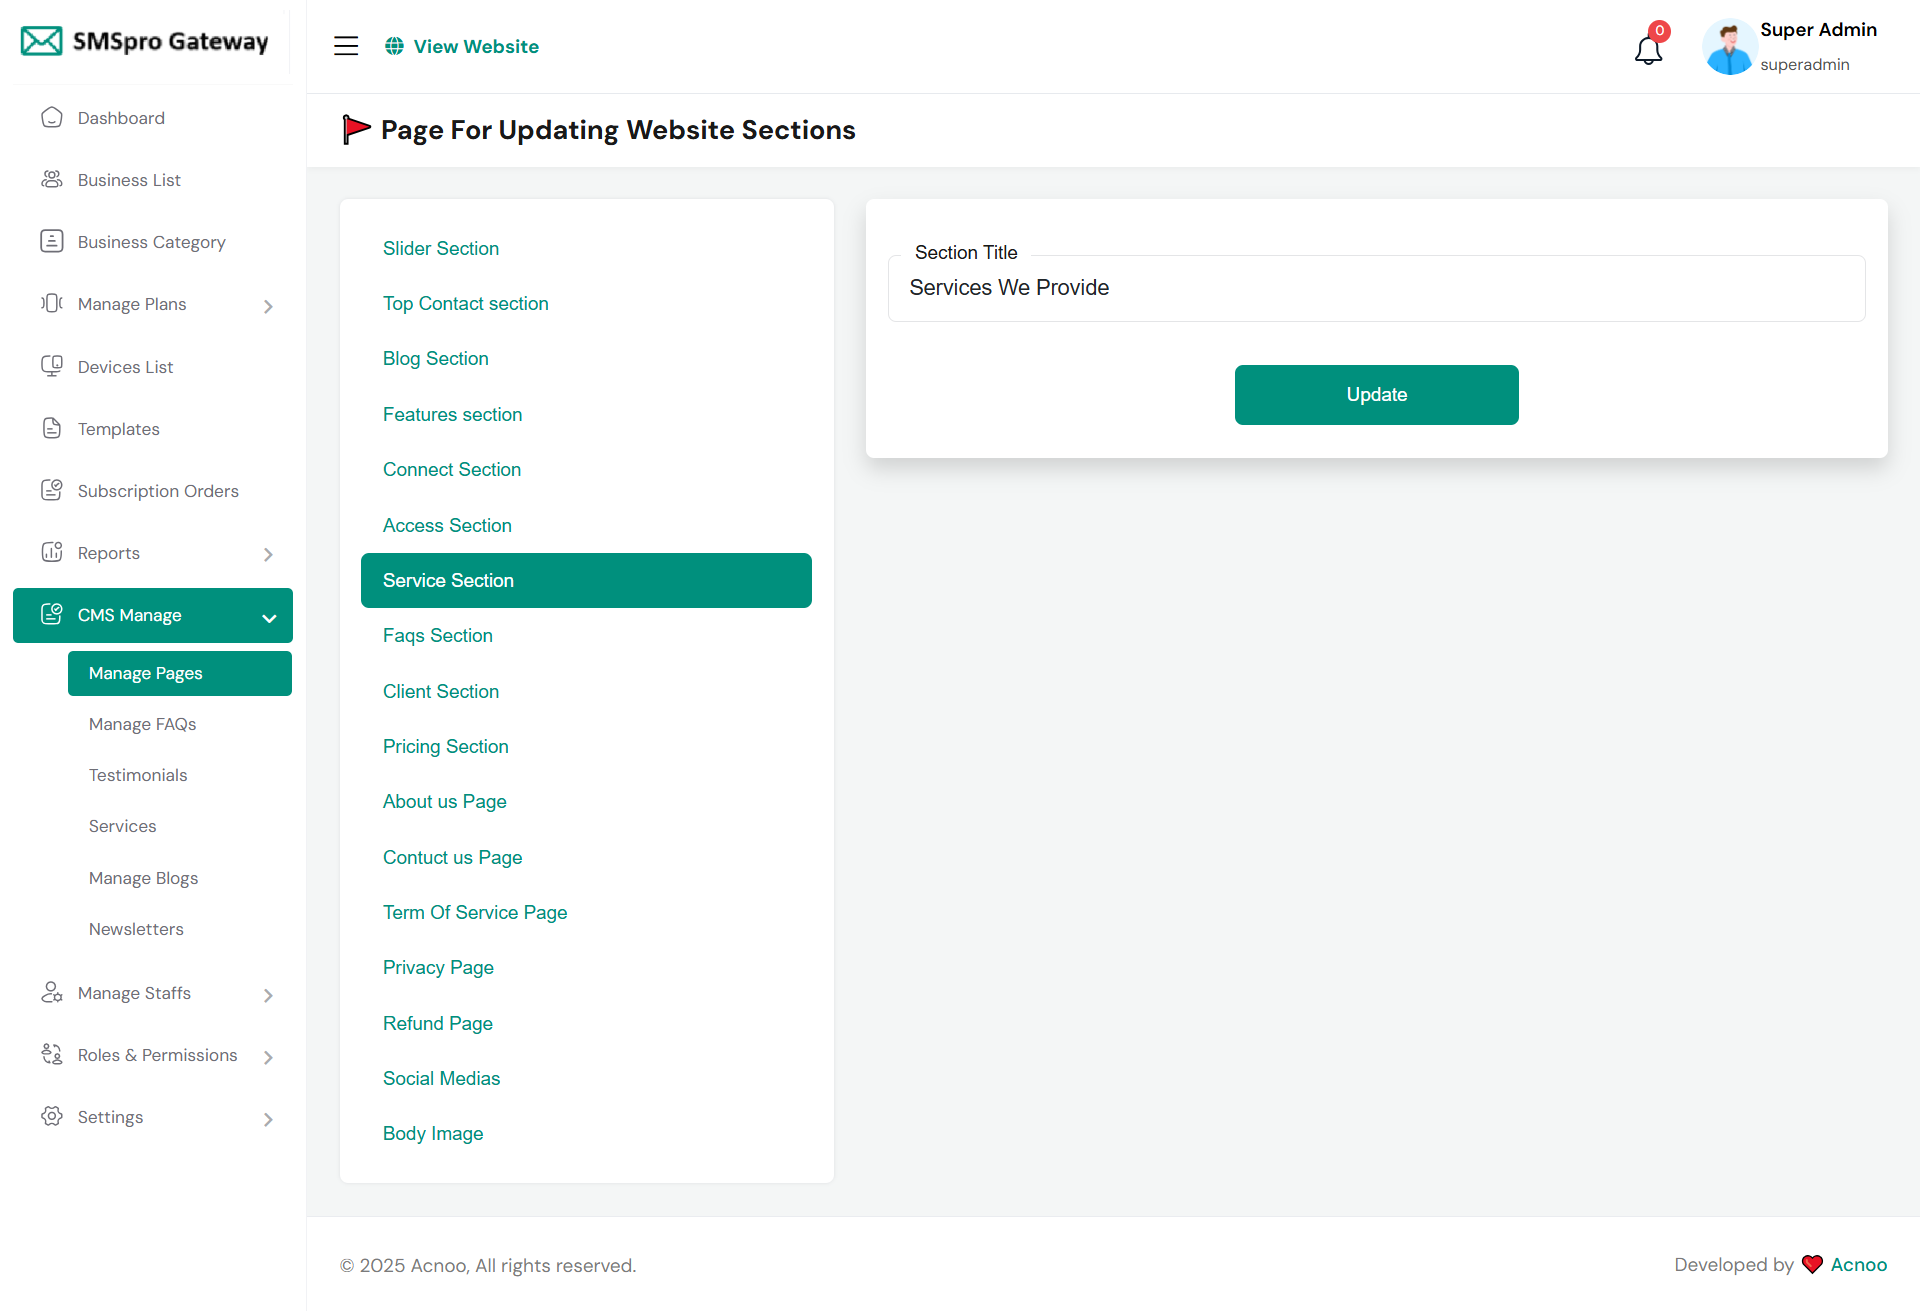
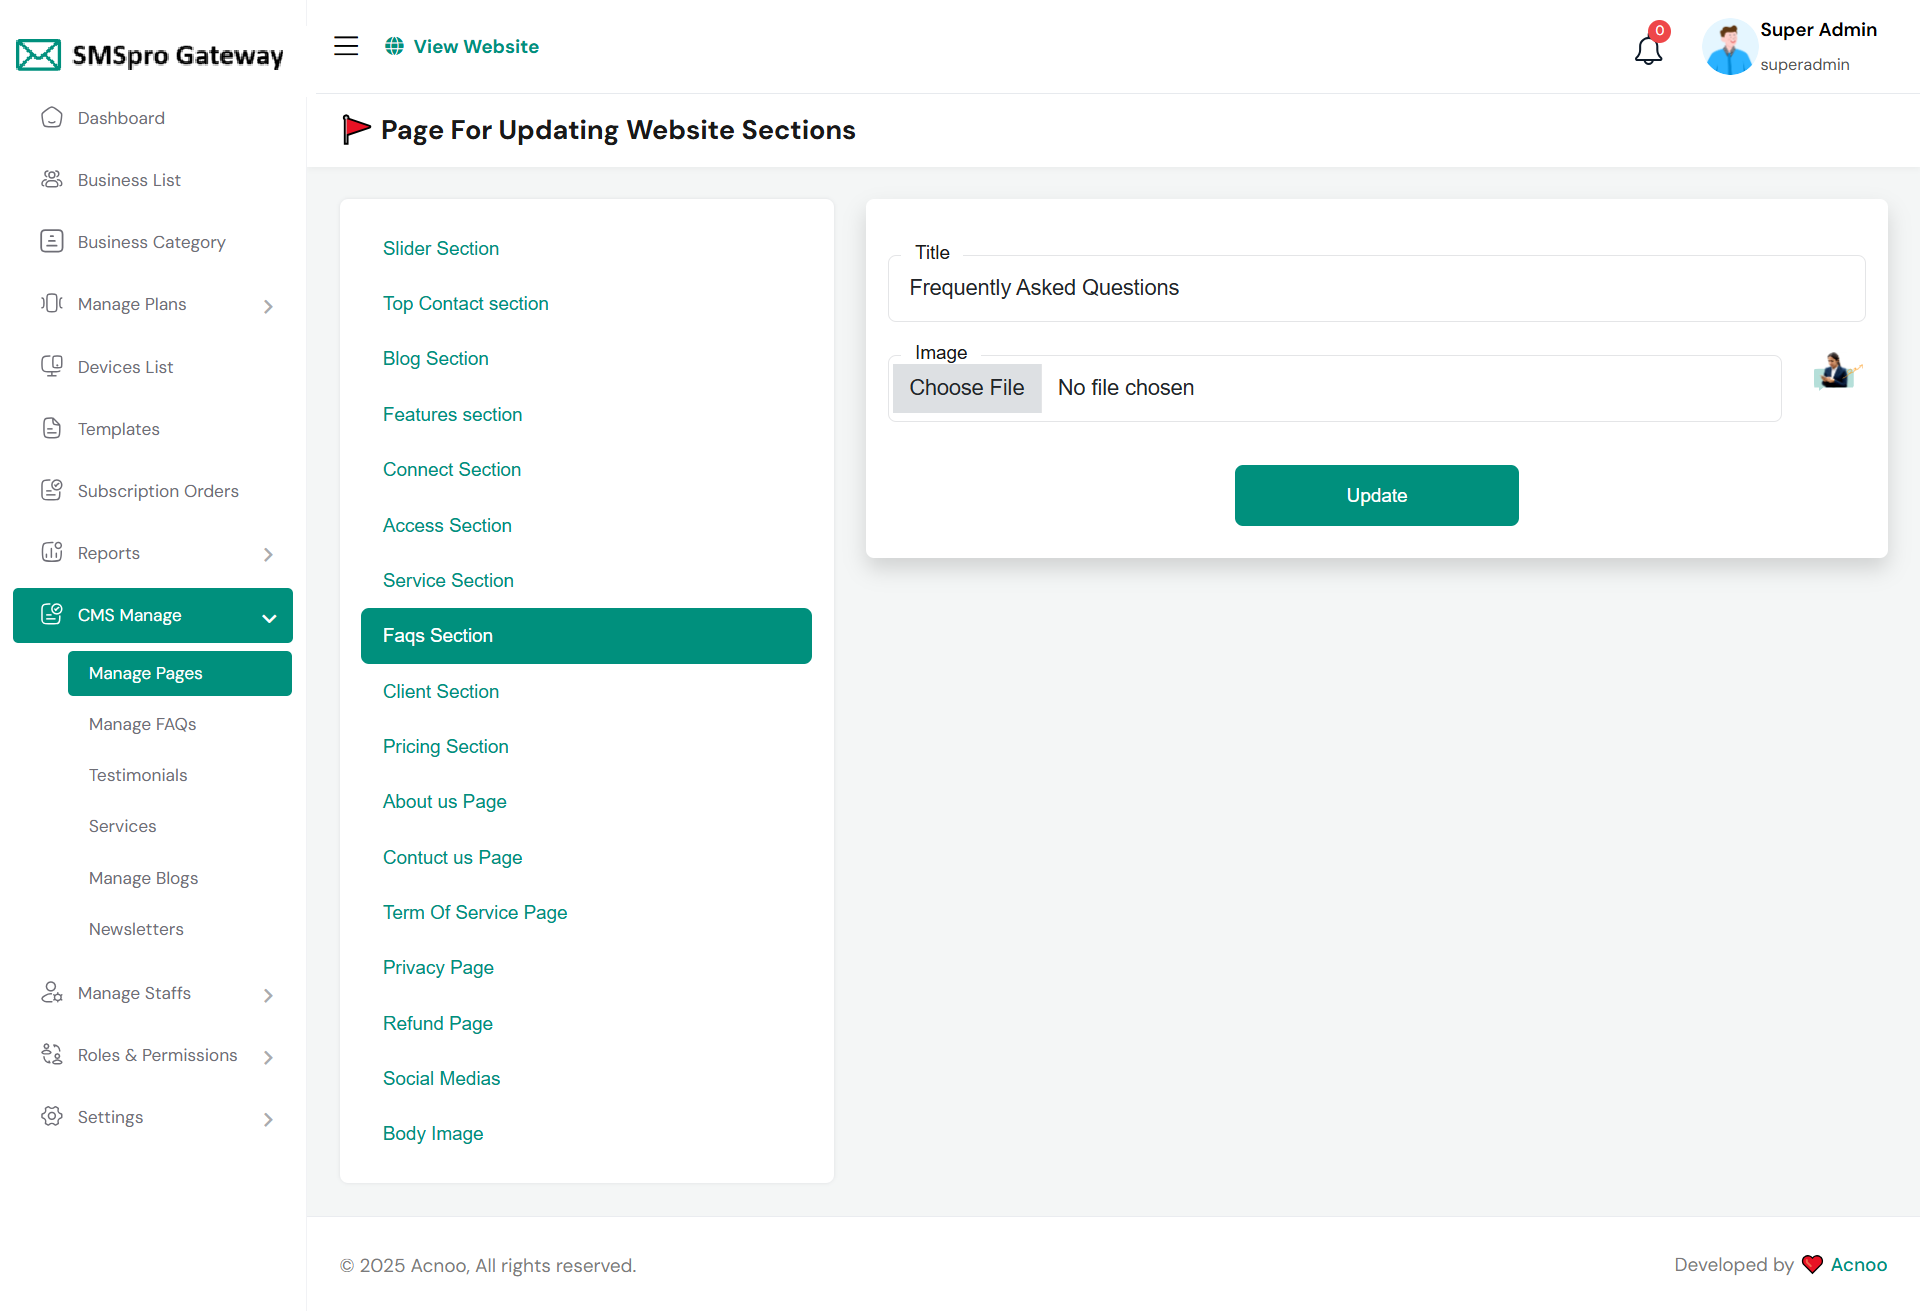
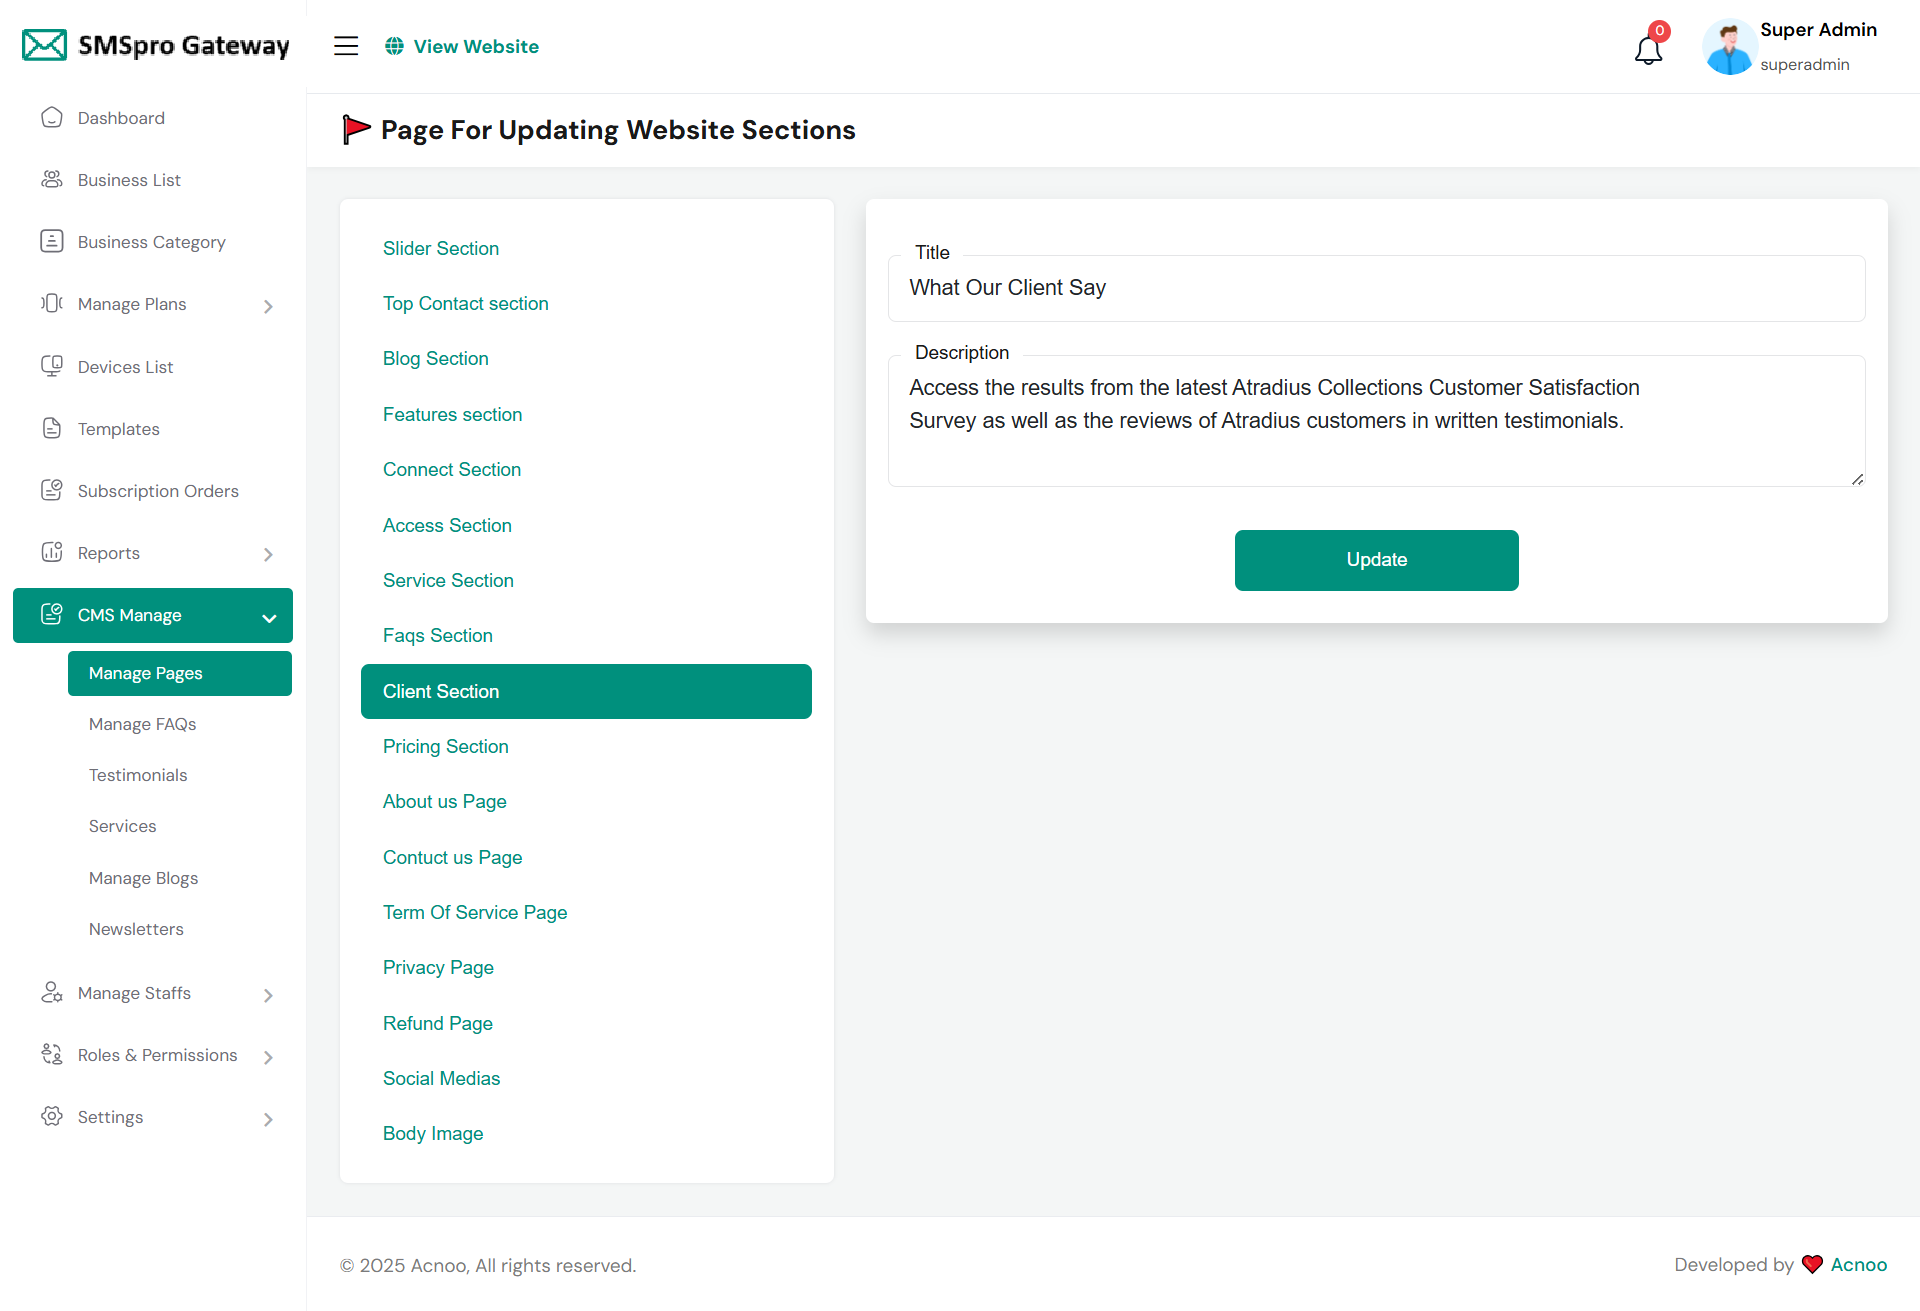
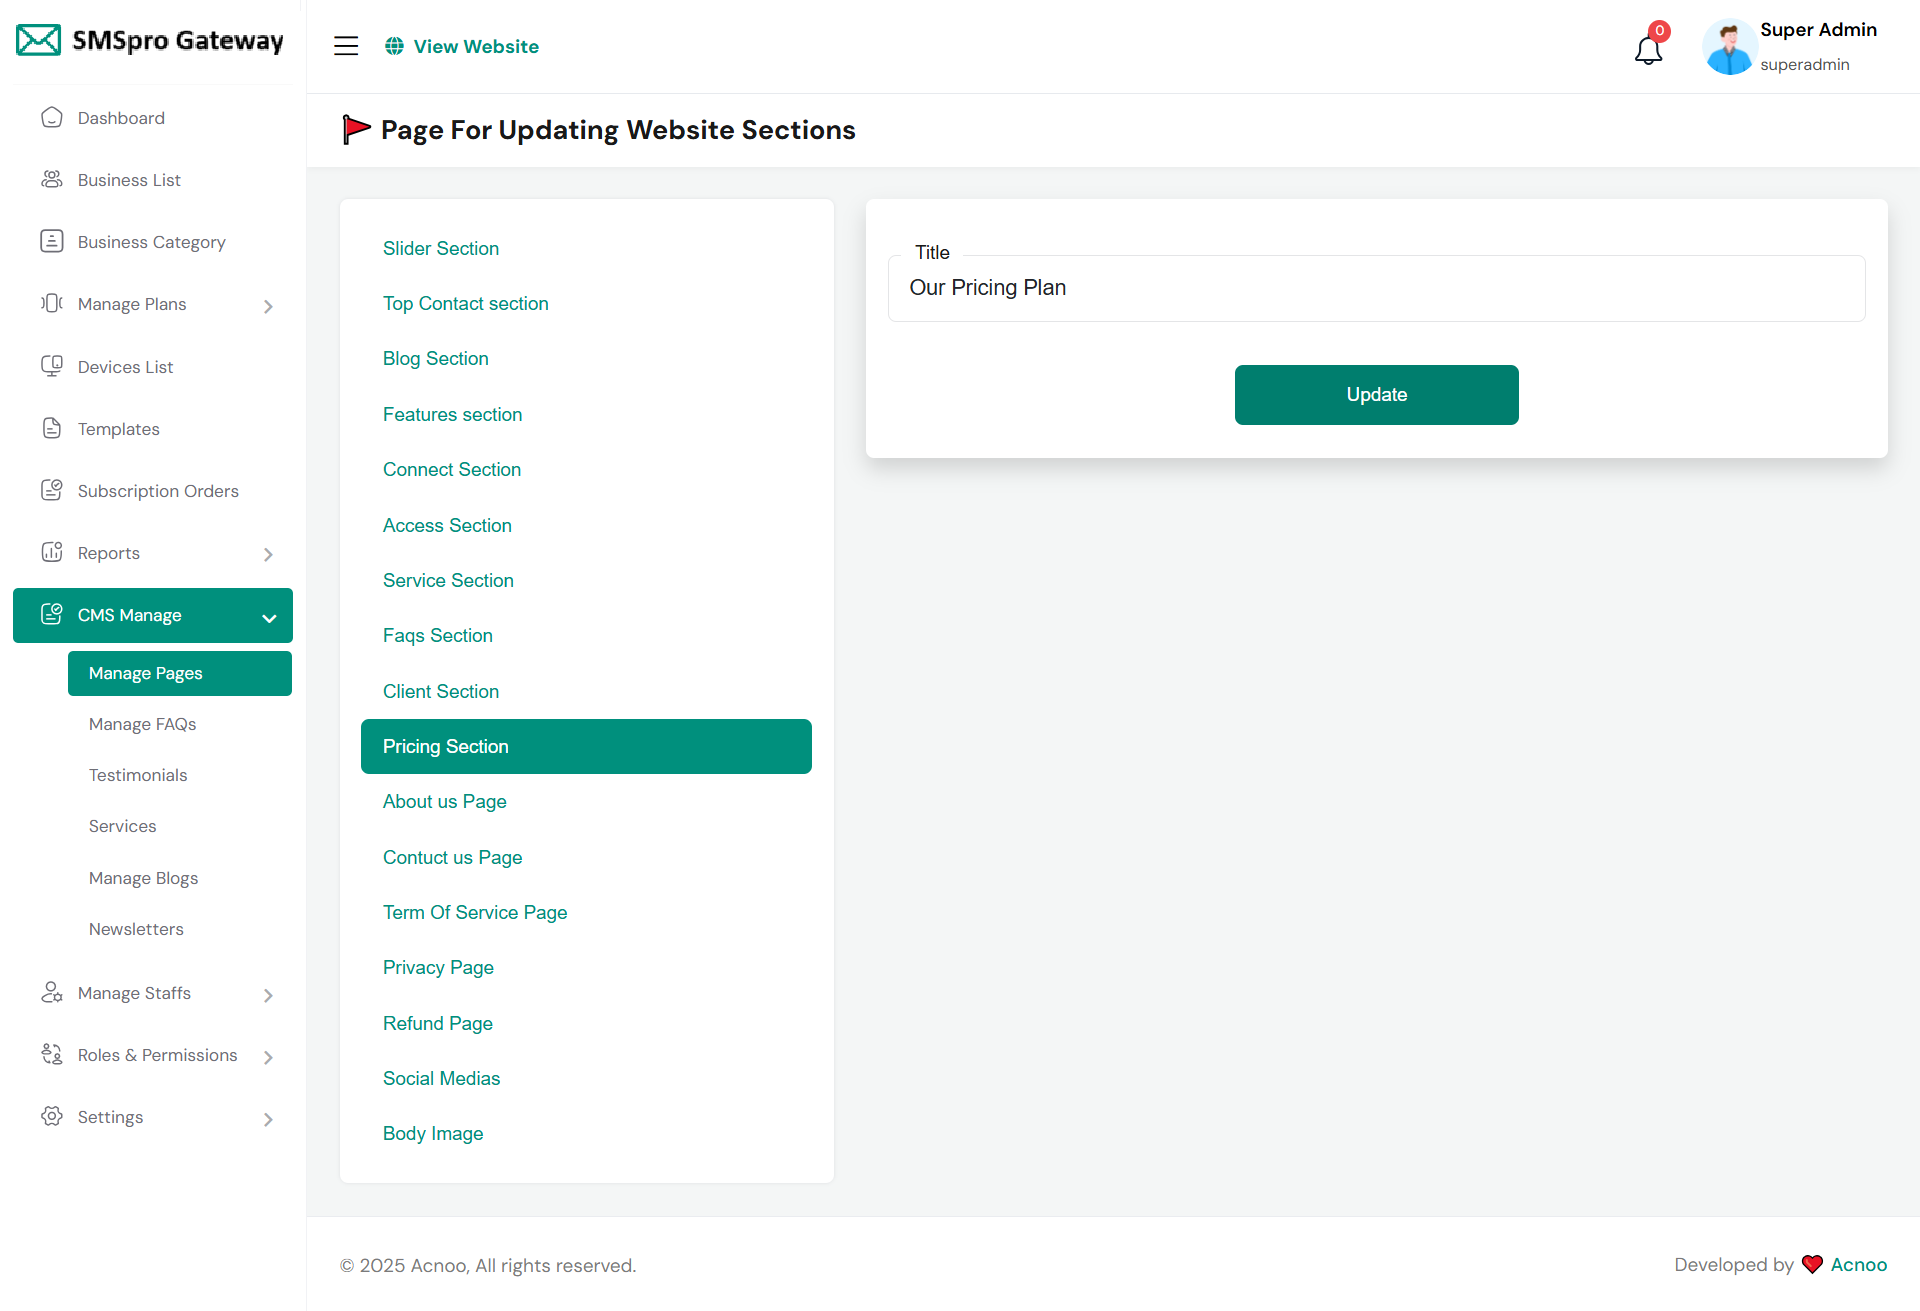
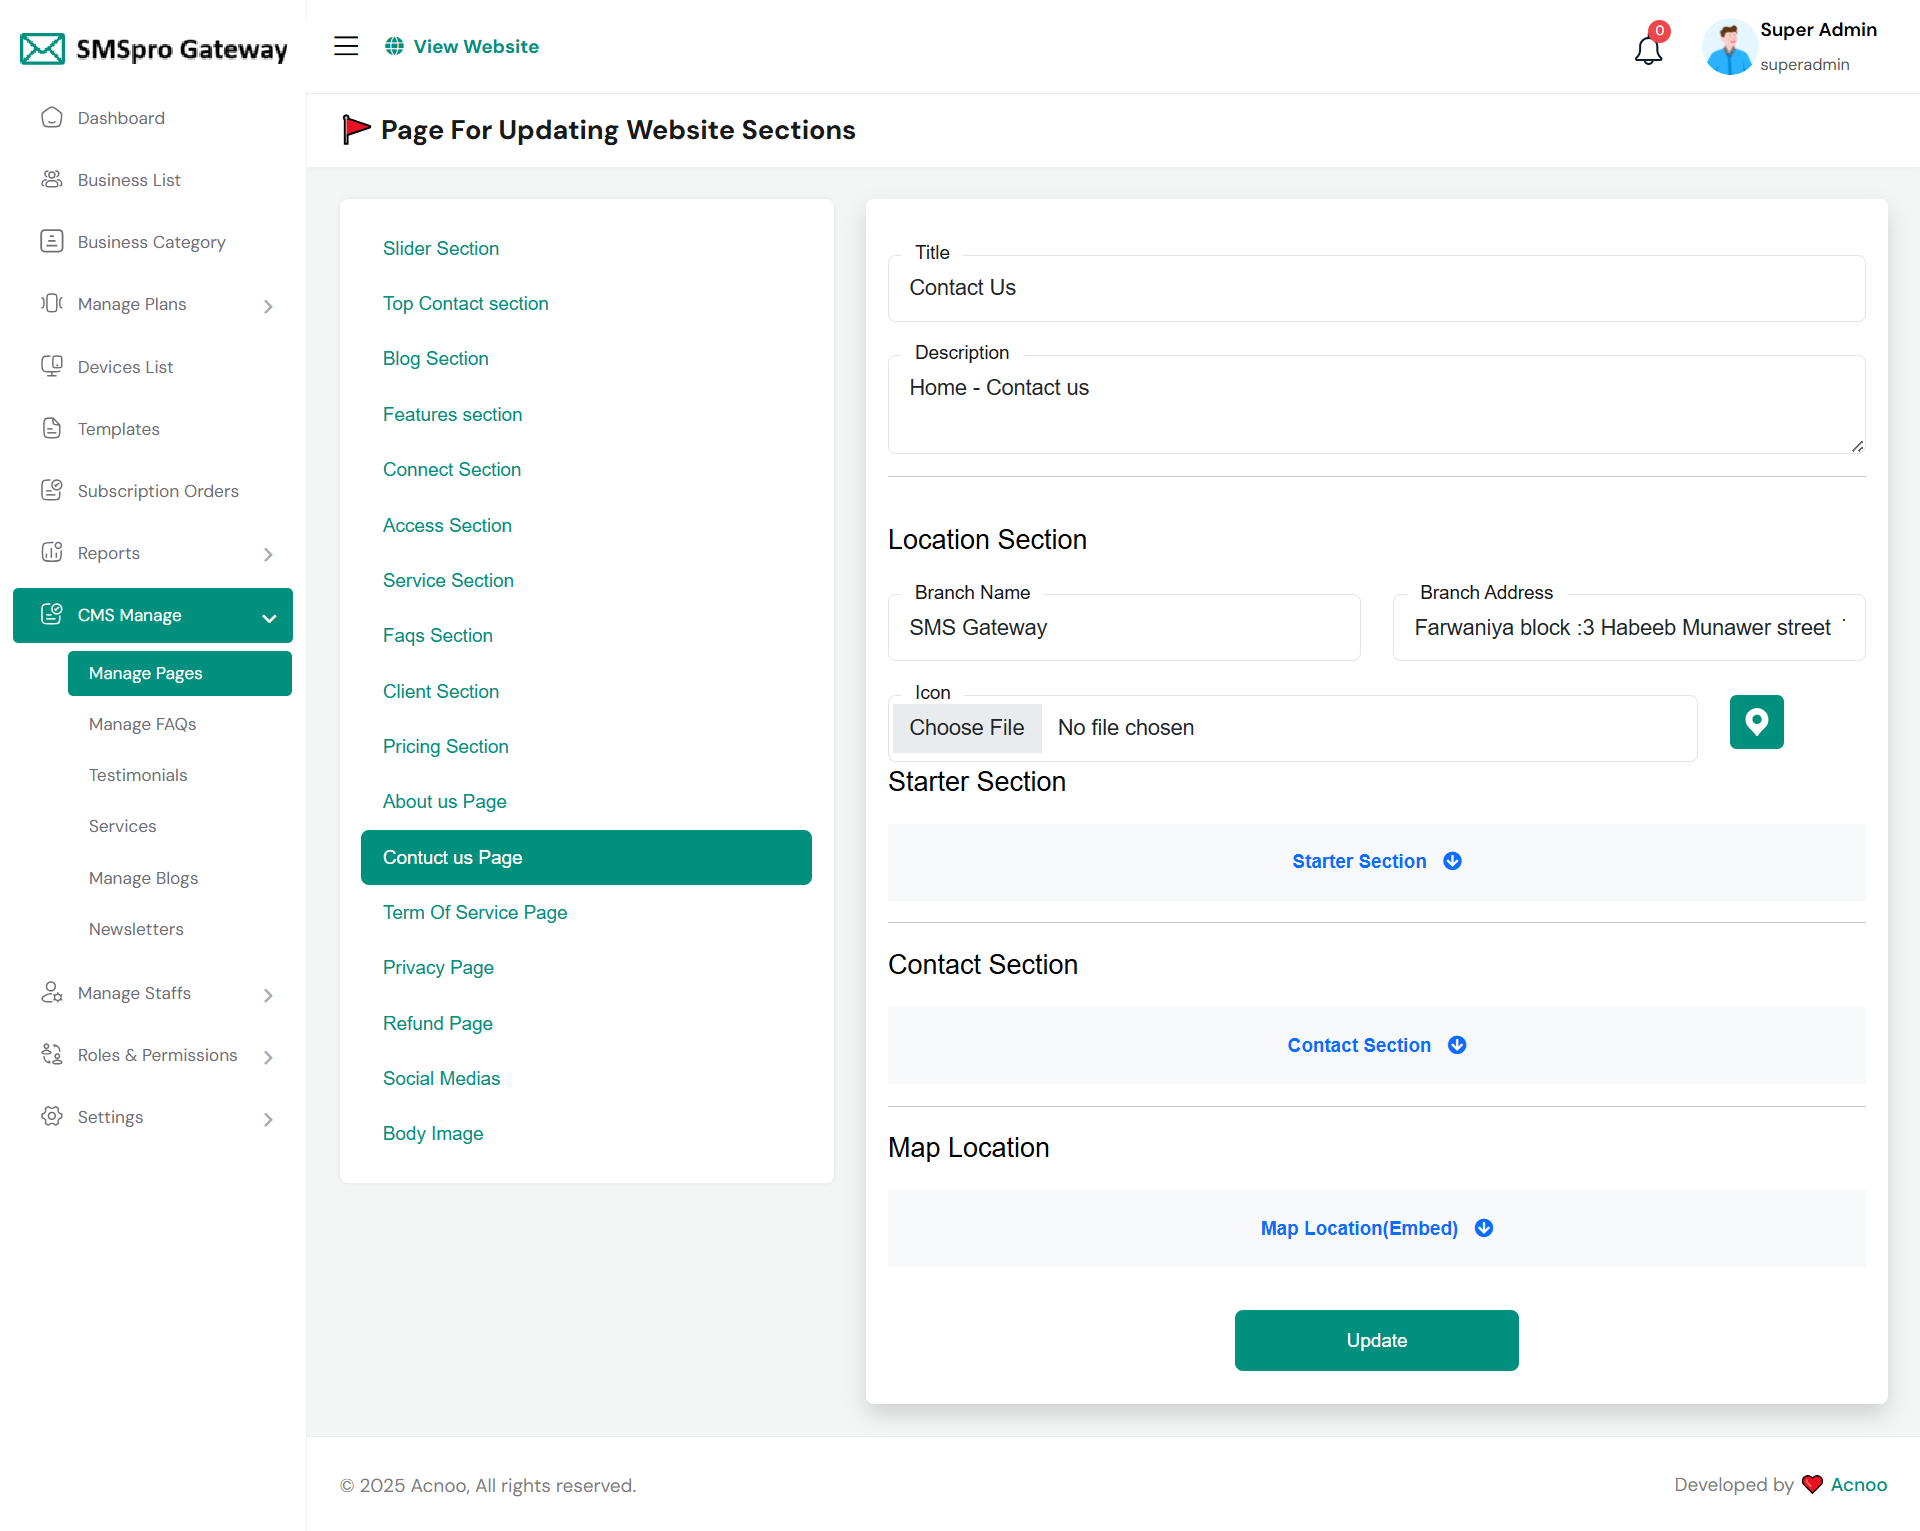
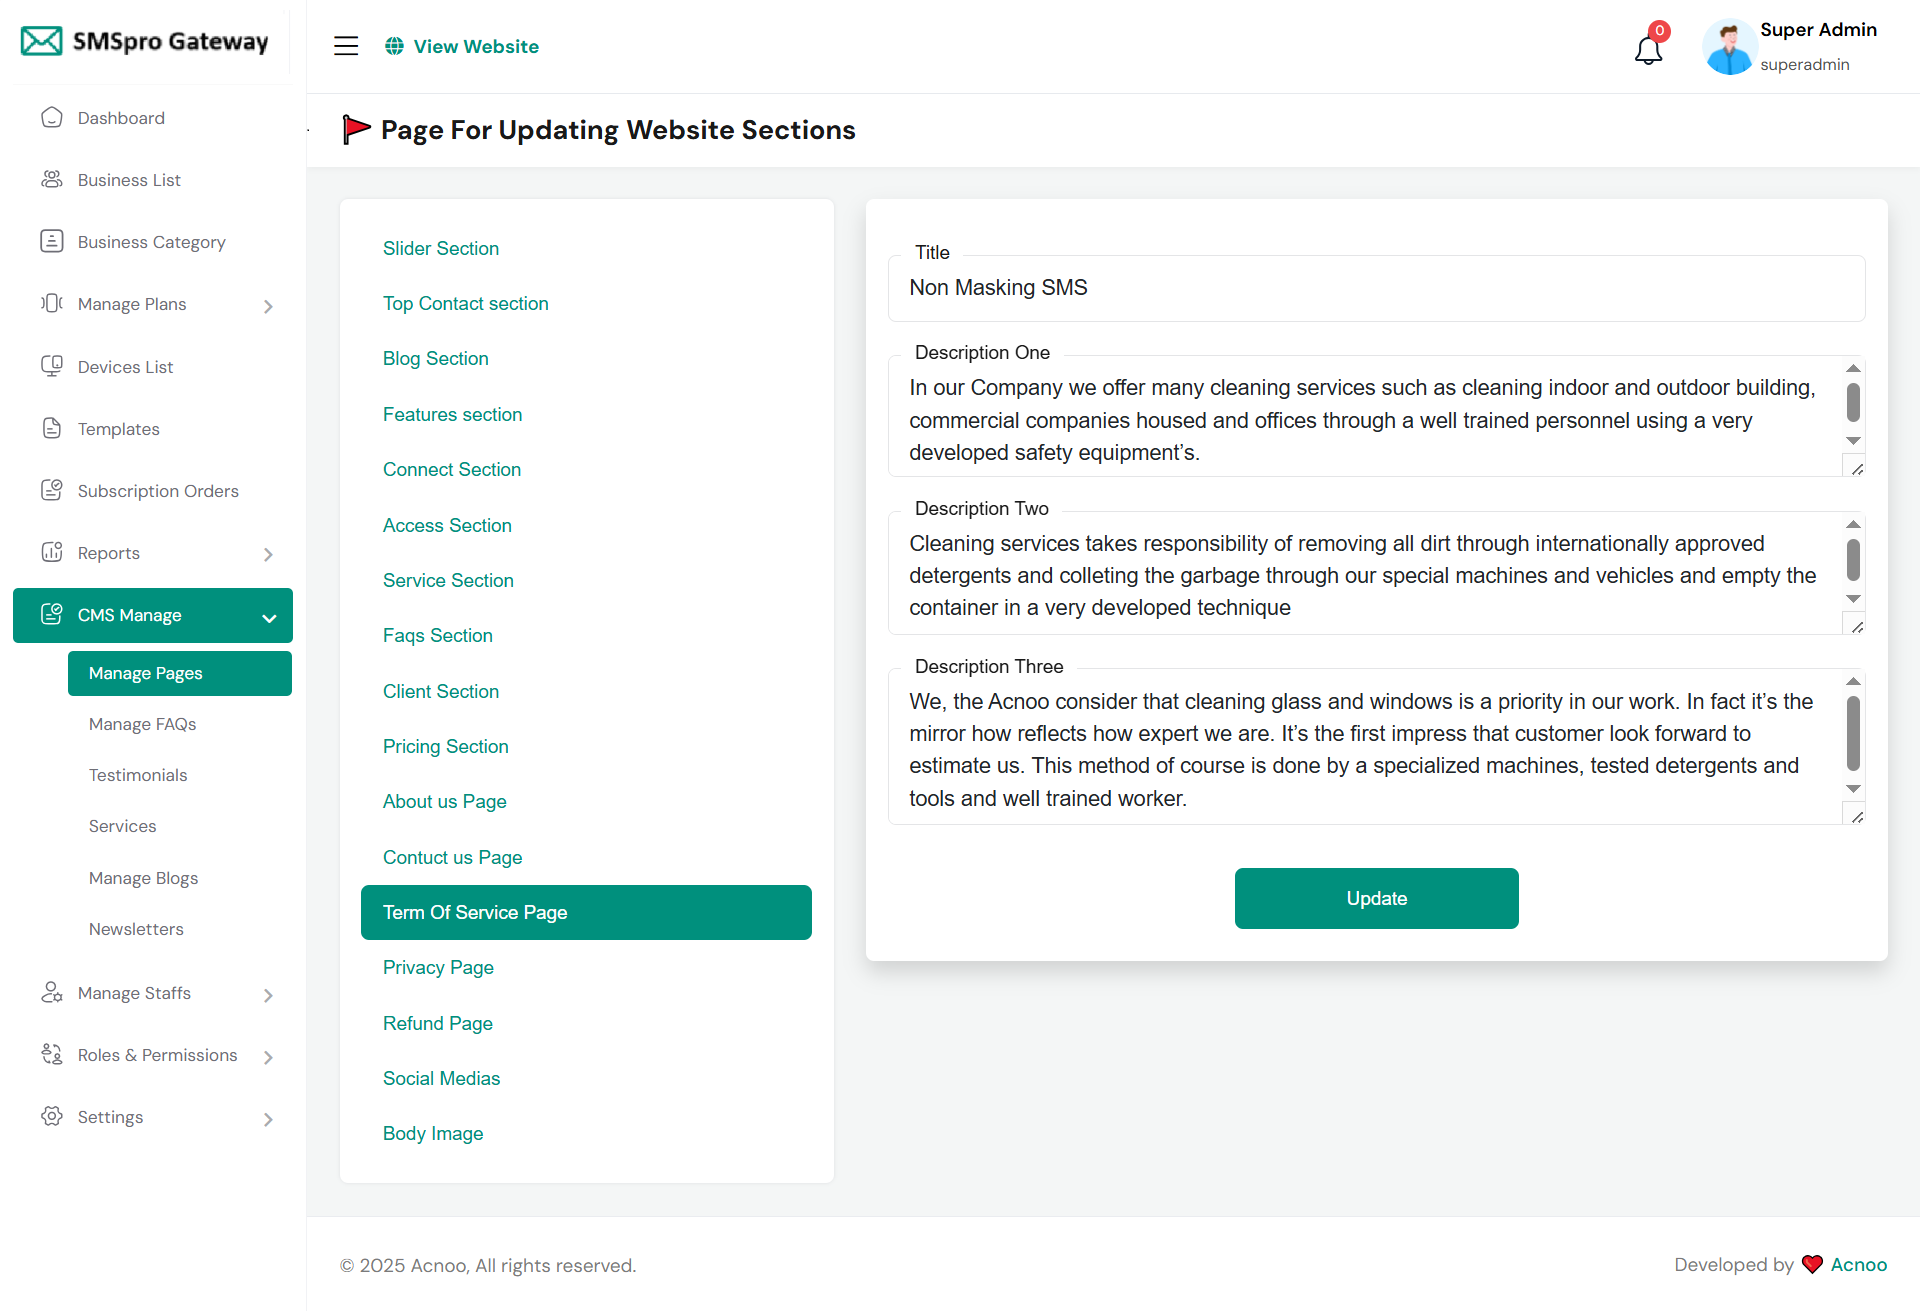
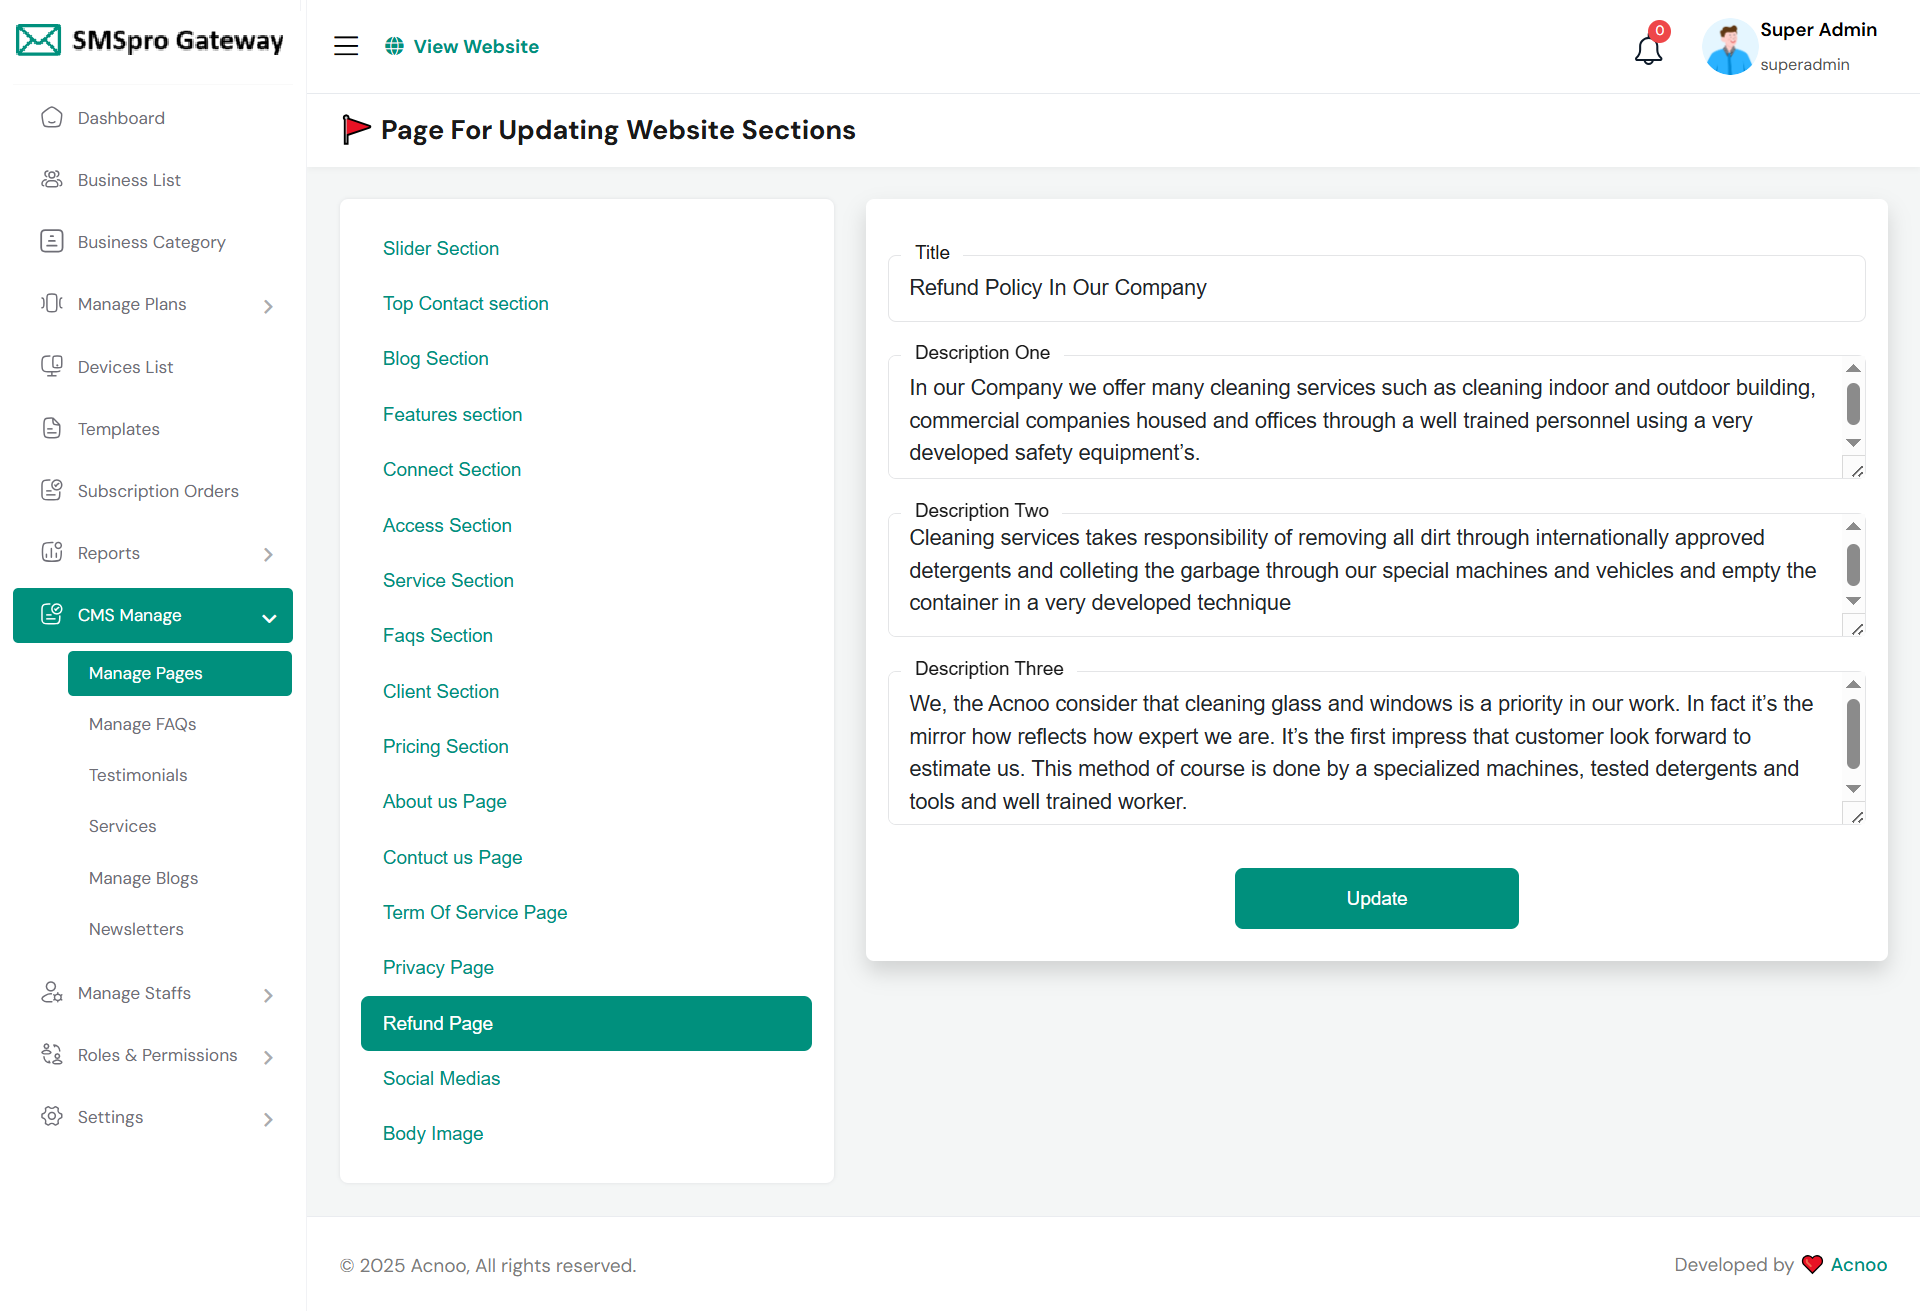
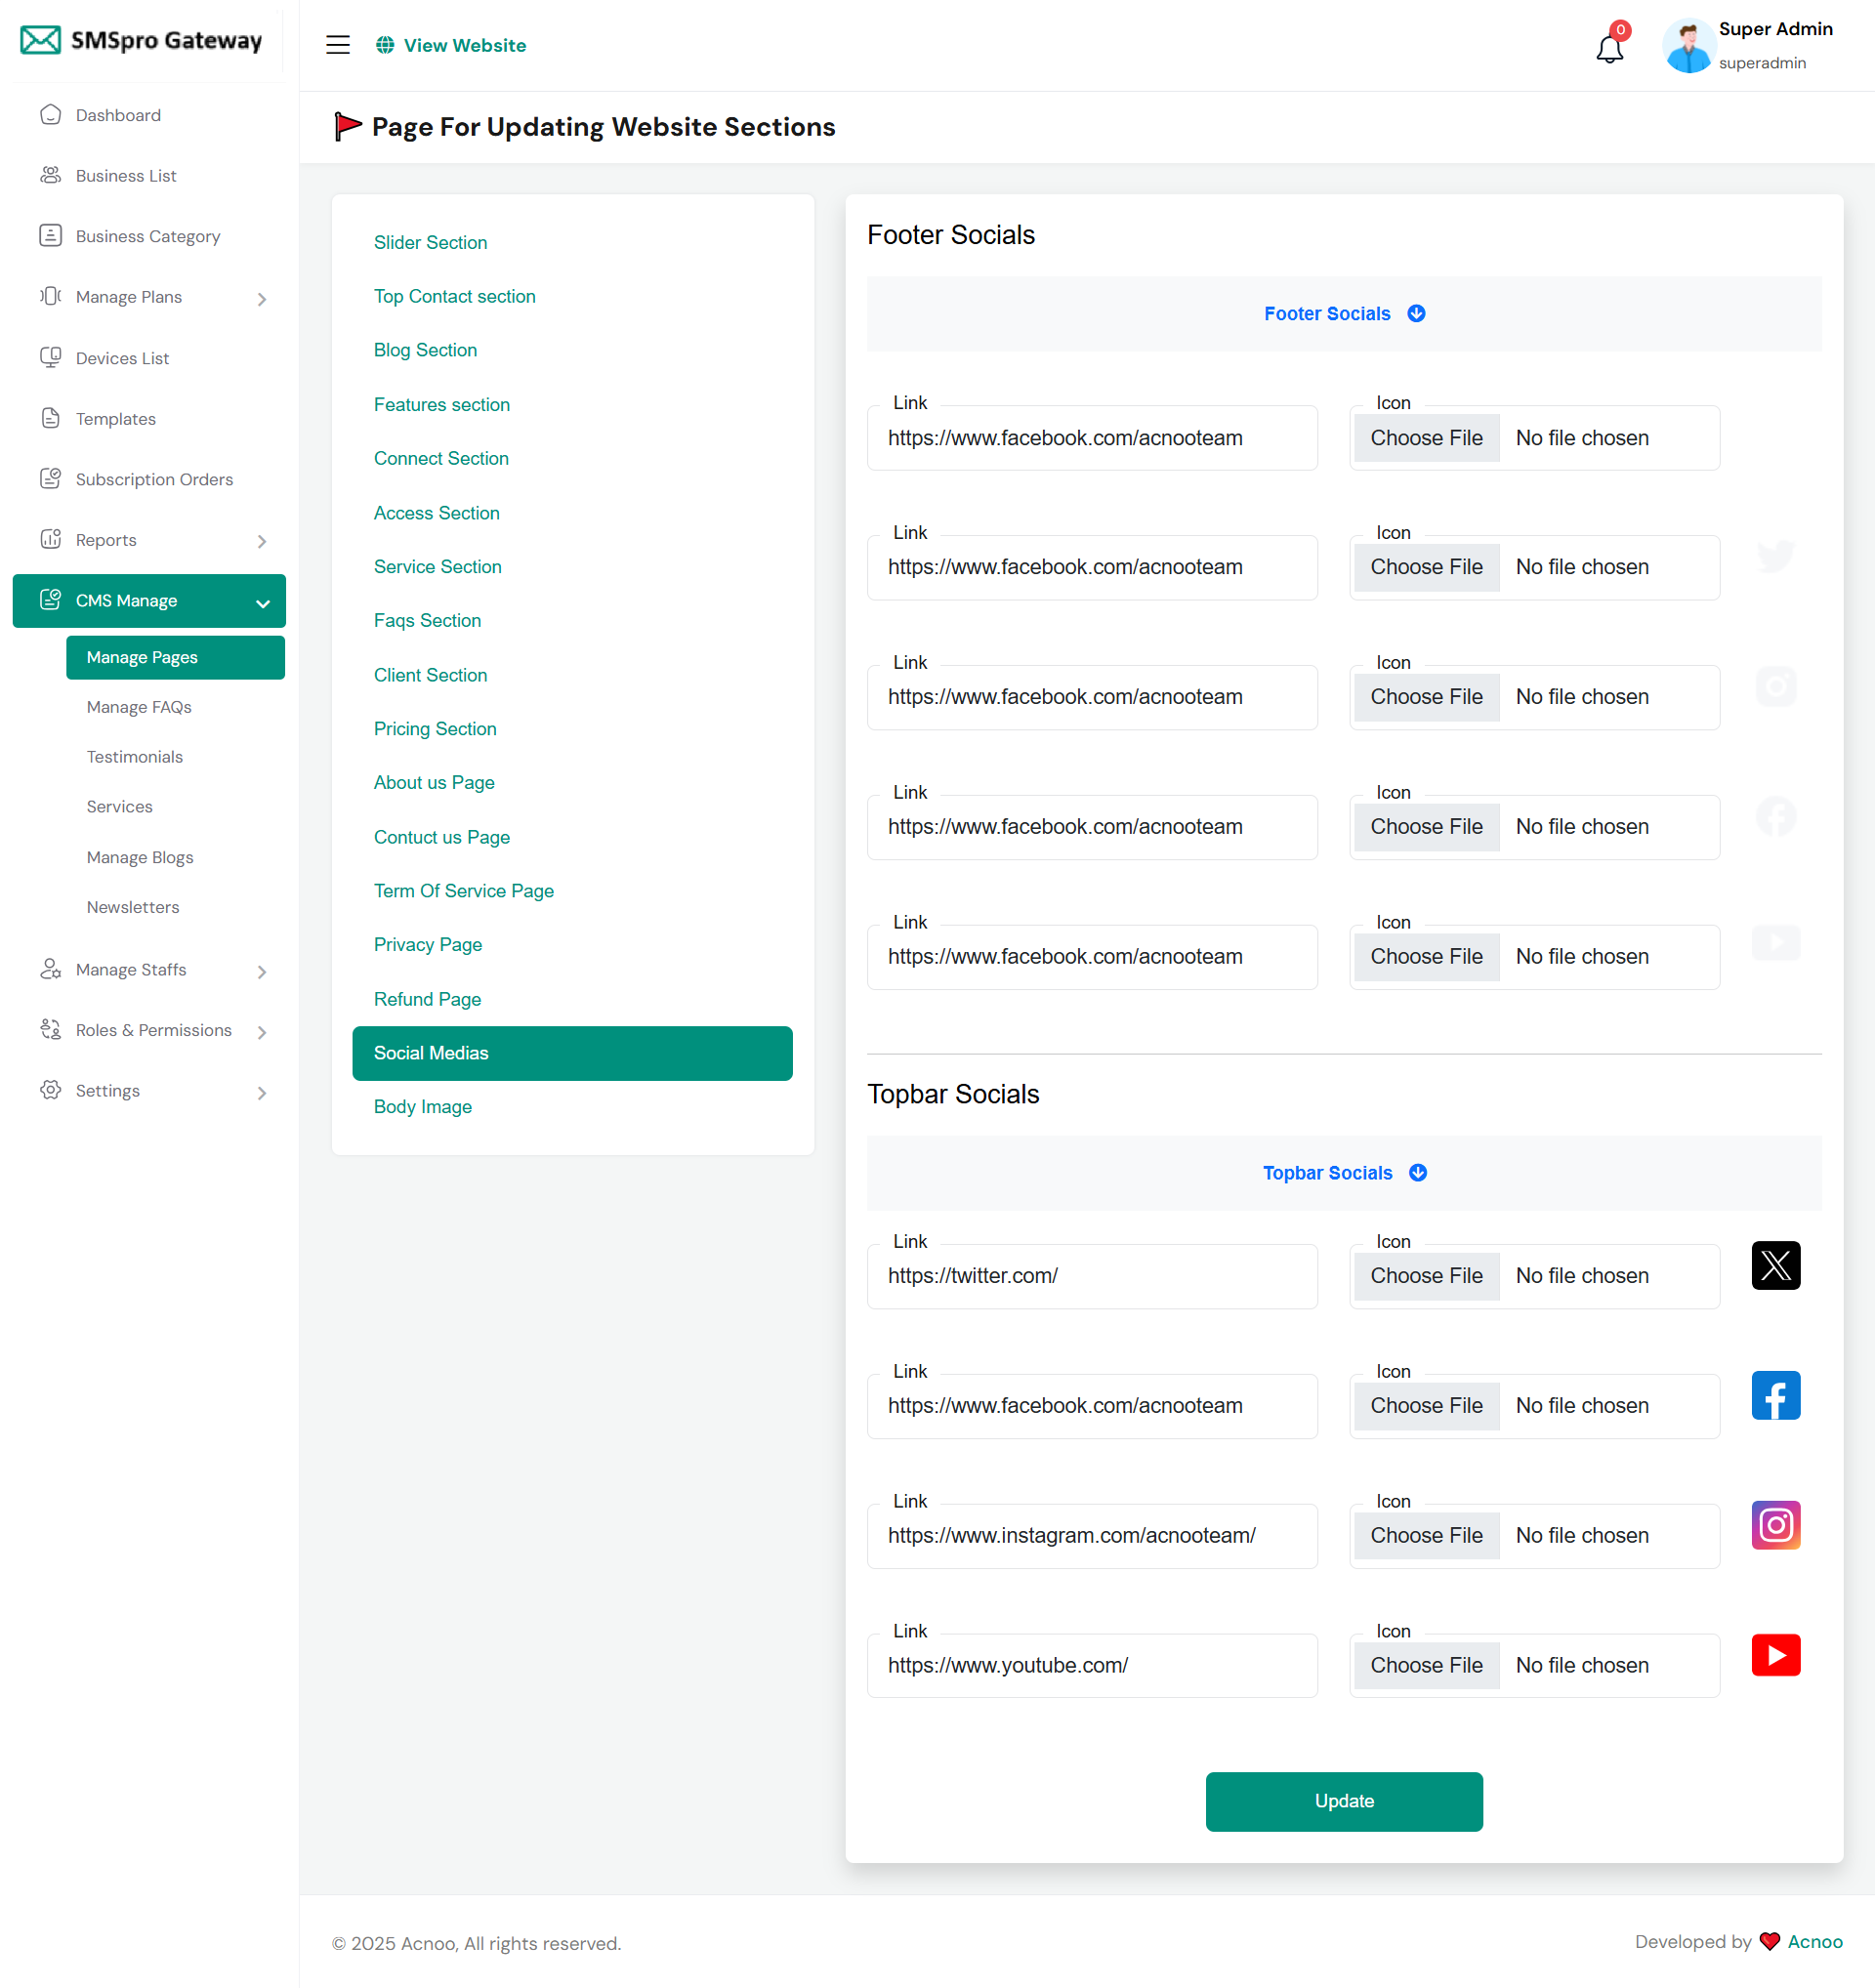
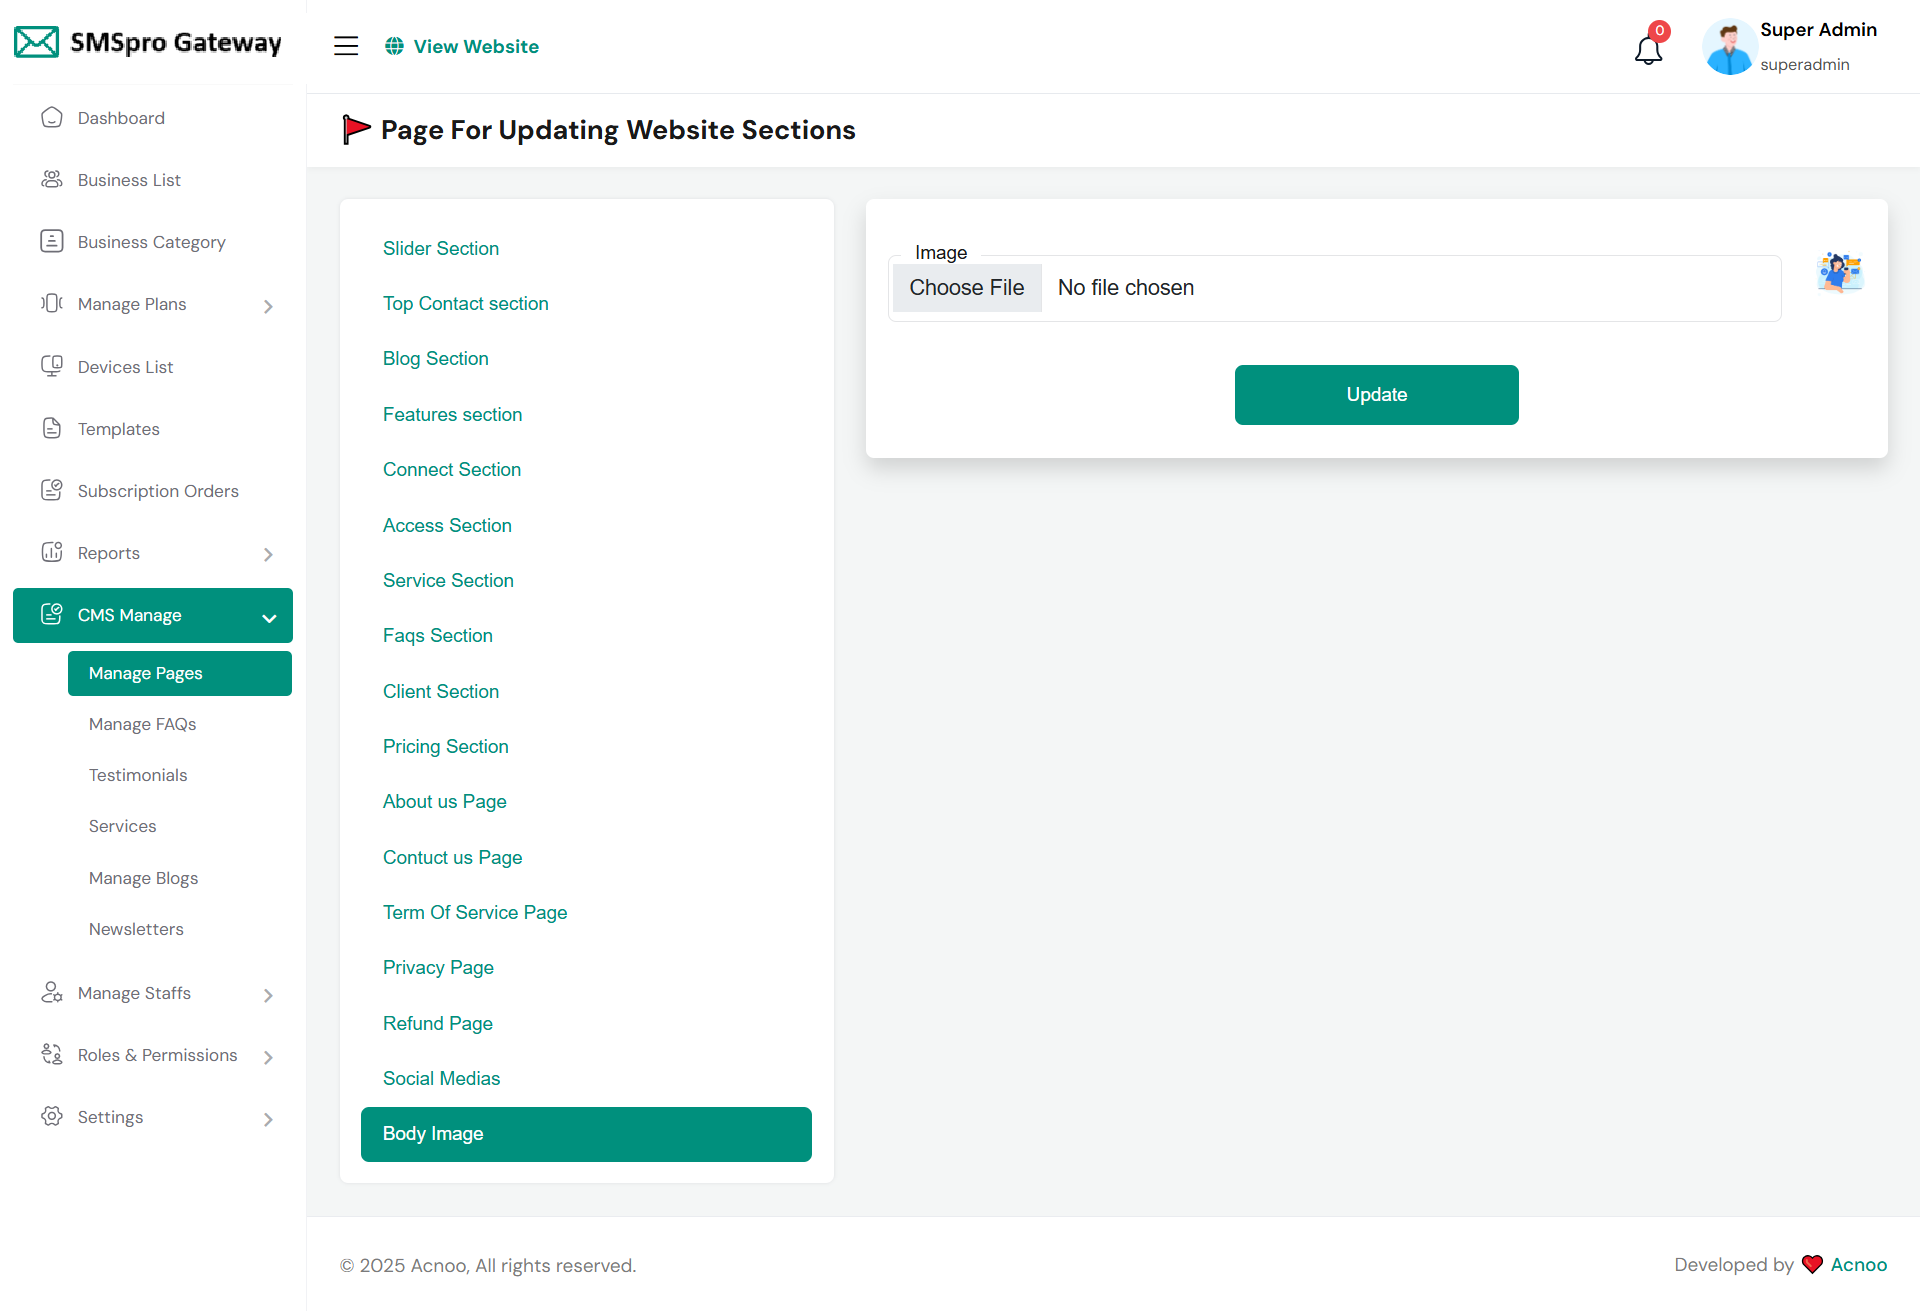
Manage Pages
You can modify various sections of the pages, including the slider, features, connections, accessibility, services, FAQs, clients, and pricing.


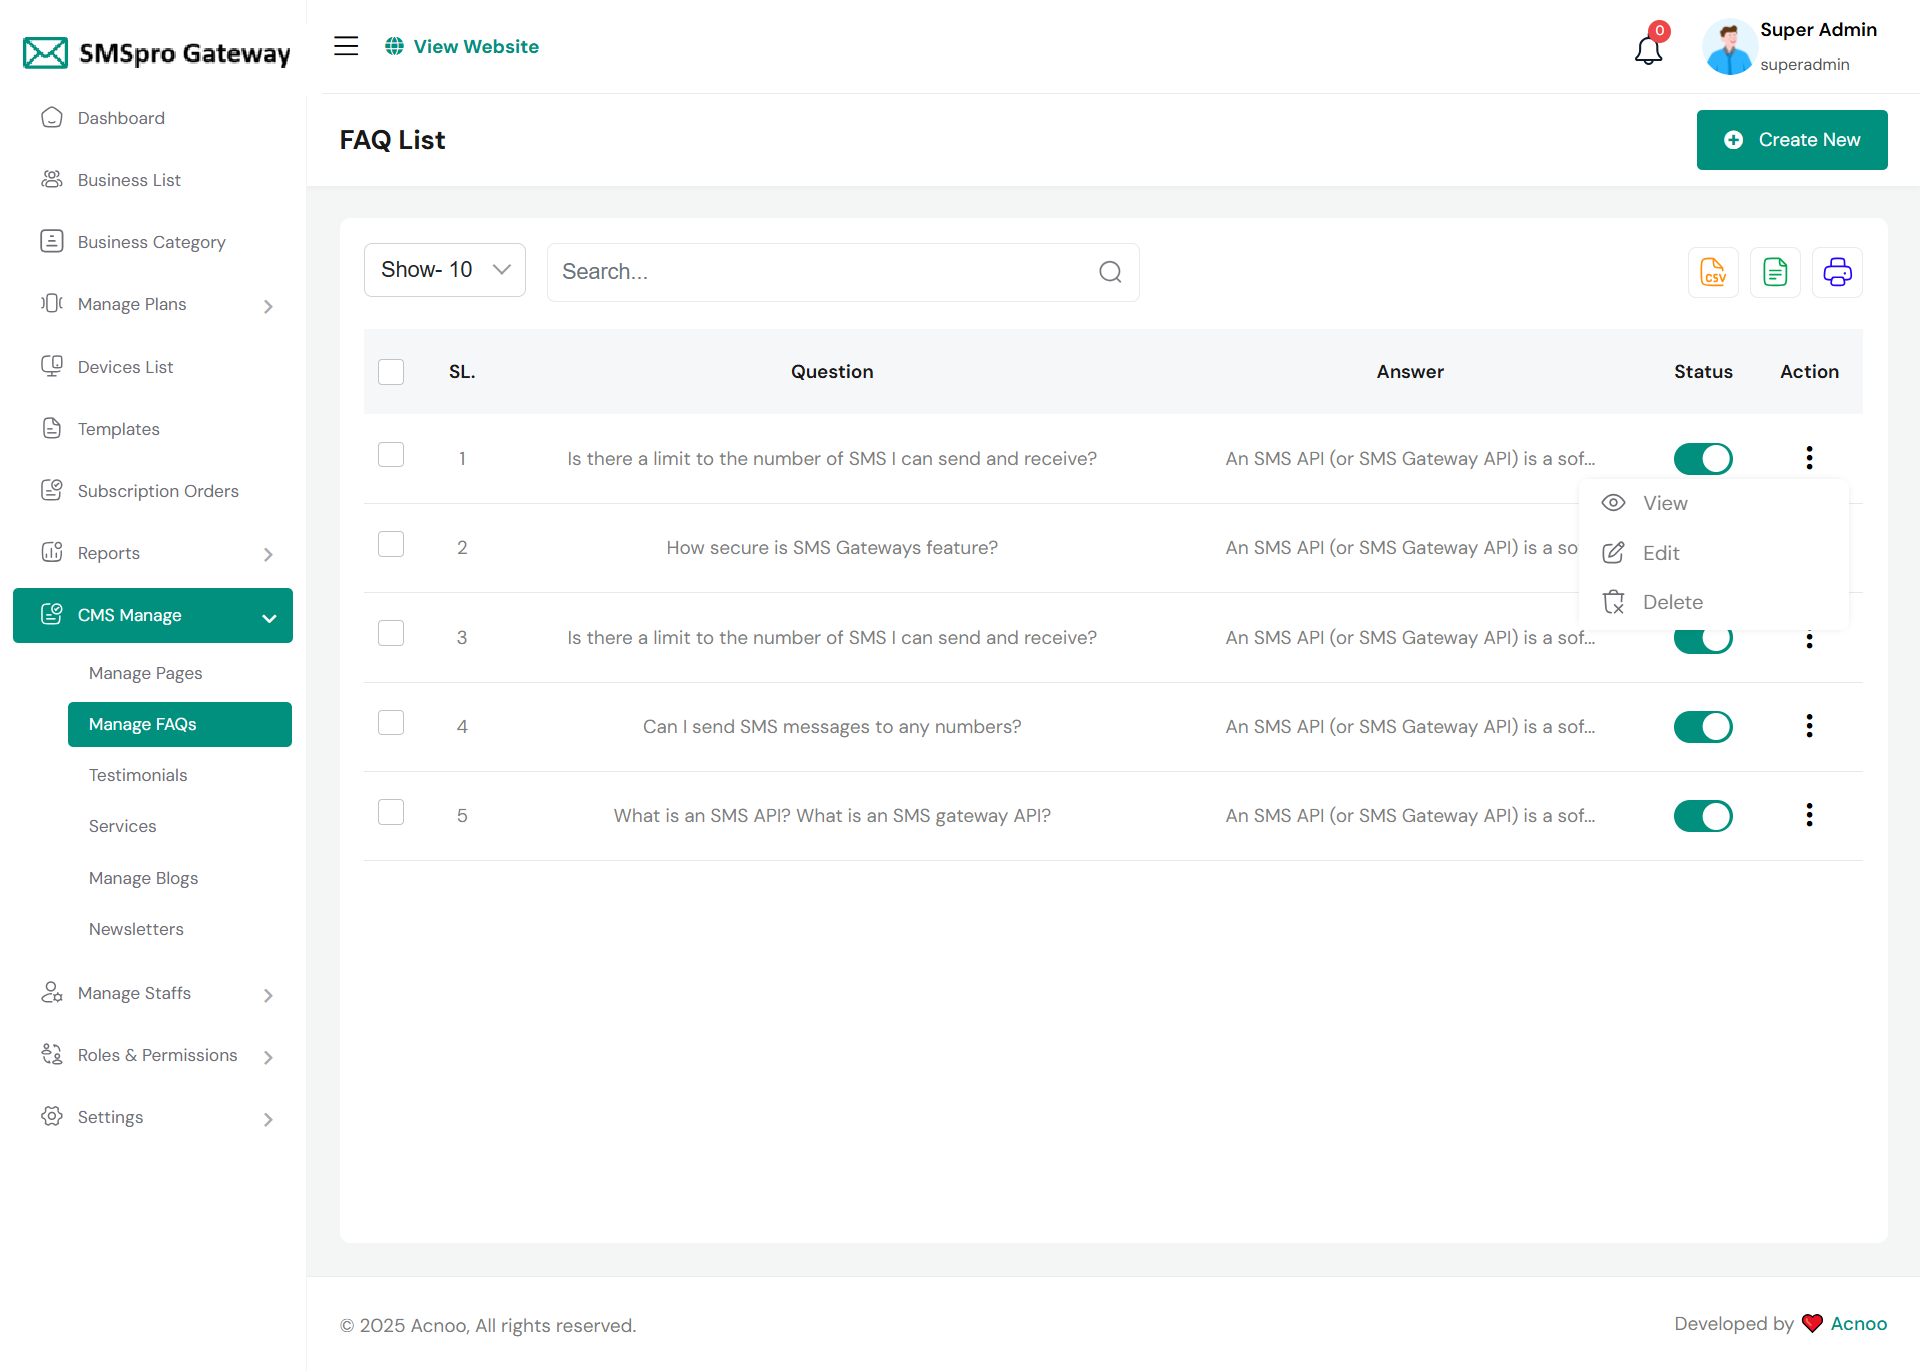
Faq List
Here you have the ability to view, update and delete faq list. Also search and multidelete option availabel here.
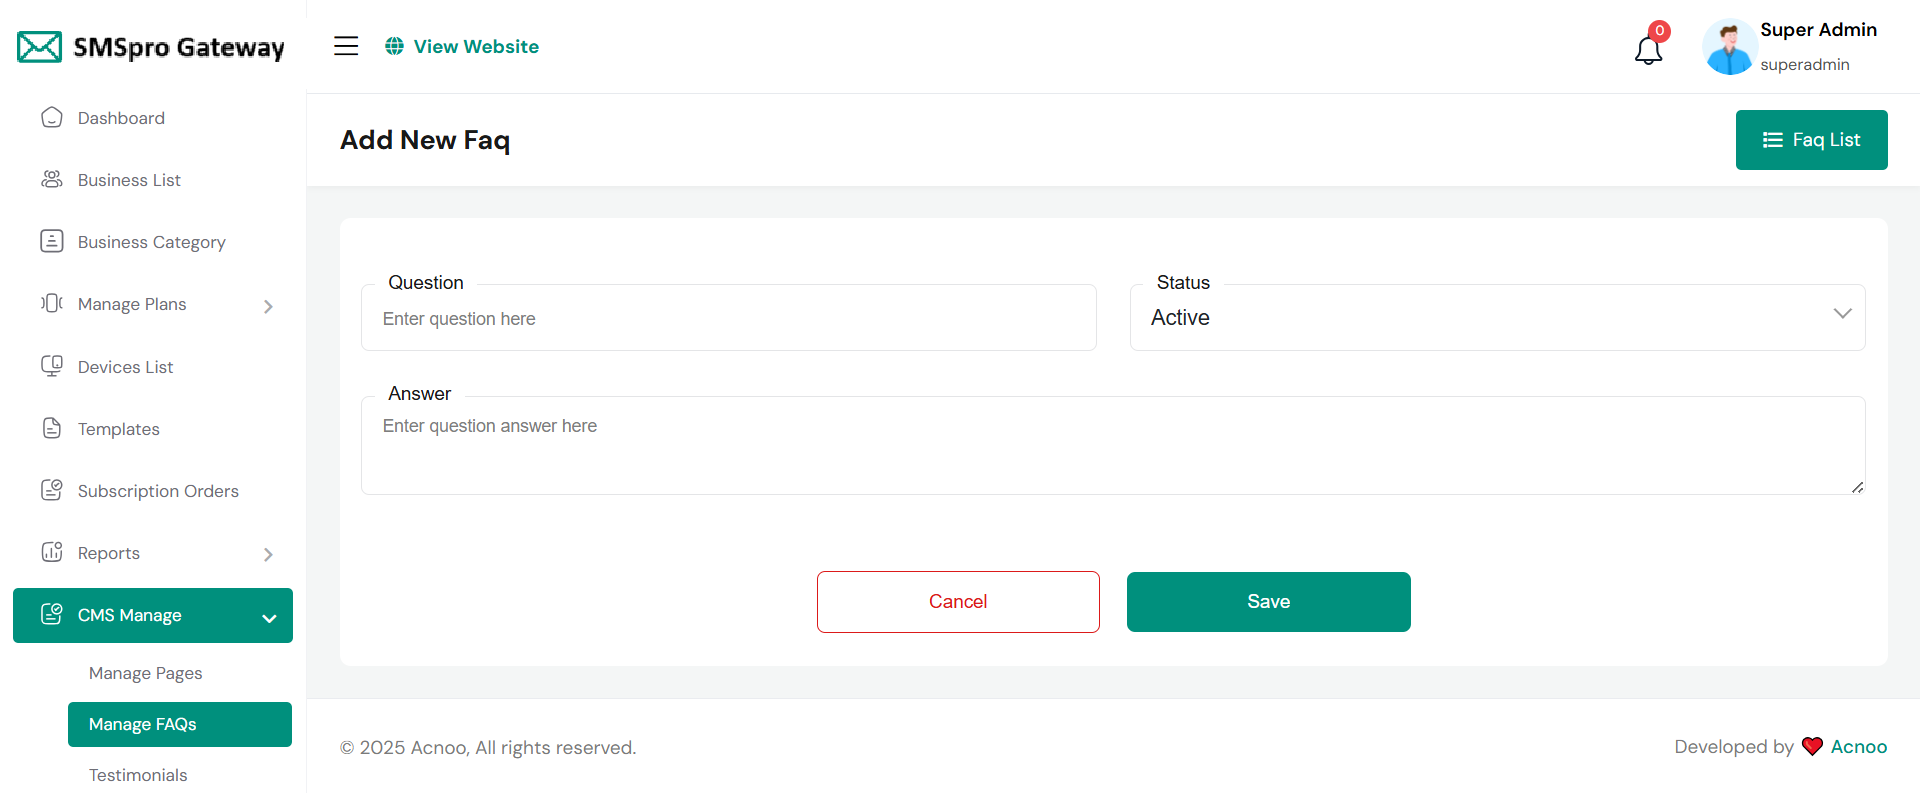
Create Faq
Here you can create Faq by fill up follow field.
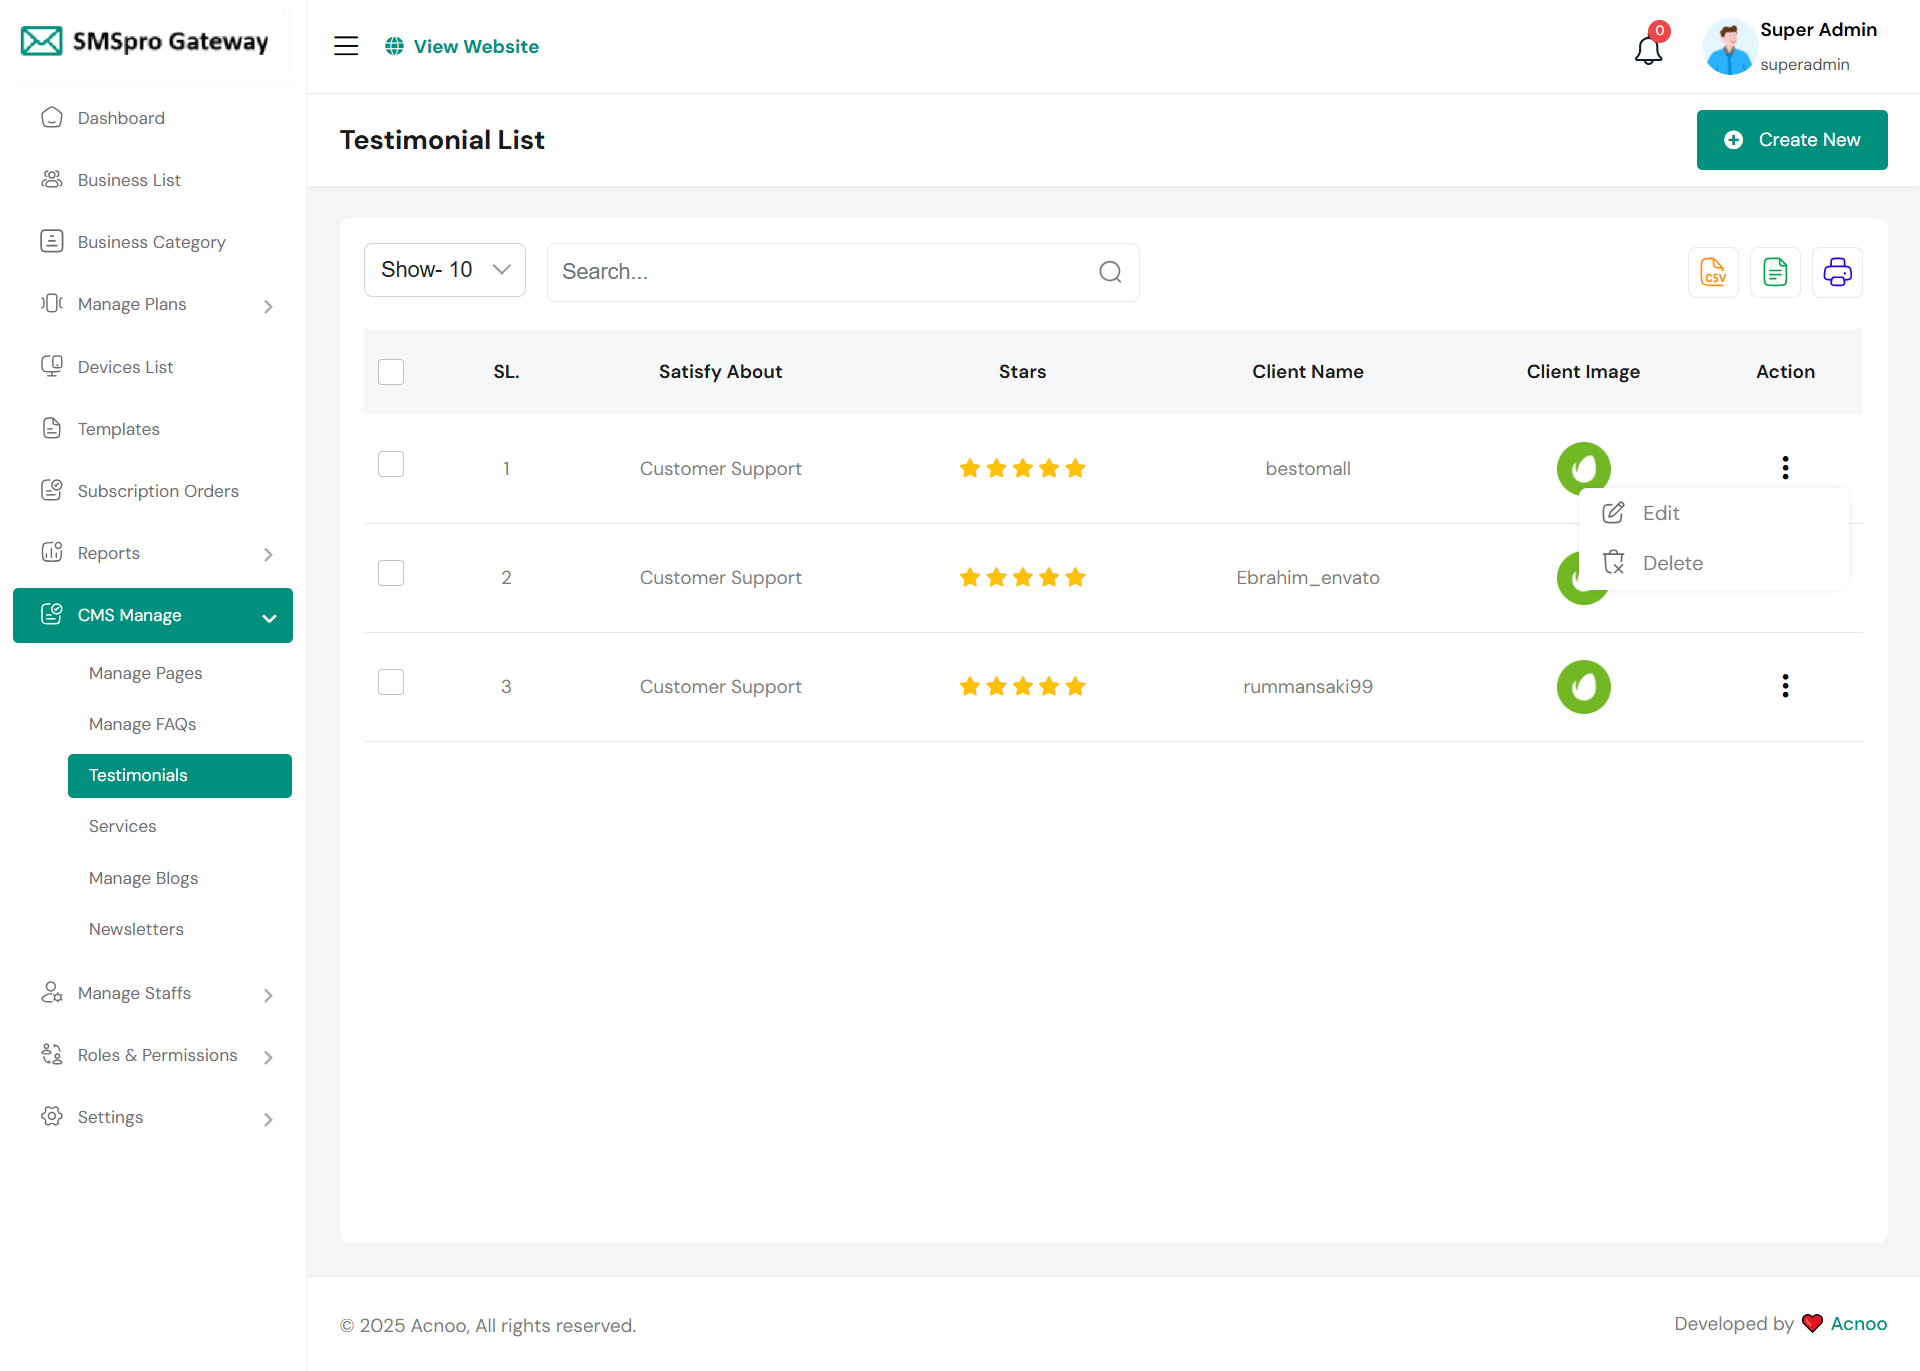
Testimonial List
Here you have option to see testimonial list and with update and delete option available. Also search and multi-deleting option exist.
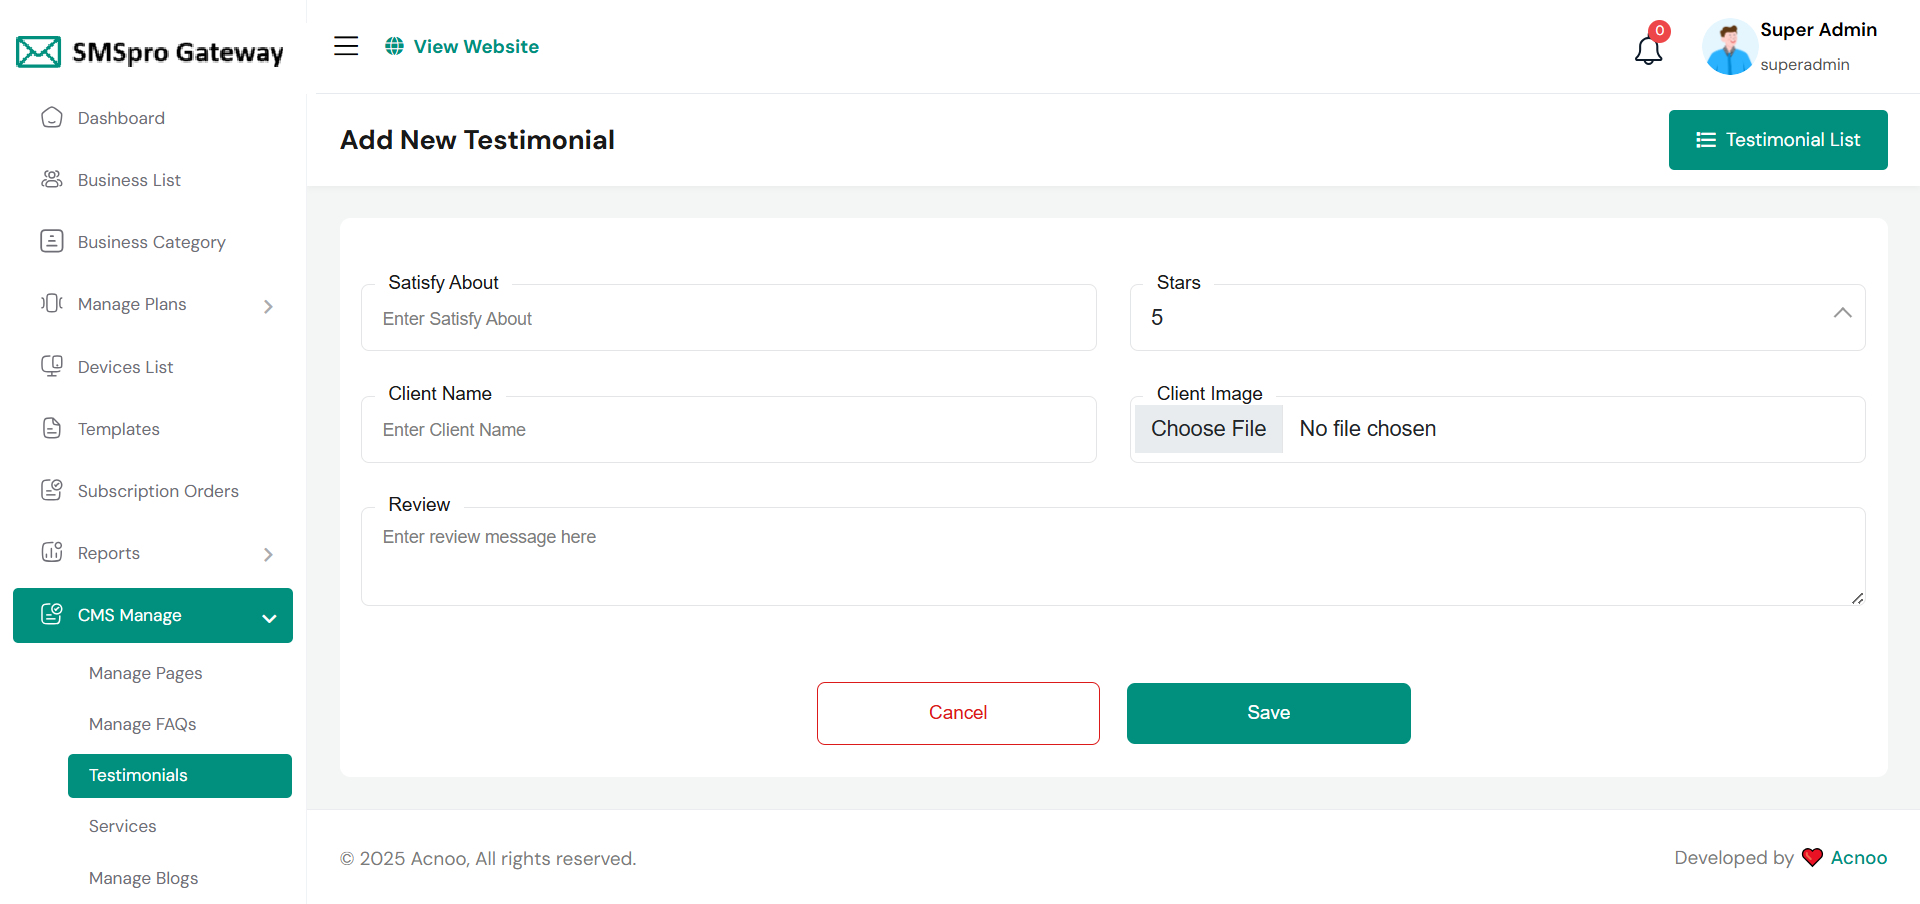
Create Testimonial
Here you create Testimonial to fill required field.
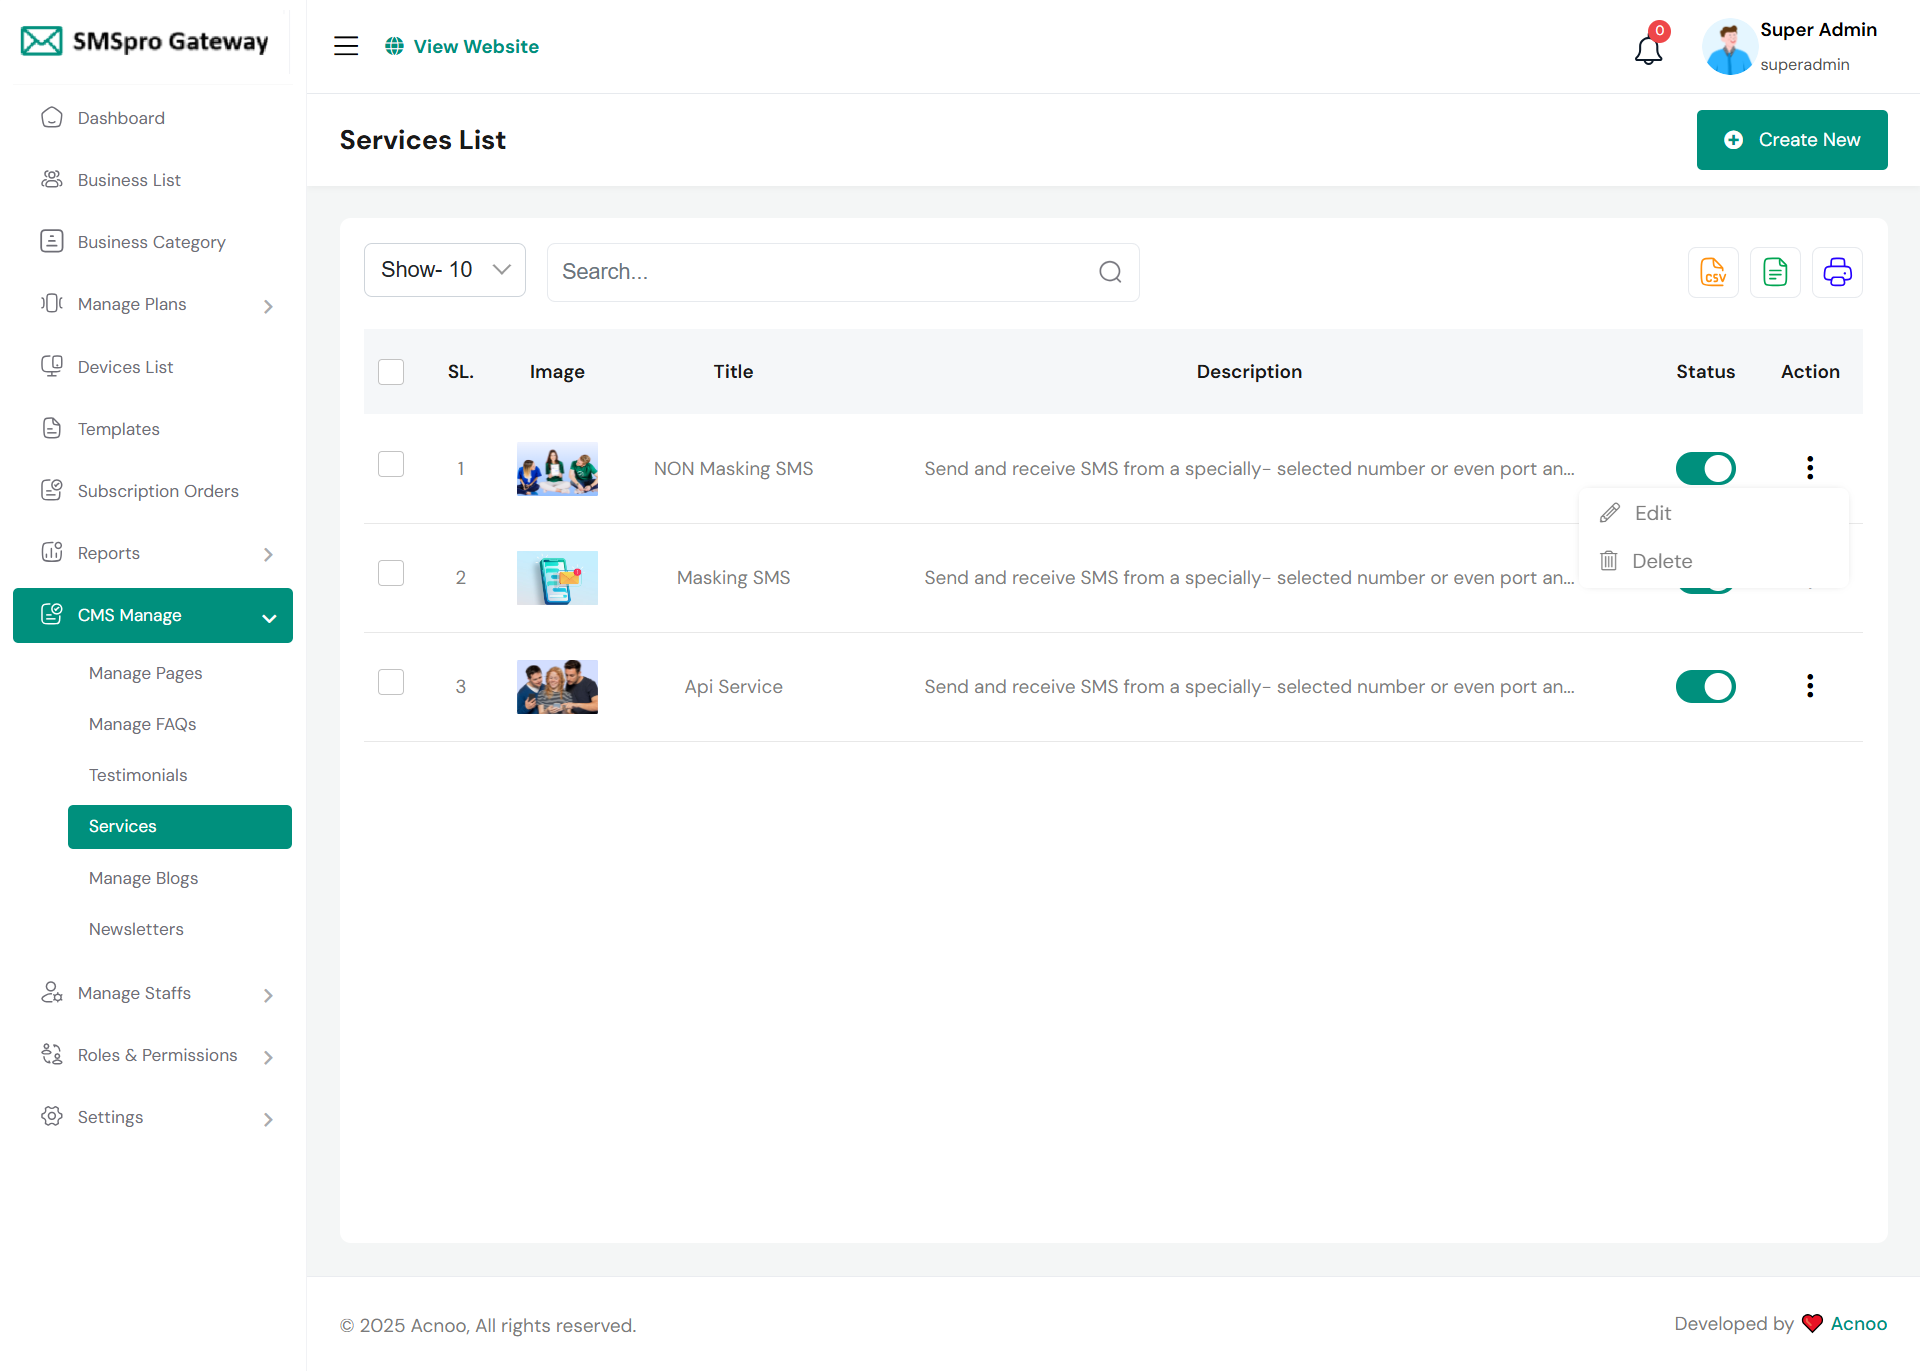
Service List
Here you have option to see service list and with update and delete option available. Also search and multi-deleting option available.
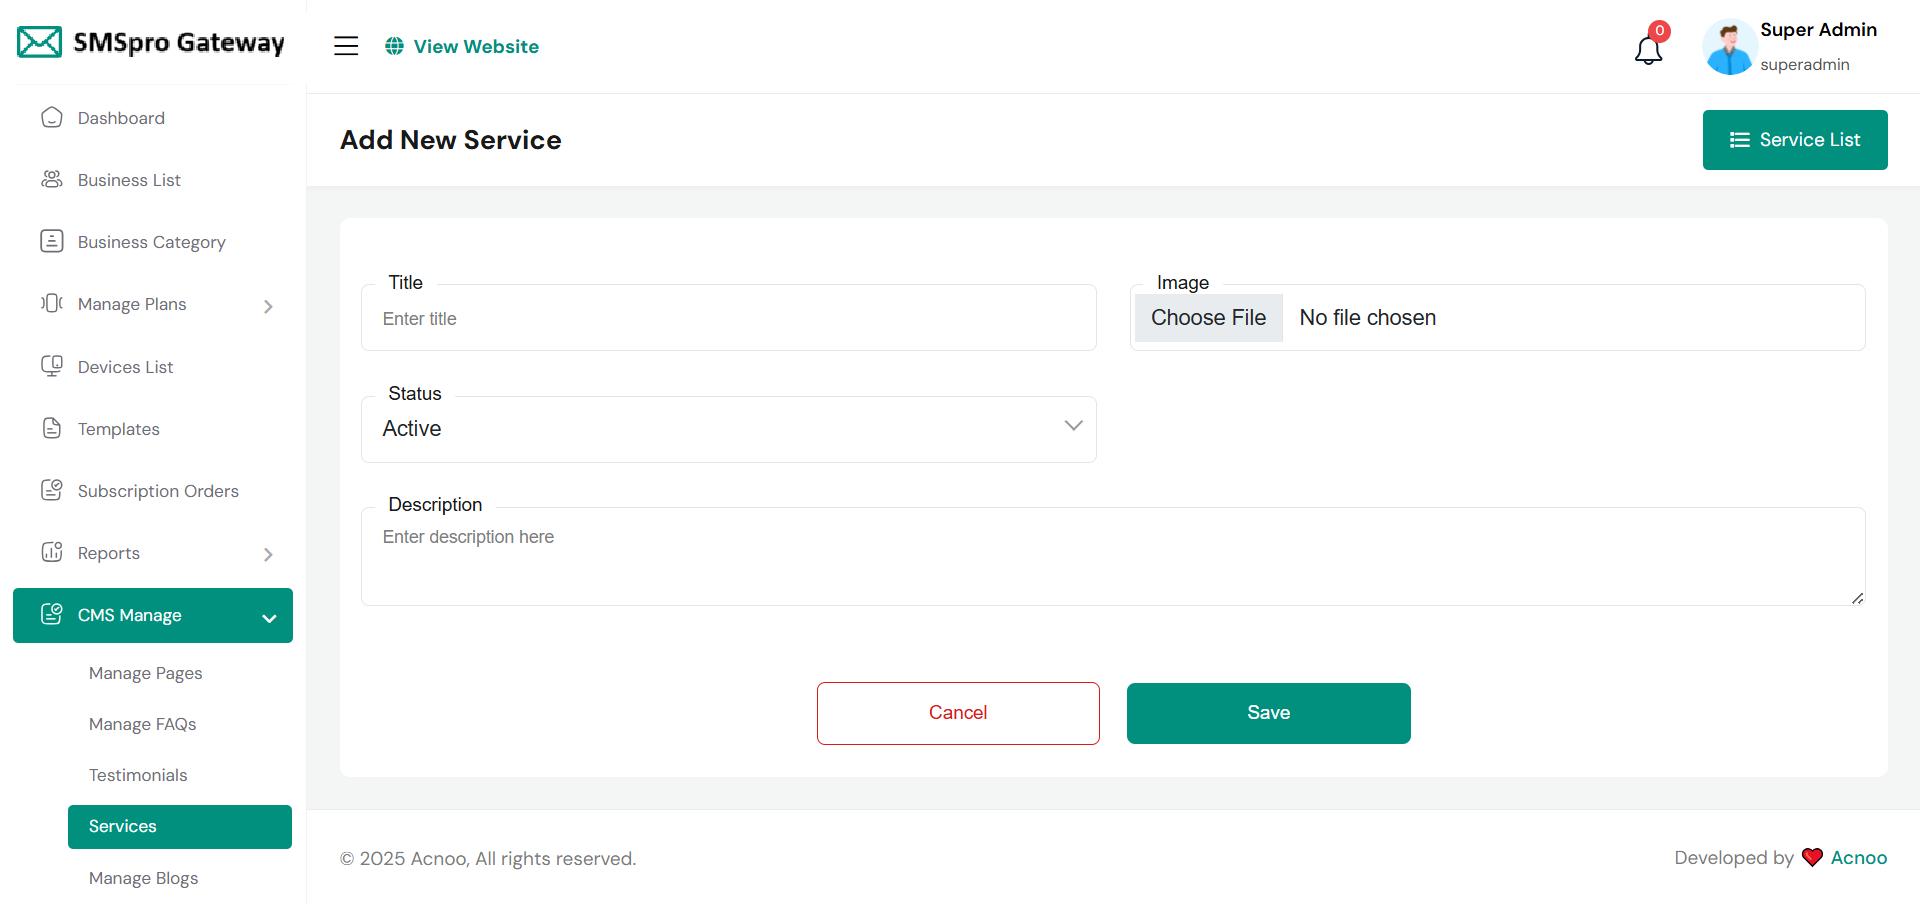
Create Service
Here you can create service to fill-up required field.
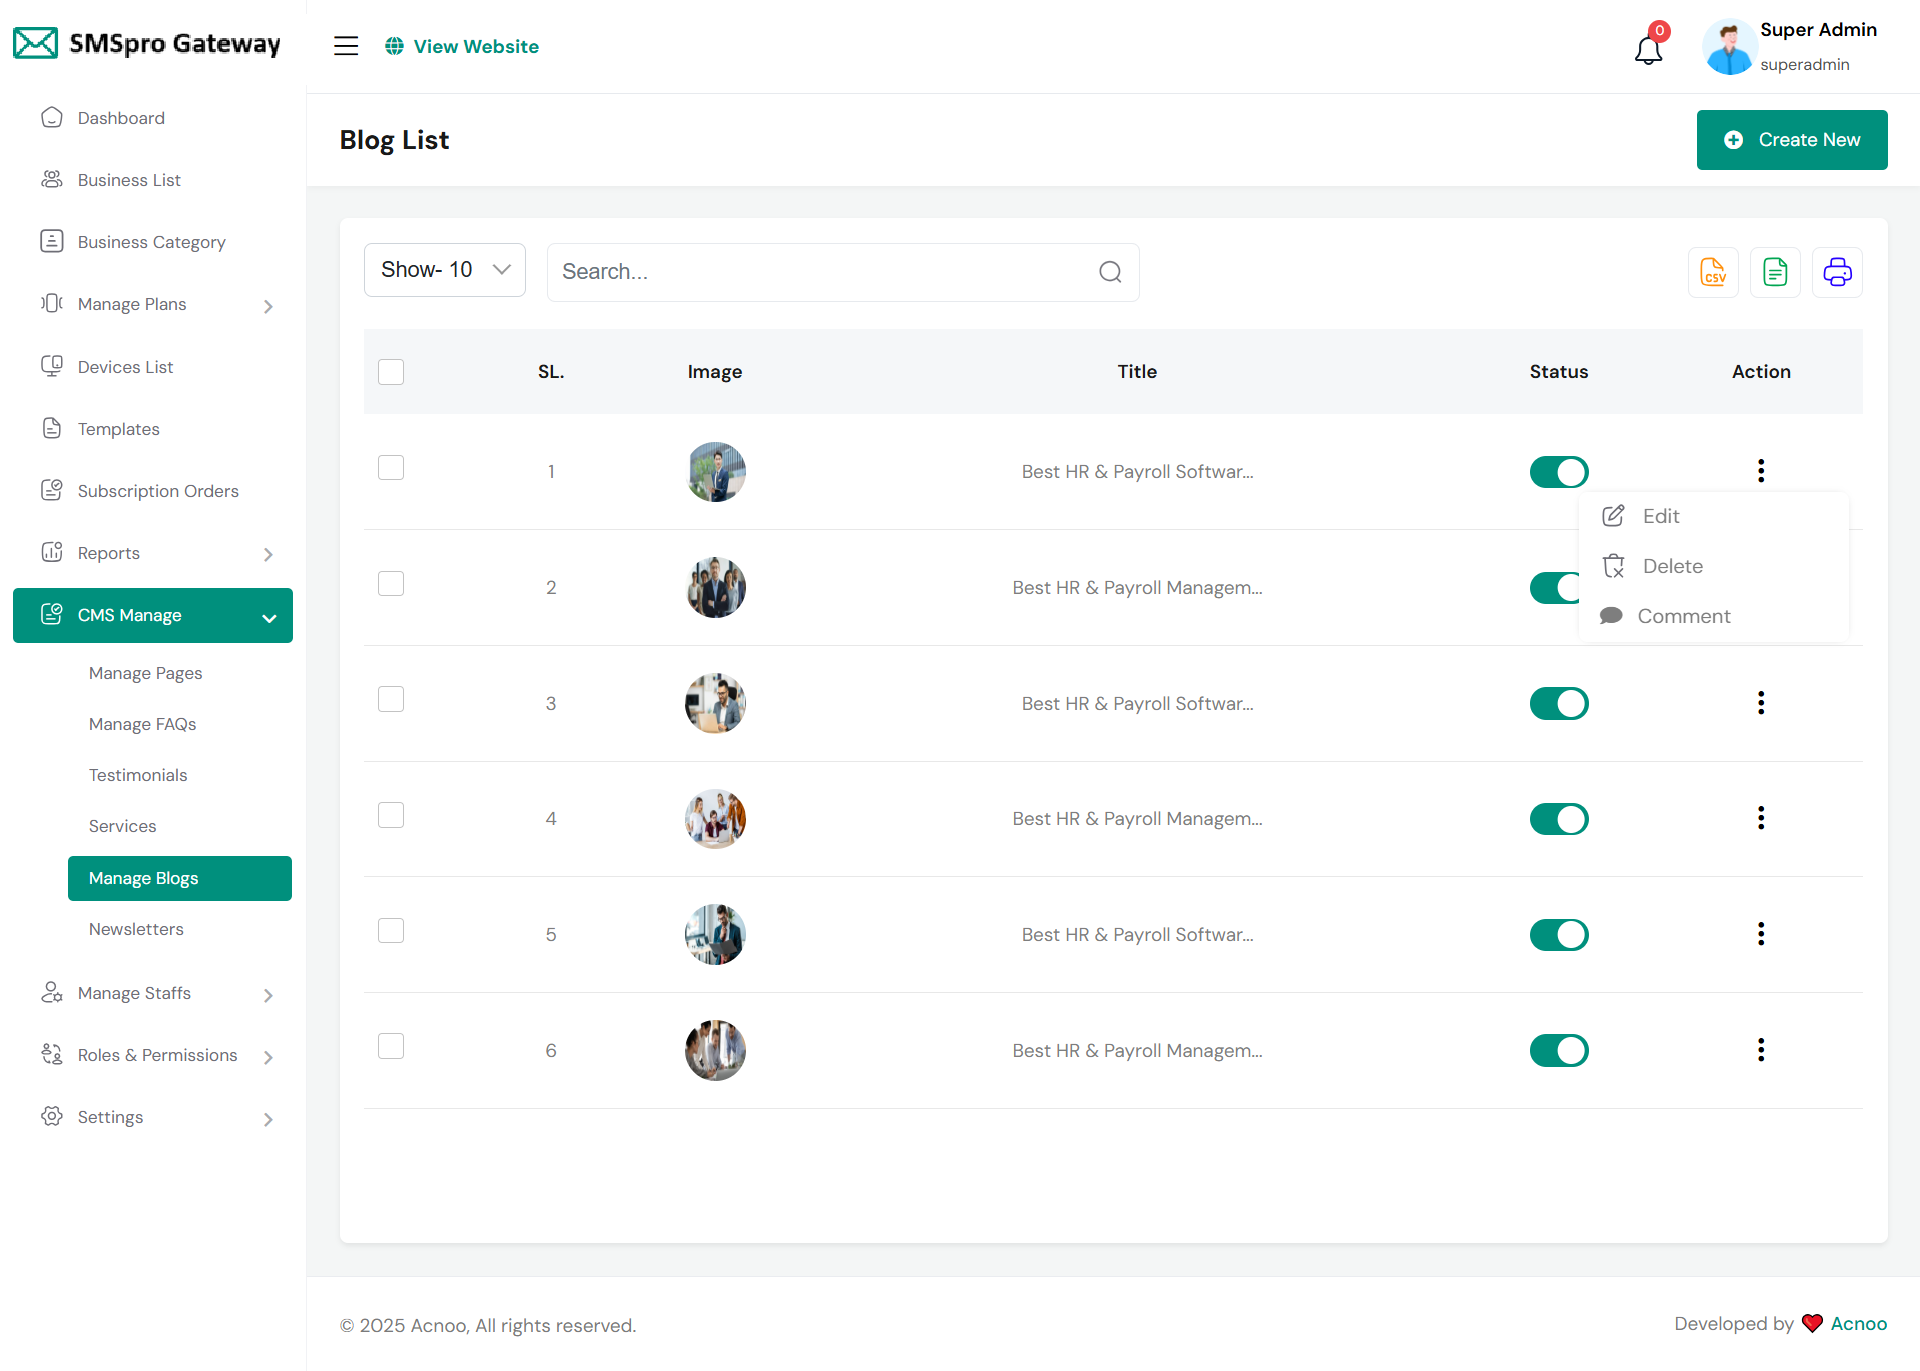
Blog List
Here you have the option to view the blog and comment lists. Additionally, editing and updating options are available. You can also search for specific items, and multi-delete functionality is also provided.
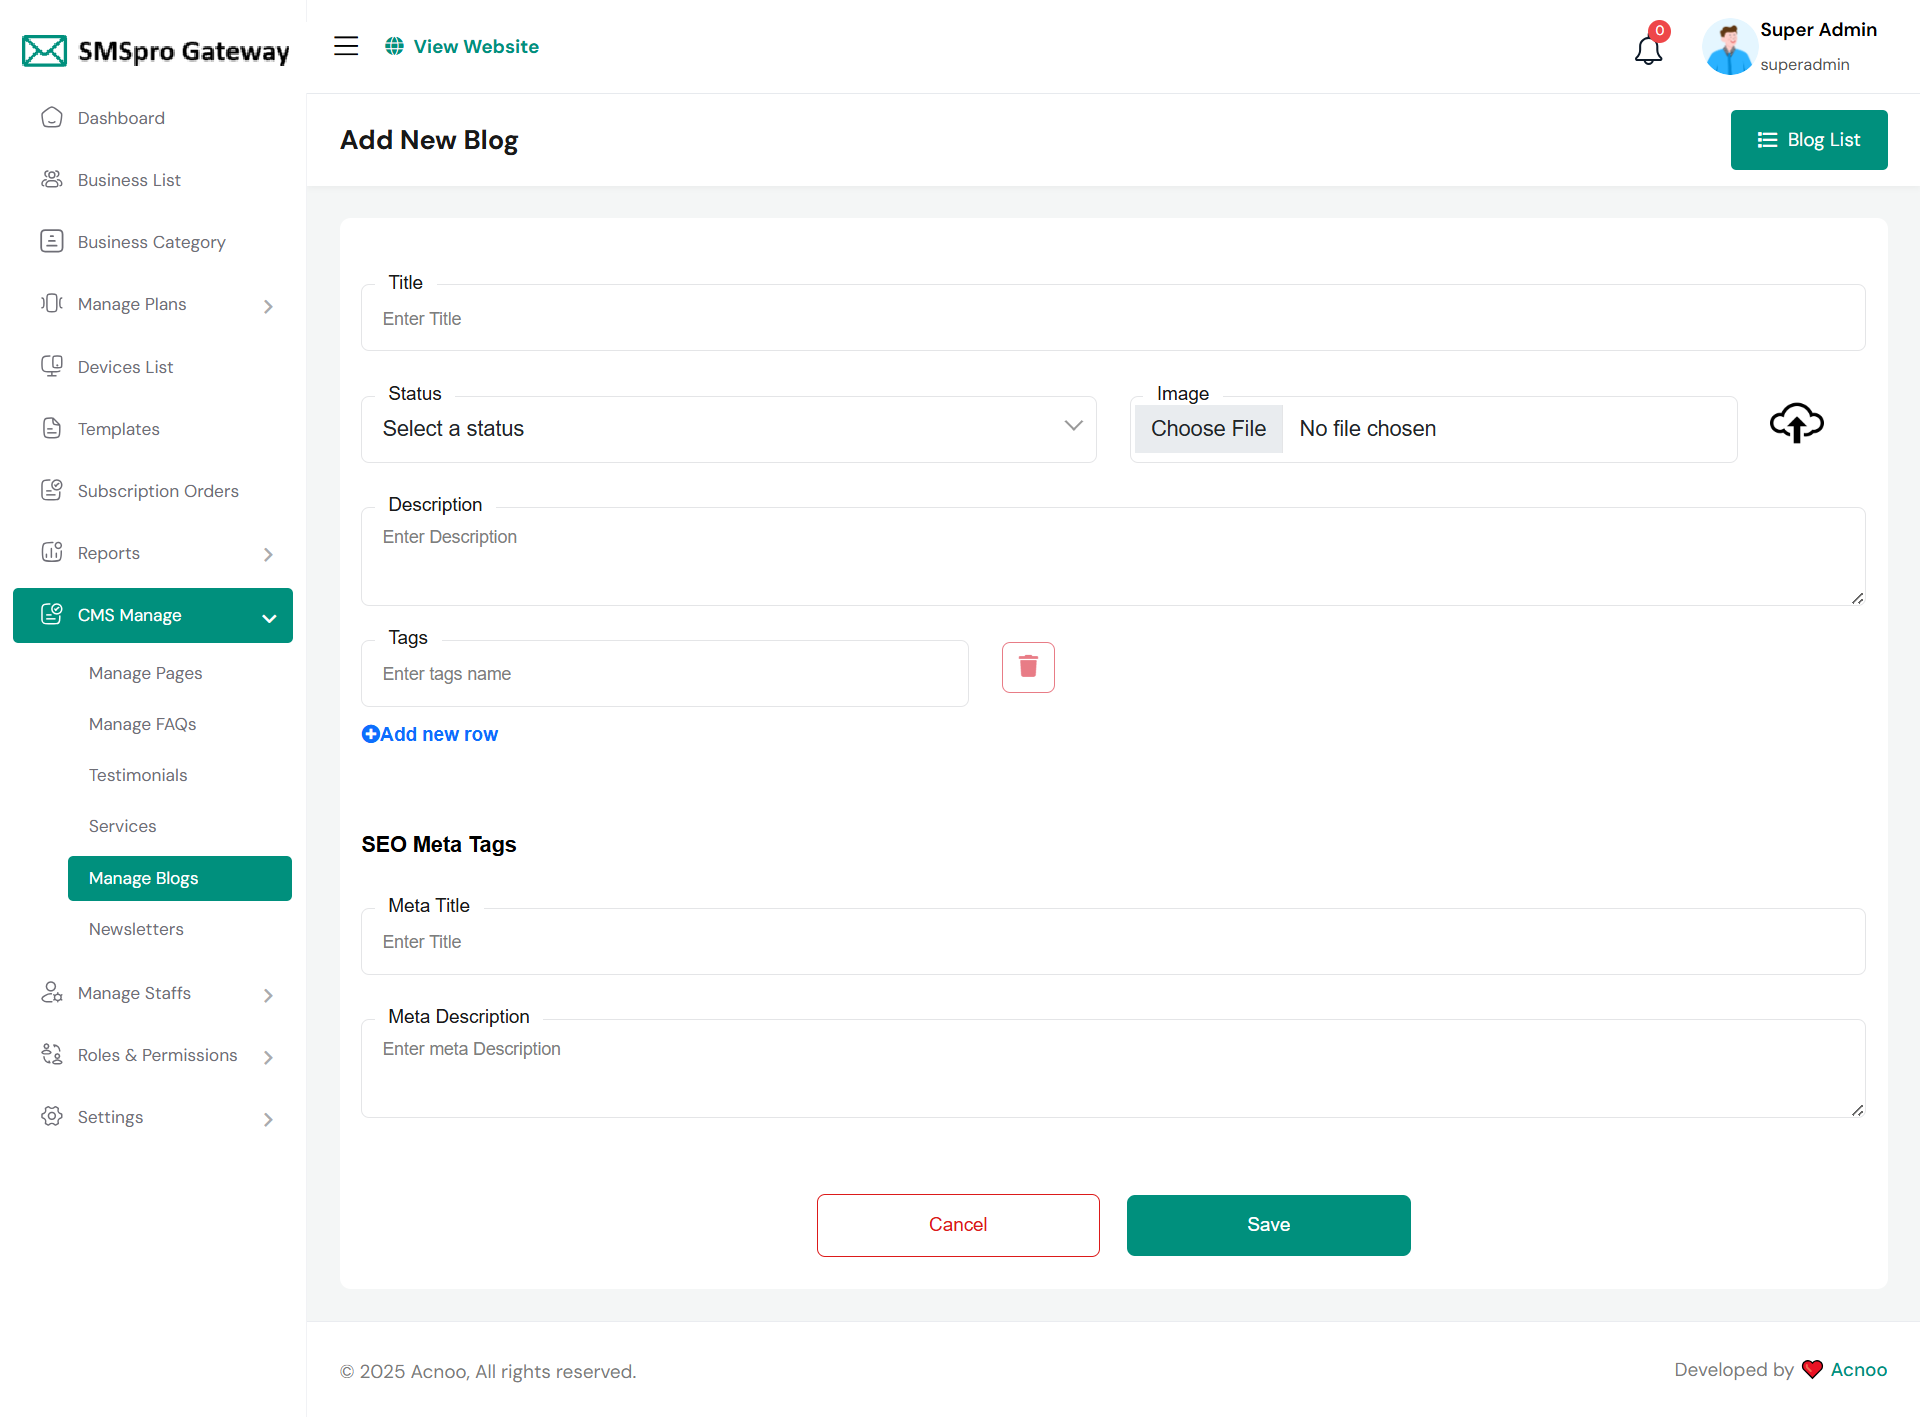
Create Blog
Feel free to utilize this platform to generate a blog post and complete the necessary fields. As you input your content, you'll notice the inclusion of multiple tags. Additionally, you can craft meta titles and meta descriptions for enhanced SEO purposes.
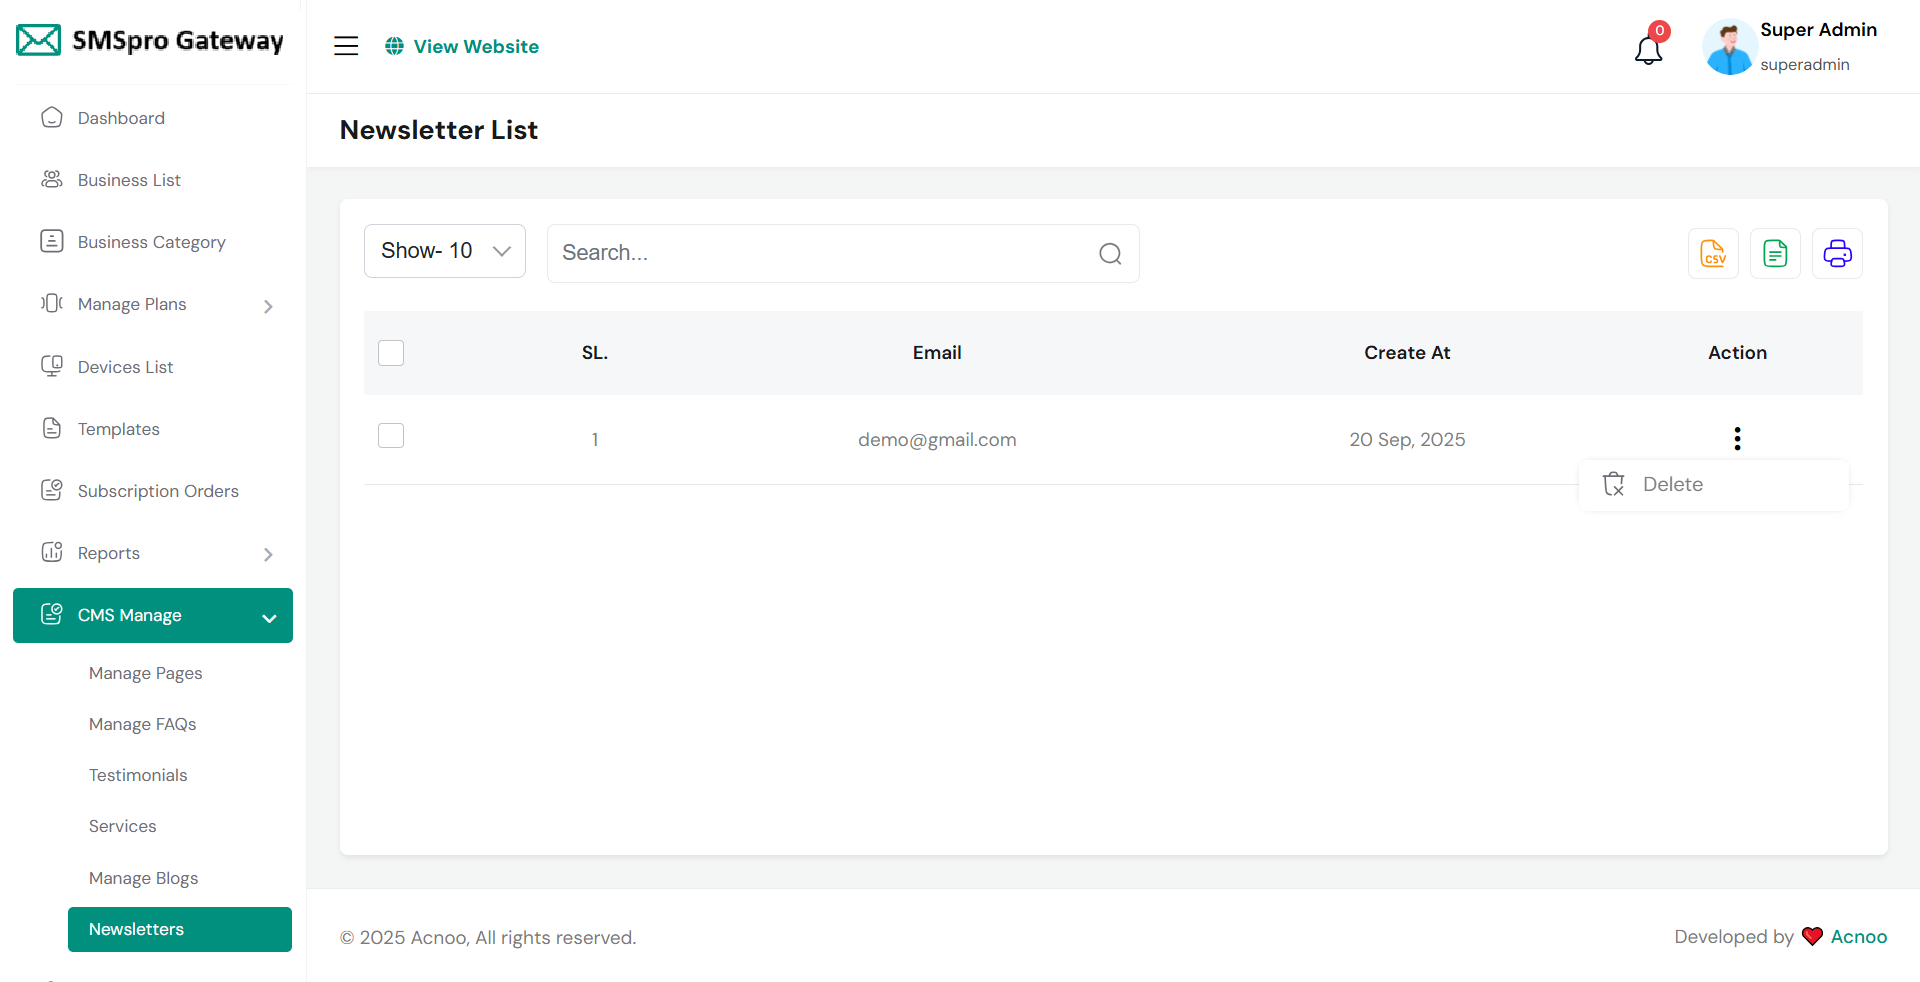
Newsletters List
Here you will able to see newsletter list also delete and search option are availabe.From frontend user will send this email.
Manage Staff List
Here, you can view a list of all staff members, search for specific entries, and perform actions like editing or deleting staff. The page also allows you to select multiple entries for bulk deletion. The table displays staff details including an image, name, phone, email, and creation date, along with an "Action" column for individual operations. Additionally, you can adjust the number of entries shown per page, export the list to Excel, CSV, or print it.

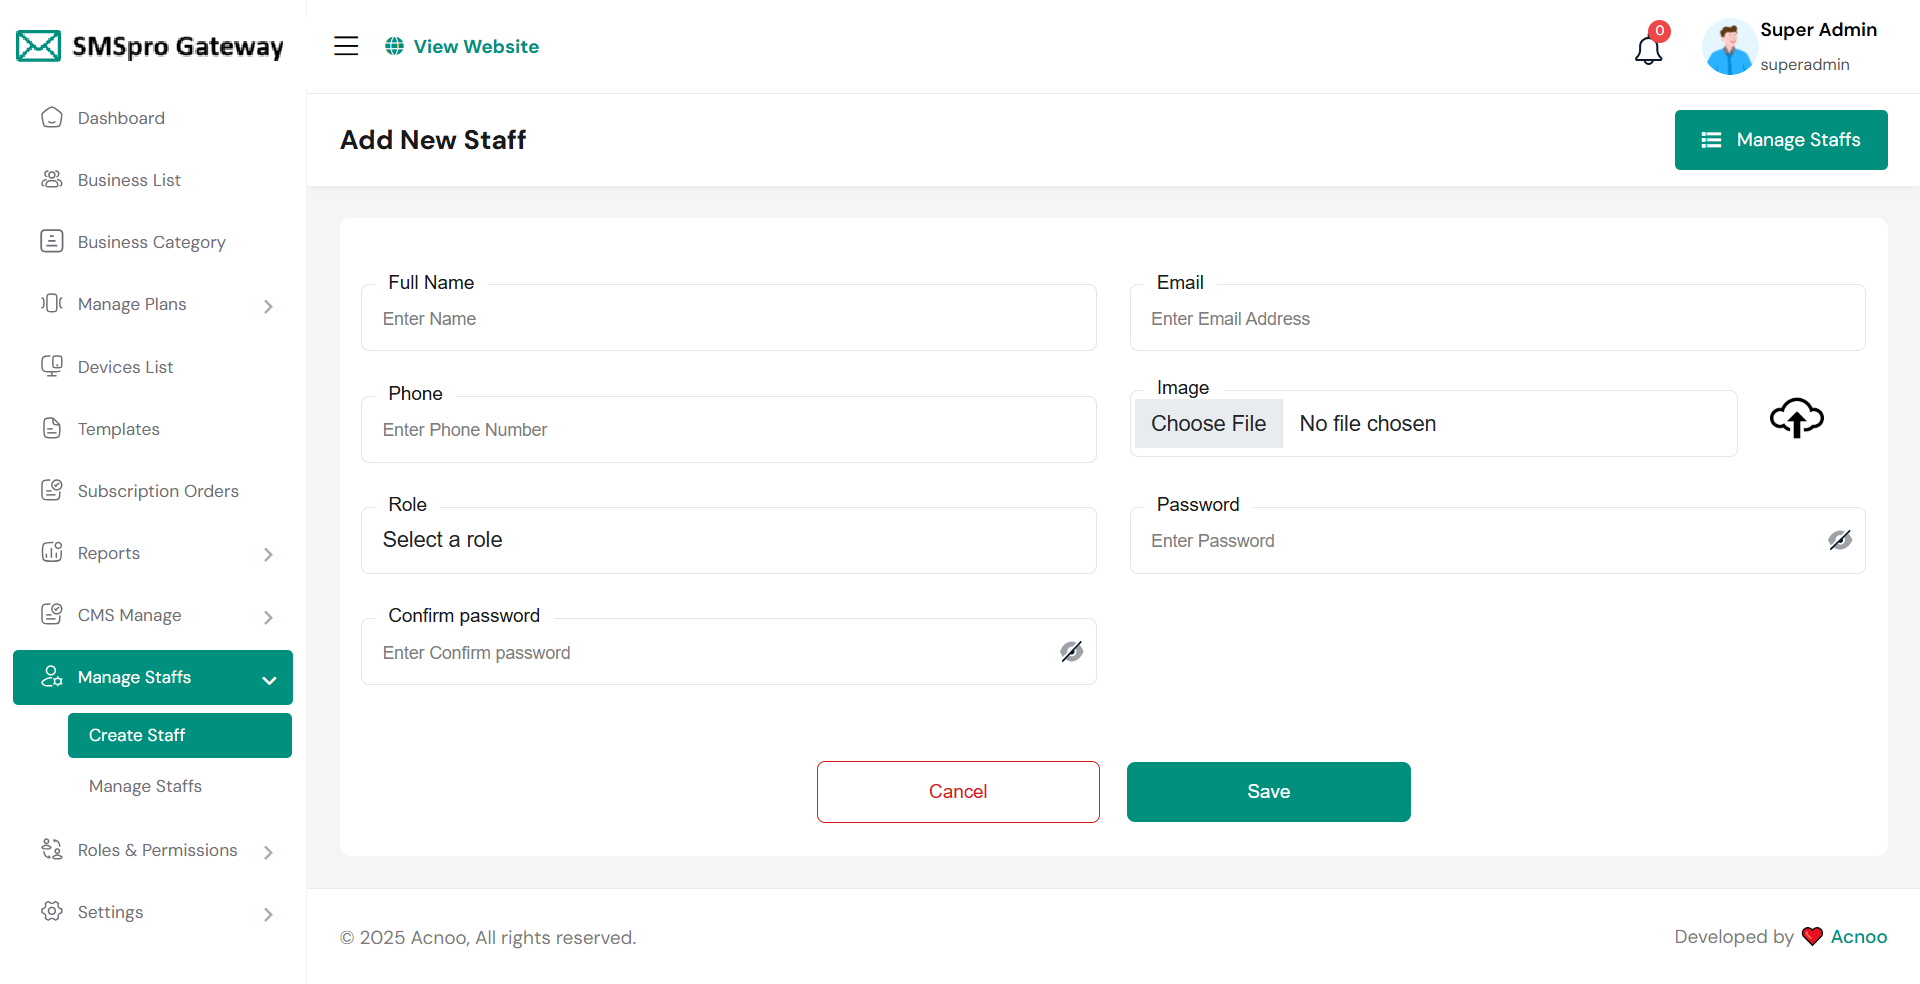
Create Staff
Here, you can create a staff by filling out the required fields. Additionally, you have the option to add a plan for the staff.When you create a staff, their user credentials will be sent to their email address.
Roles & Permissions
In this section, you have the ability to define roles and allocate specific permissions to different users as needed.
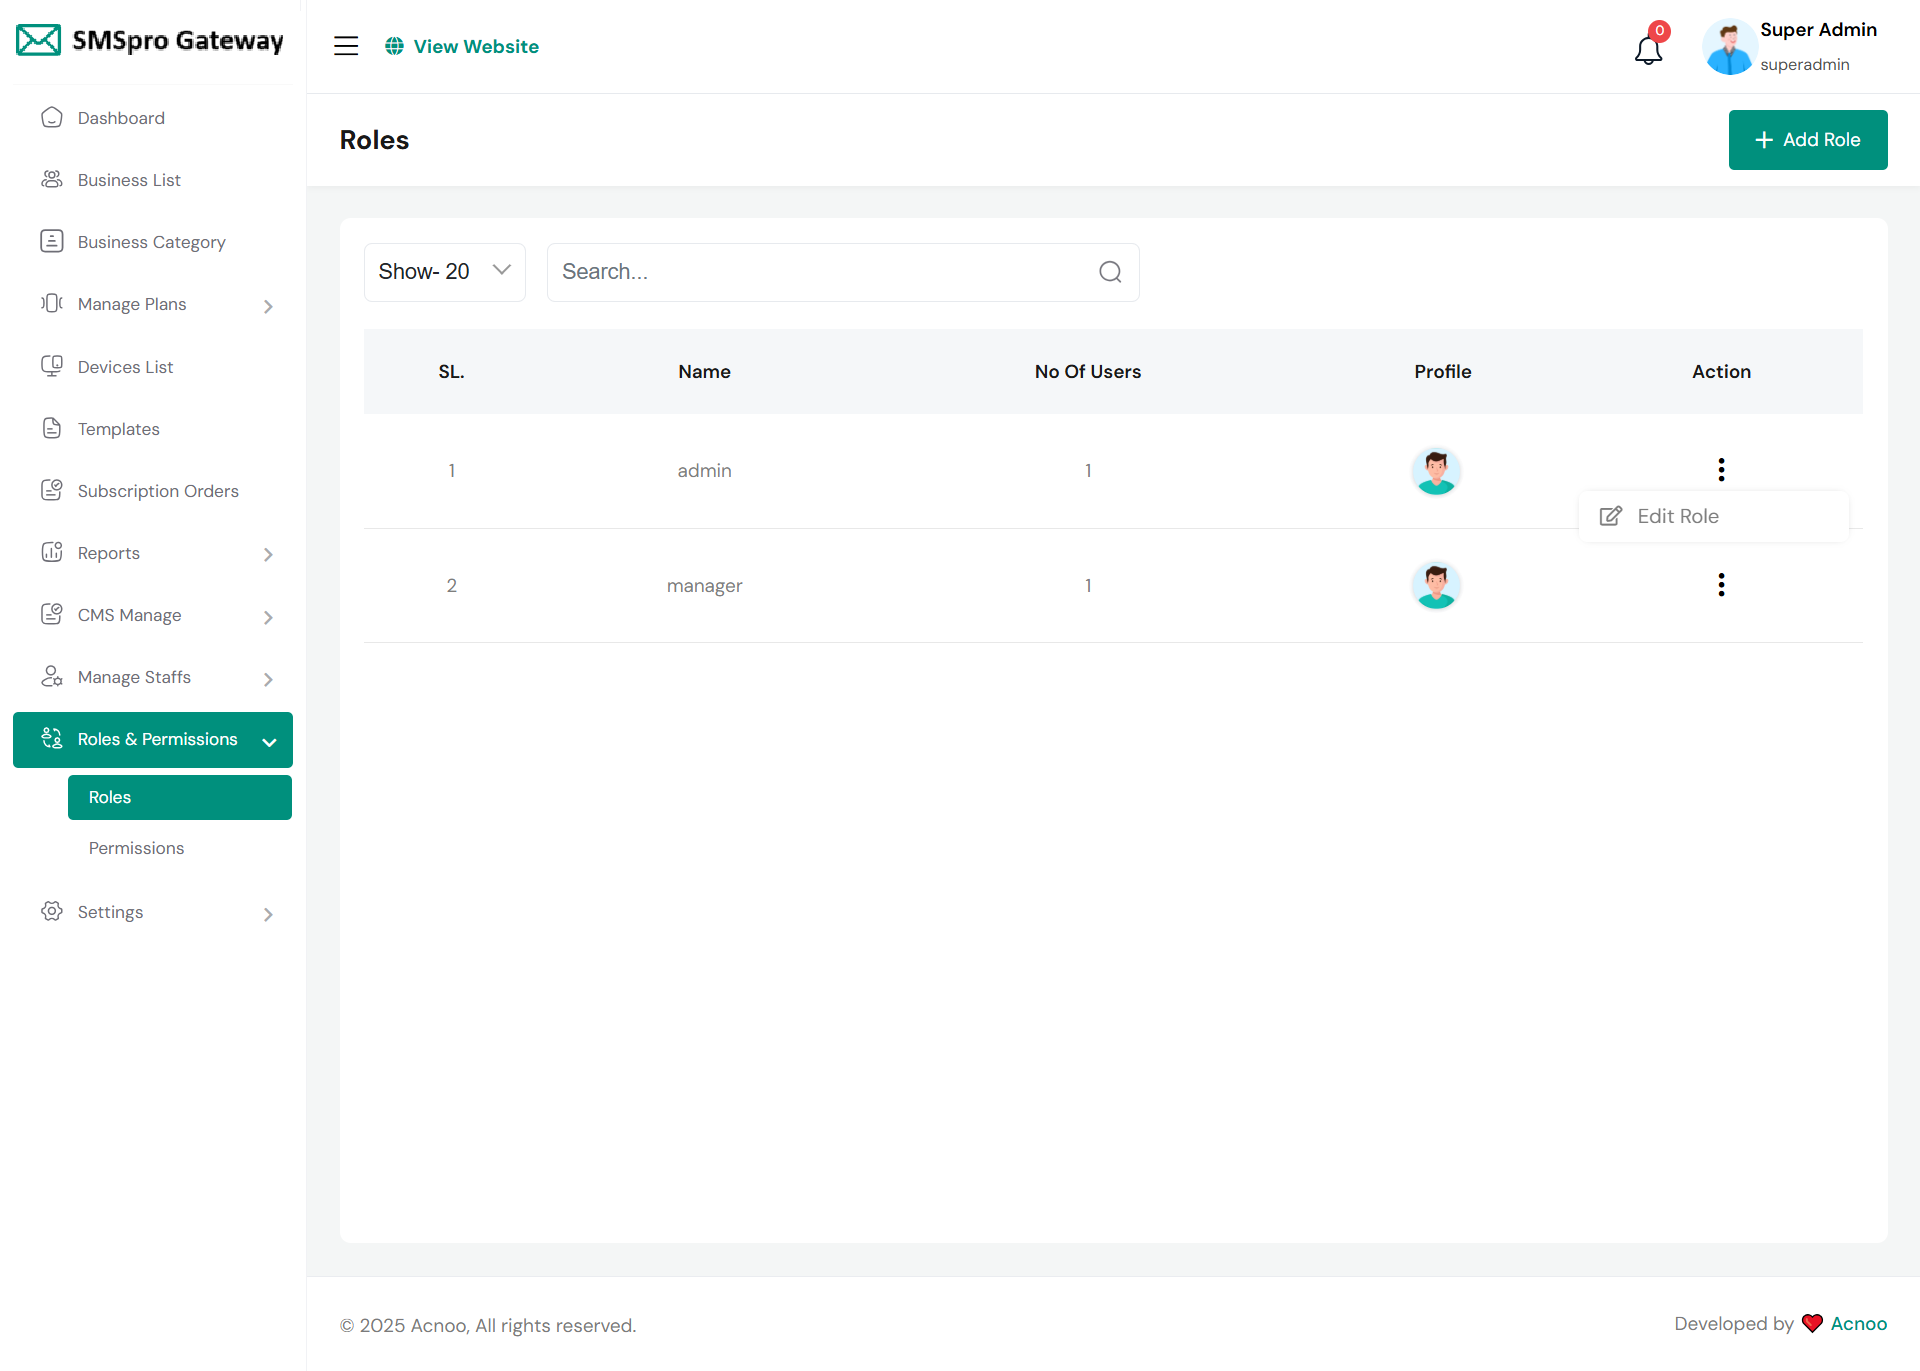
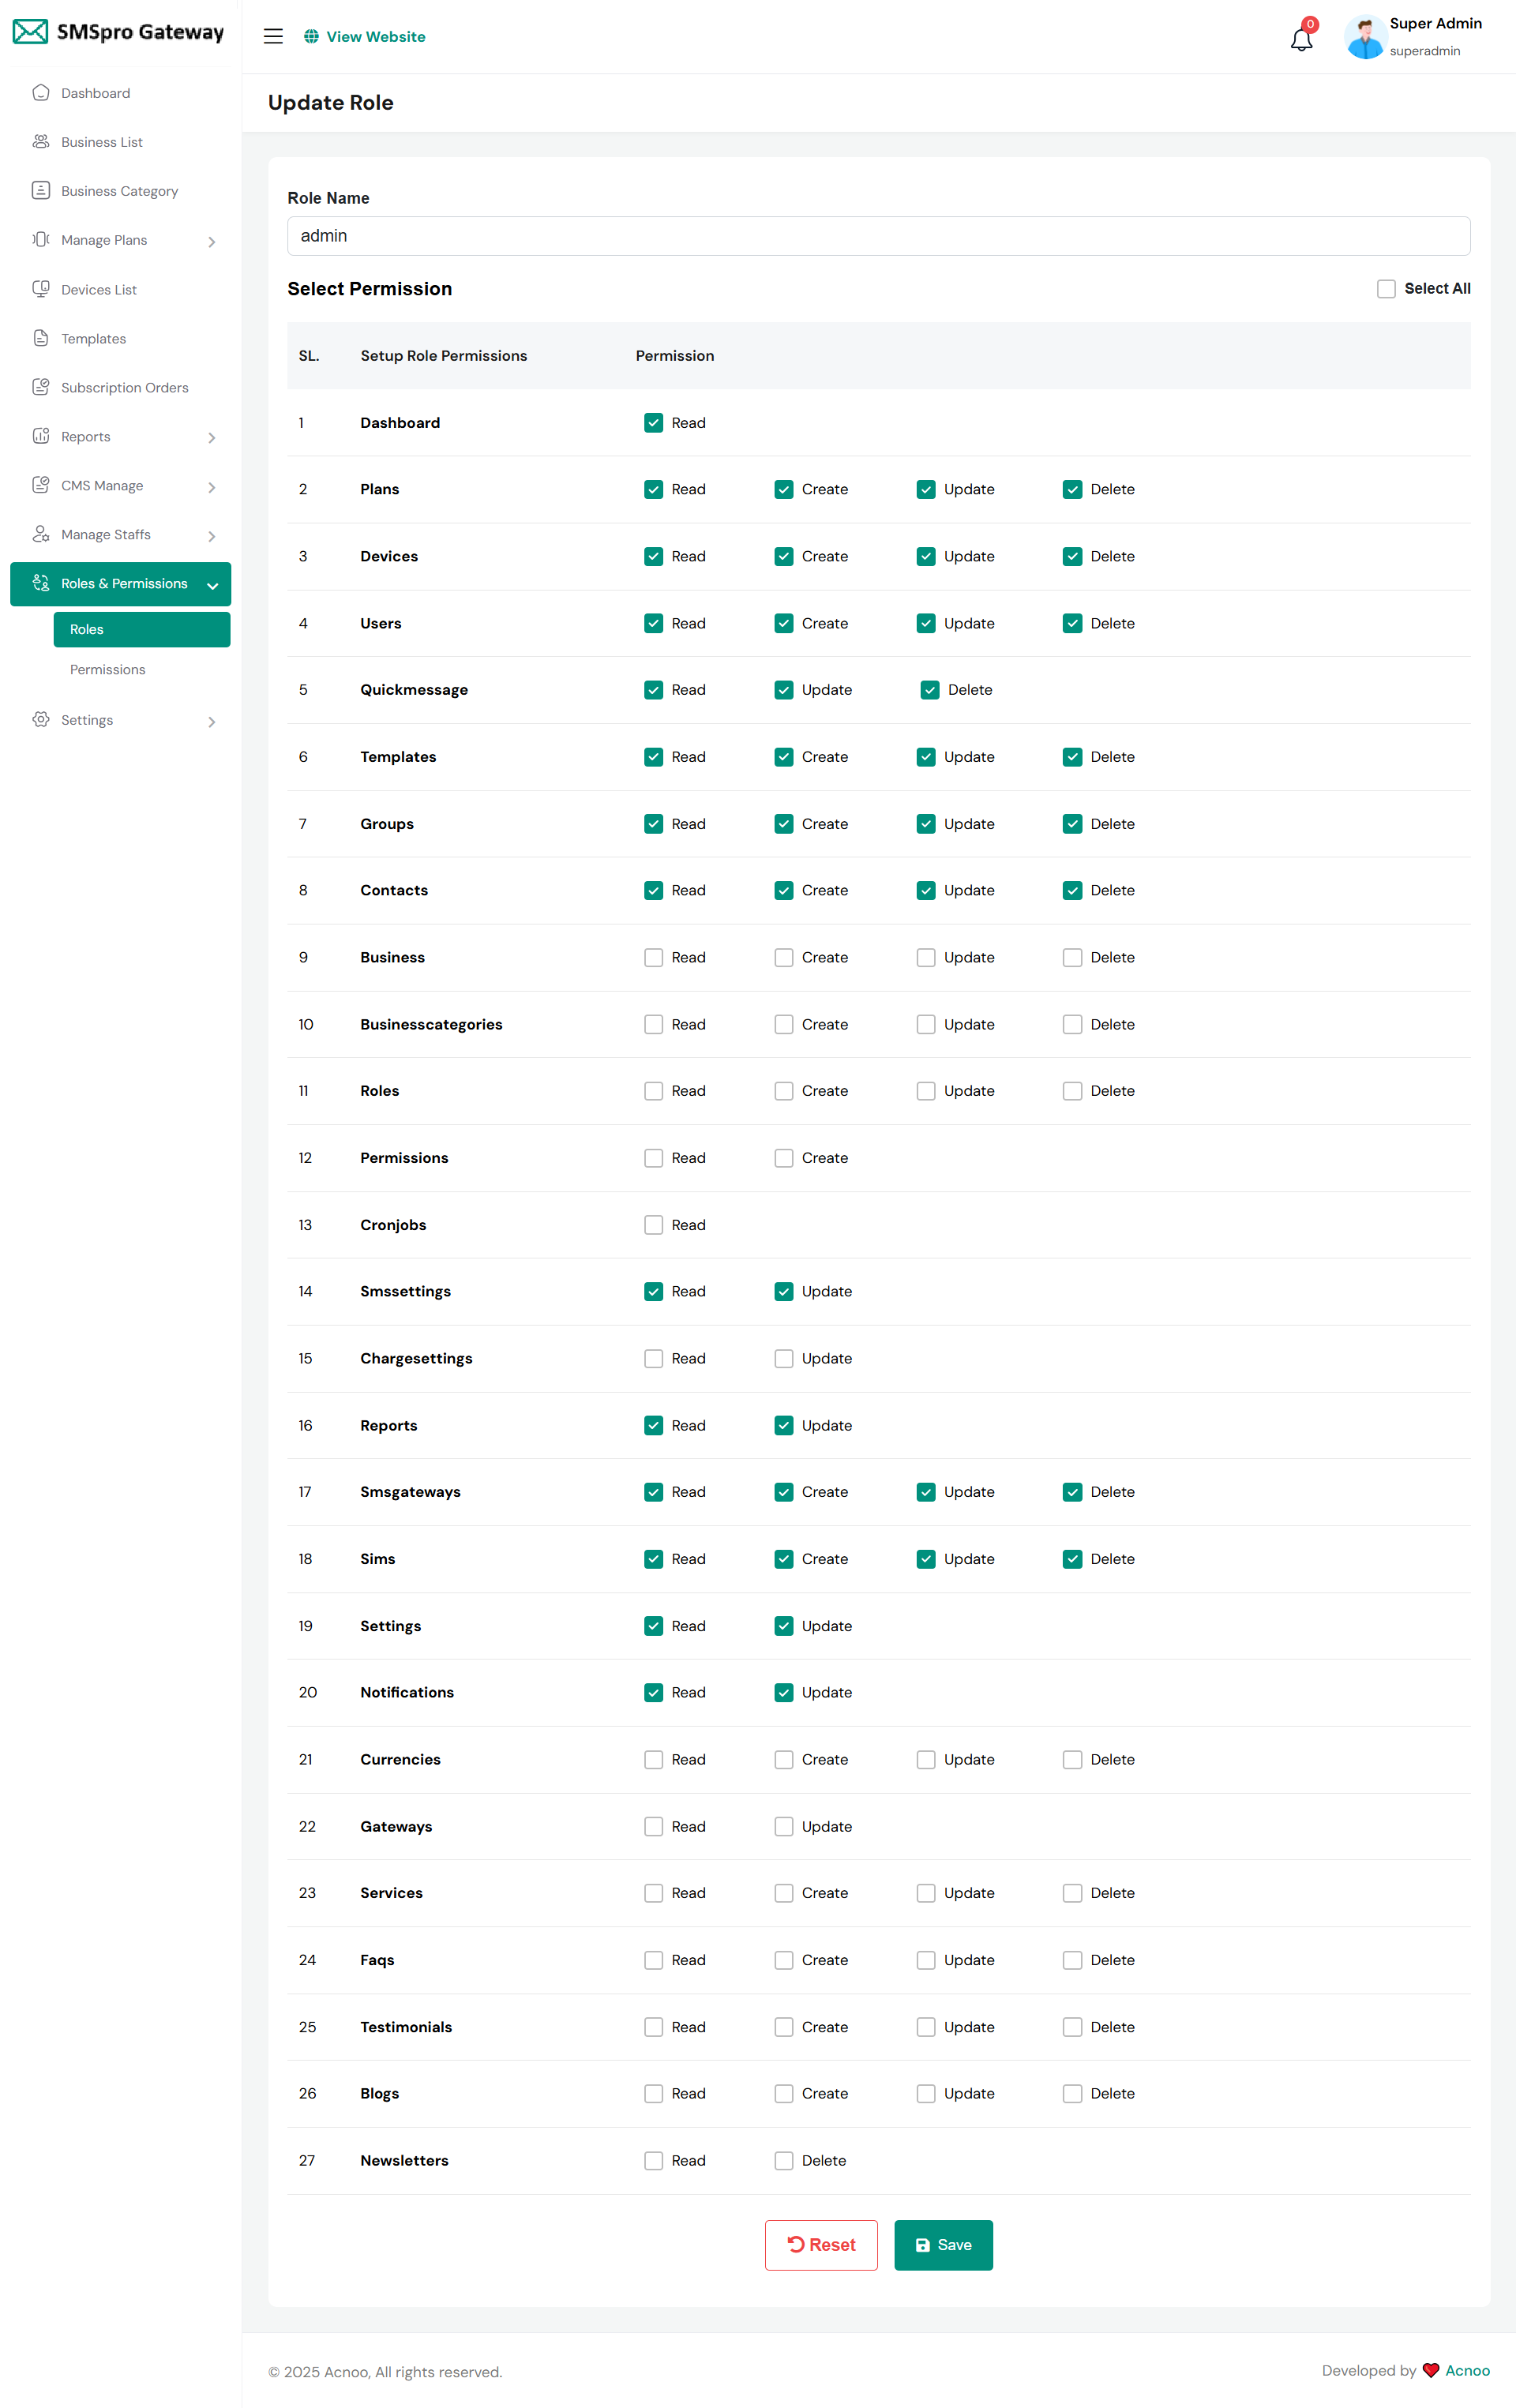
Roles
In this section, you have the capability to create new roles and update existing ones. When updating roles, you can configure their specific role permissions, granting or restricting access to various features and functionalities as required. This allows you to tailor user roles to your organizational needs and security requirements.
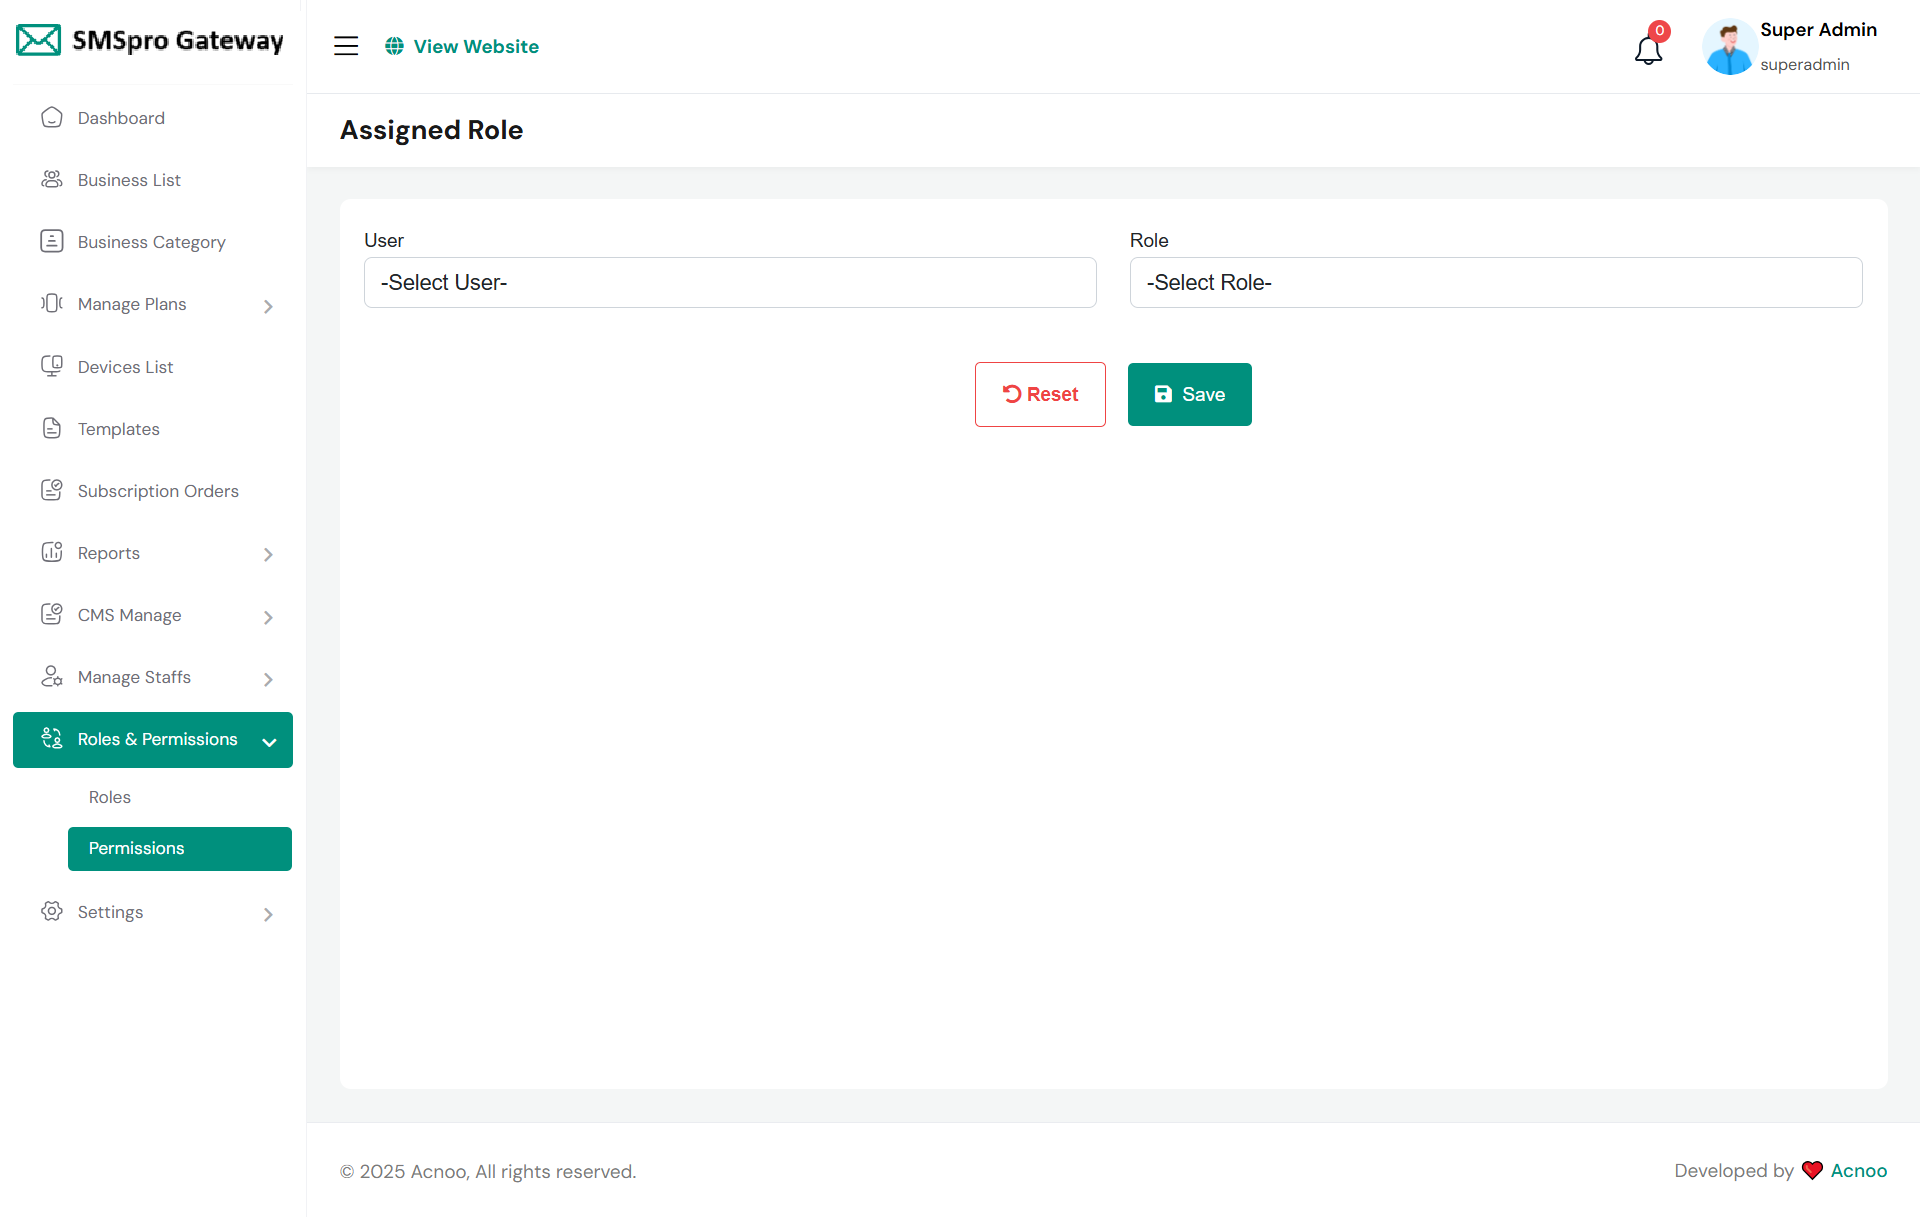
Permissions
In this section, you have the capability to set role-specific permissions, allowing you to fine-tune and control access rights for each role according to your organization's needs and security requirements.
Setting
In the Setting section, you have the capability to configure the fundamental aspects or core elements of this project.
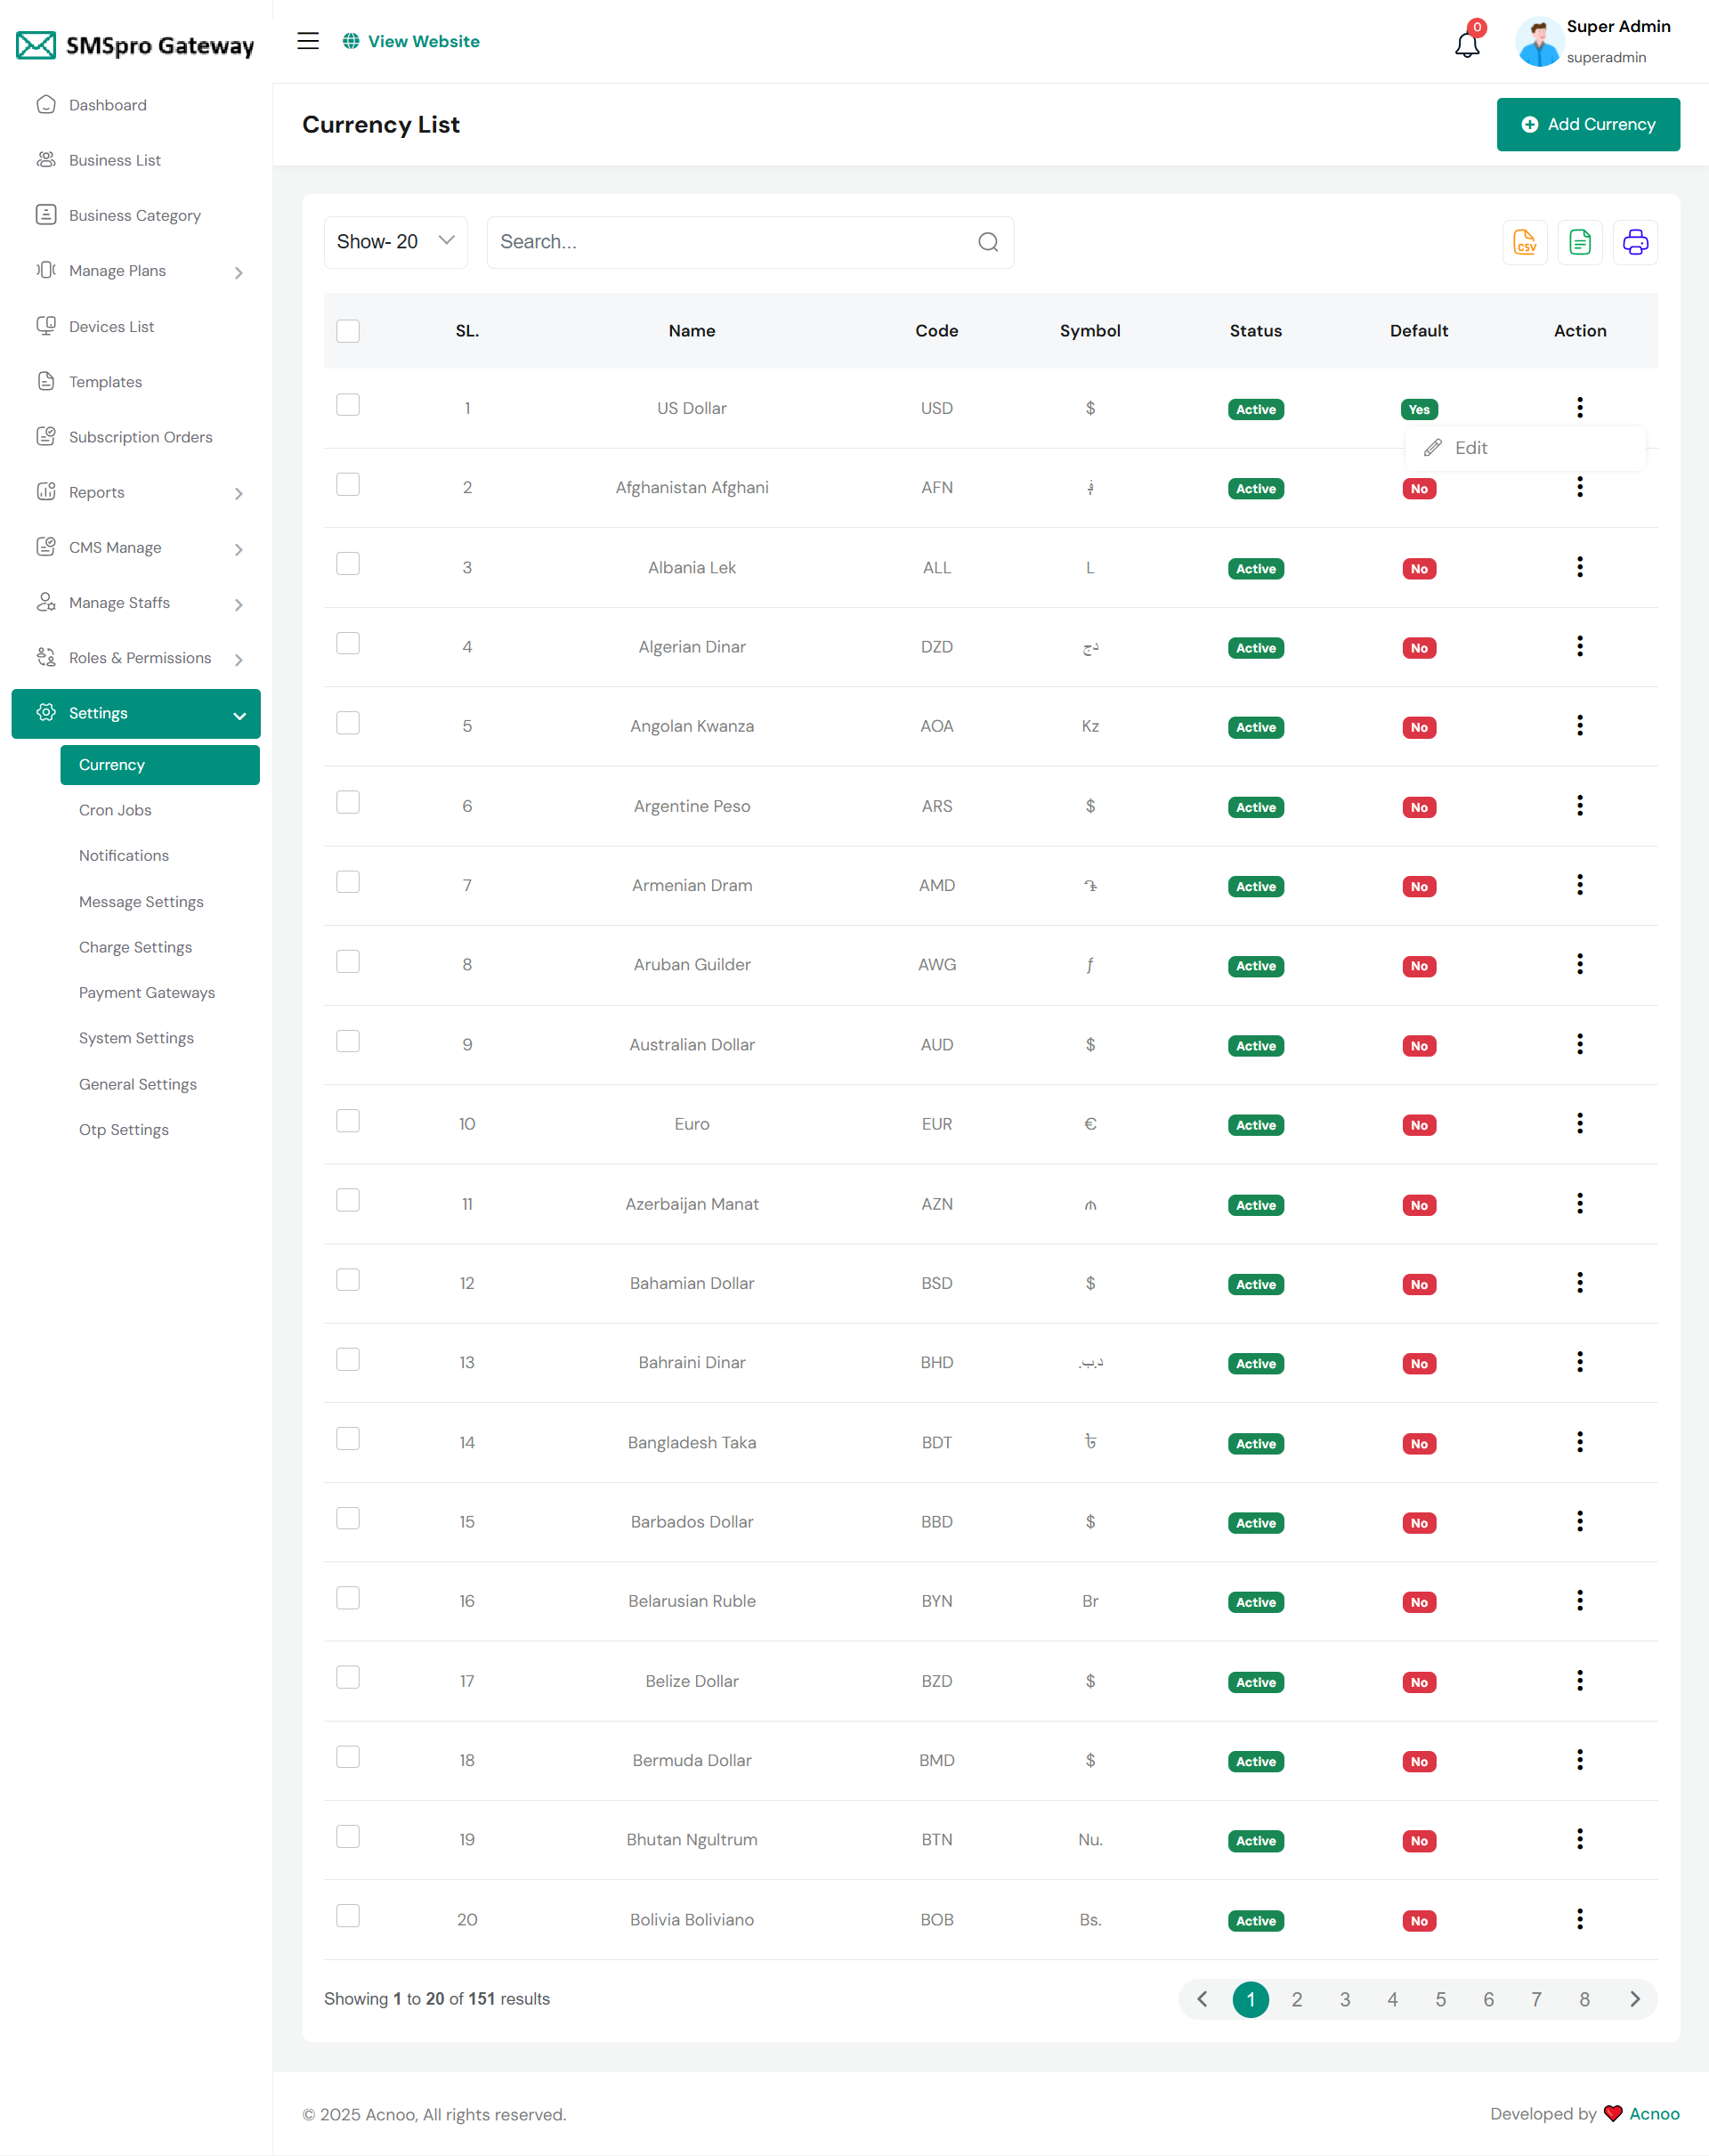
Currency list
Here, you can view a list of currencies with filtering options. Users can edit, delete, or bulk delete currencies, set a default currency, and export the list to Excel, CSV, or print it.
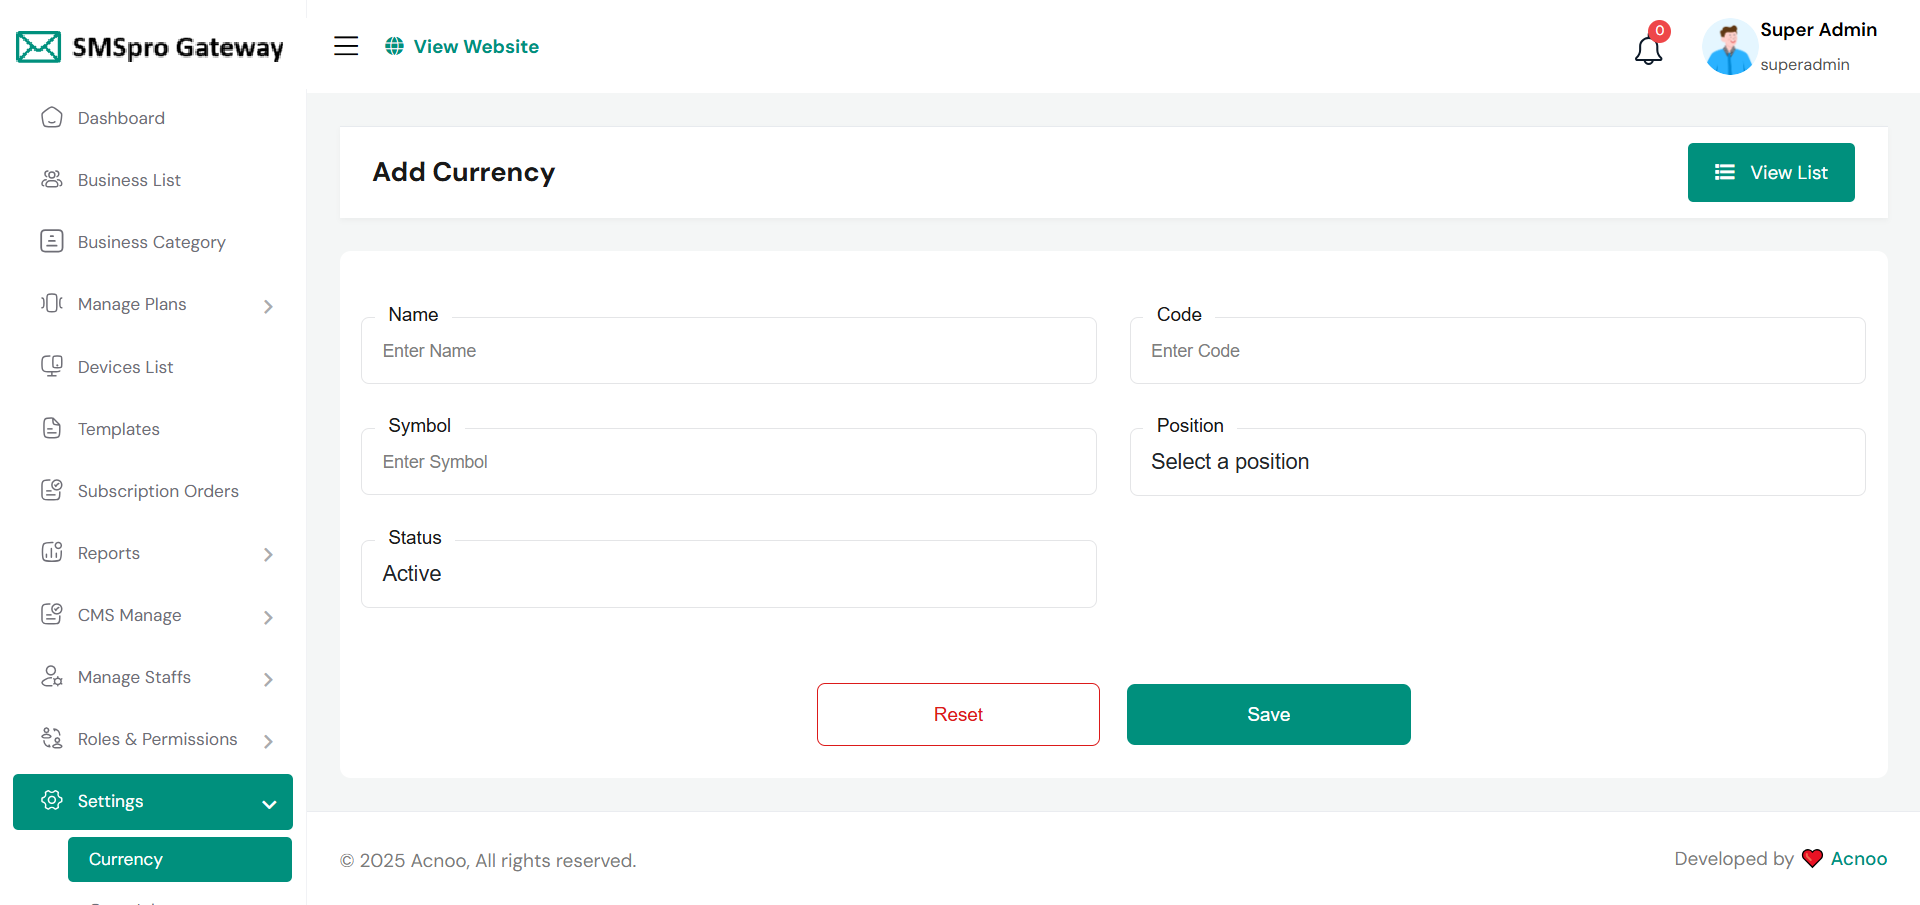
Create Currency
You have the option to include currency from this location.
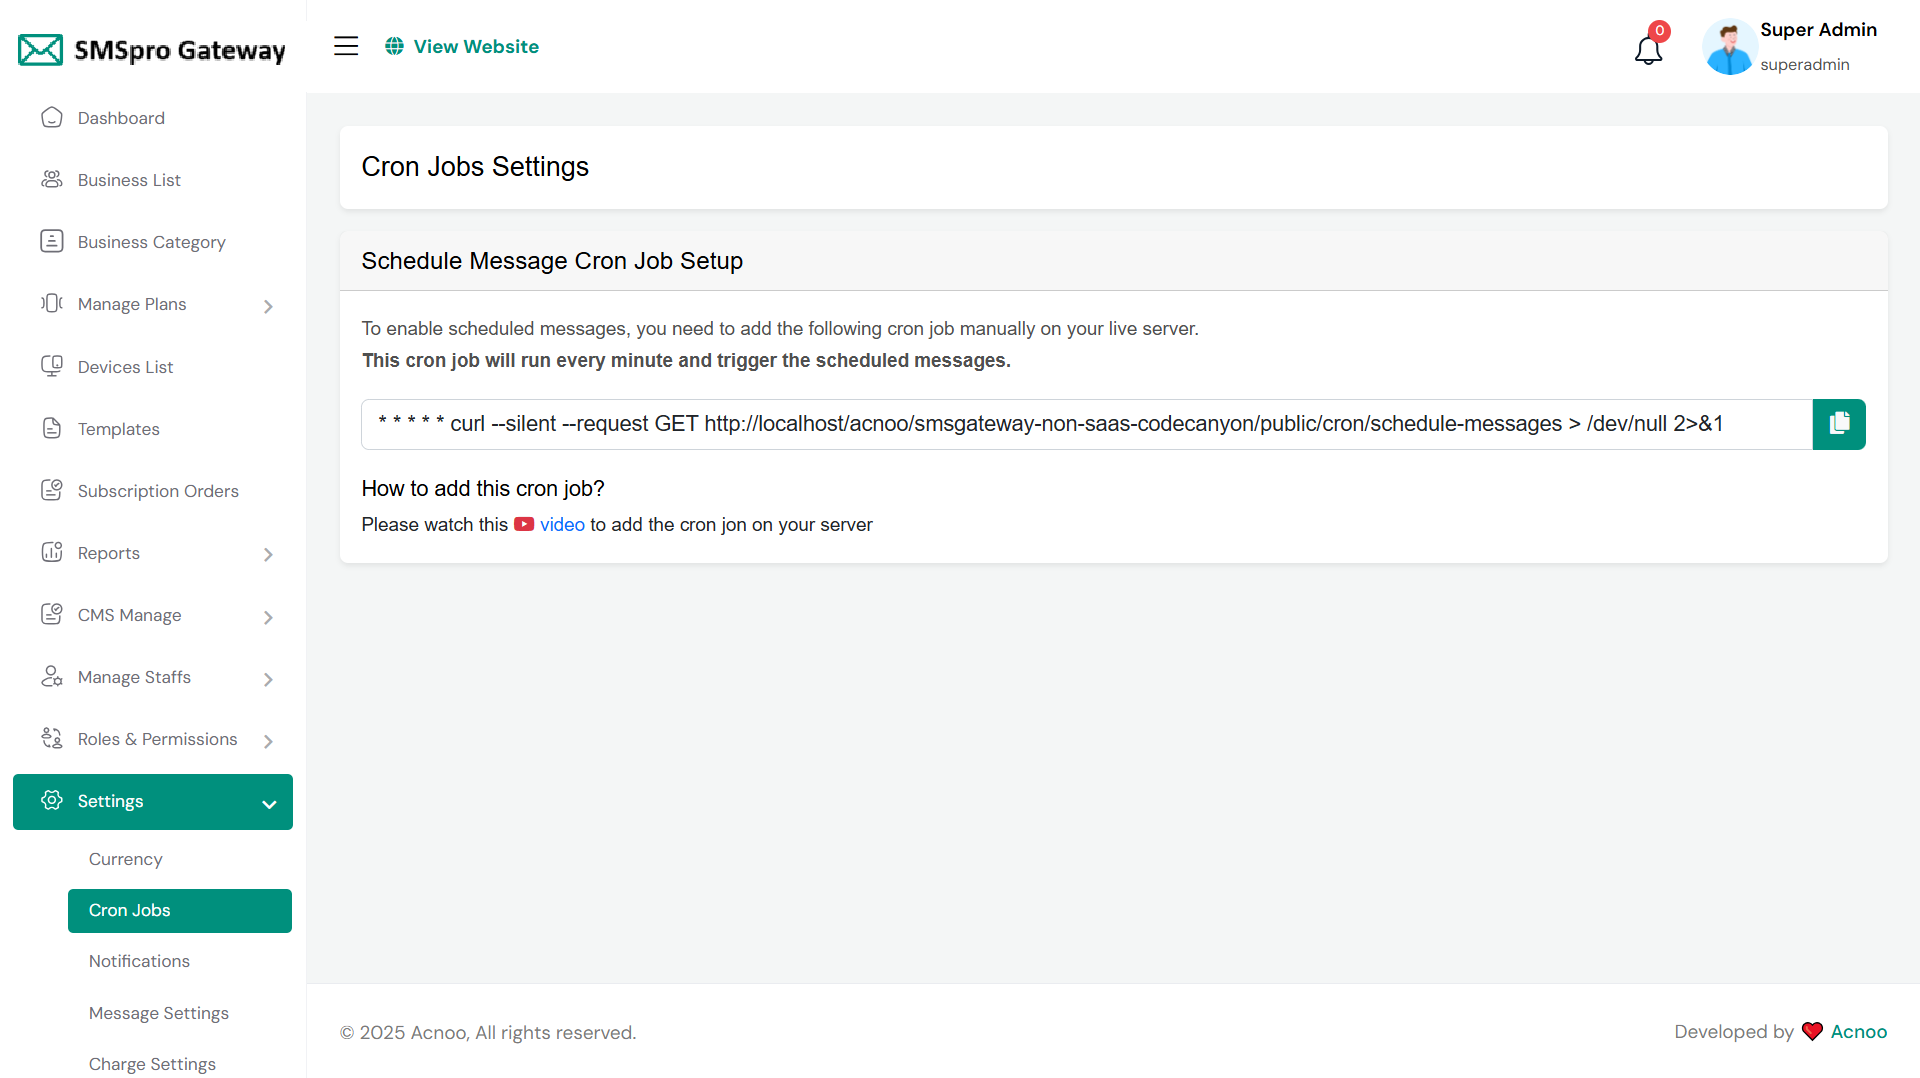
Cron Jobs
You can view Cron Jobs here, which will be configured directly from the server.
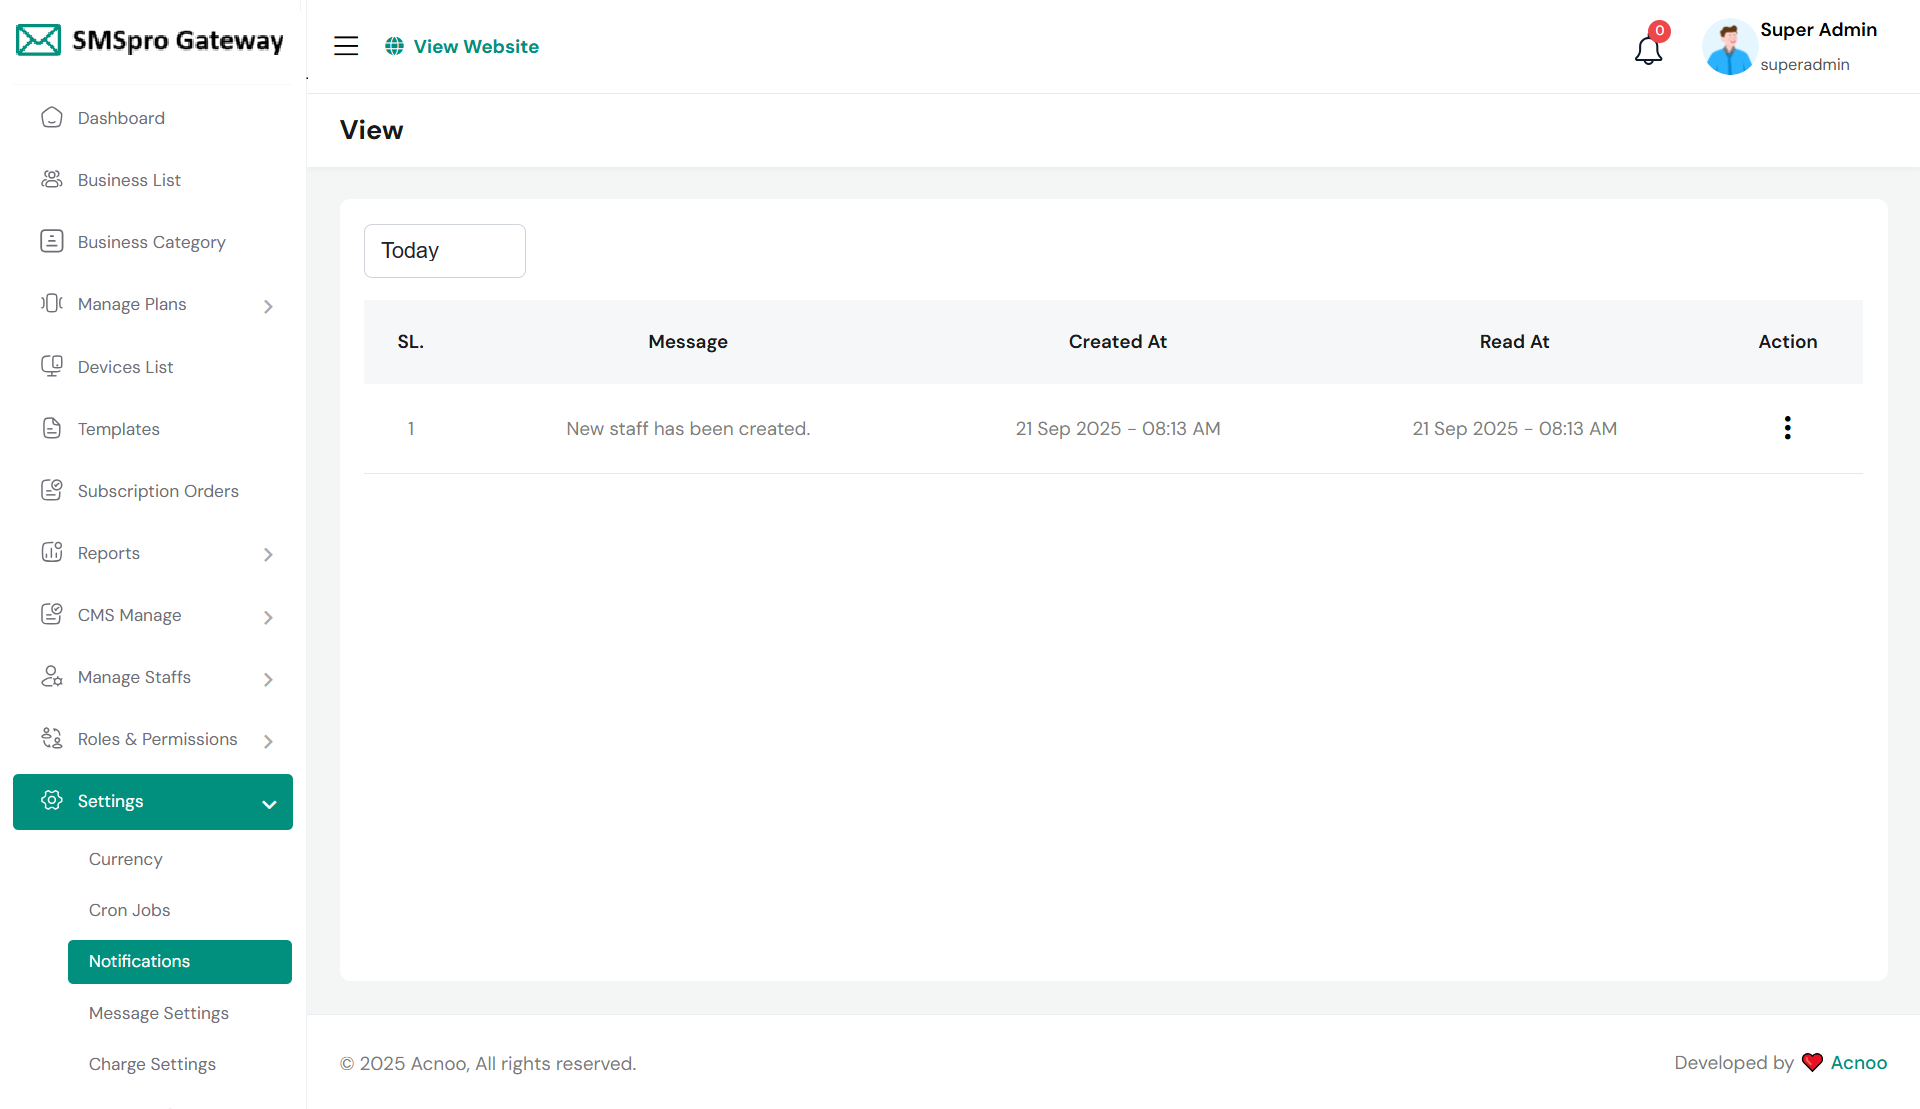
Notification
You can view notifications filtered by a specific time and access detailed information for each notification by clicking the "View" button.
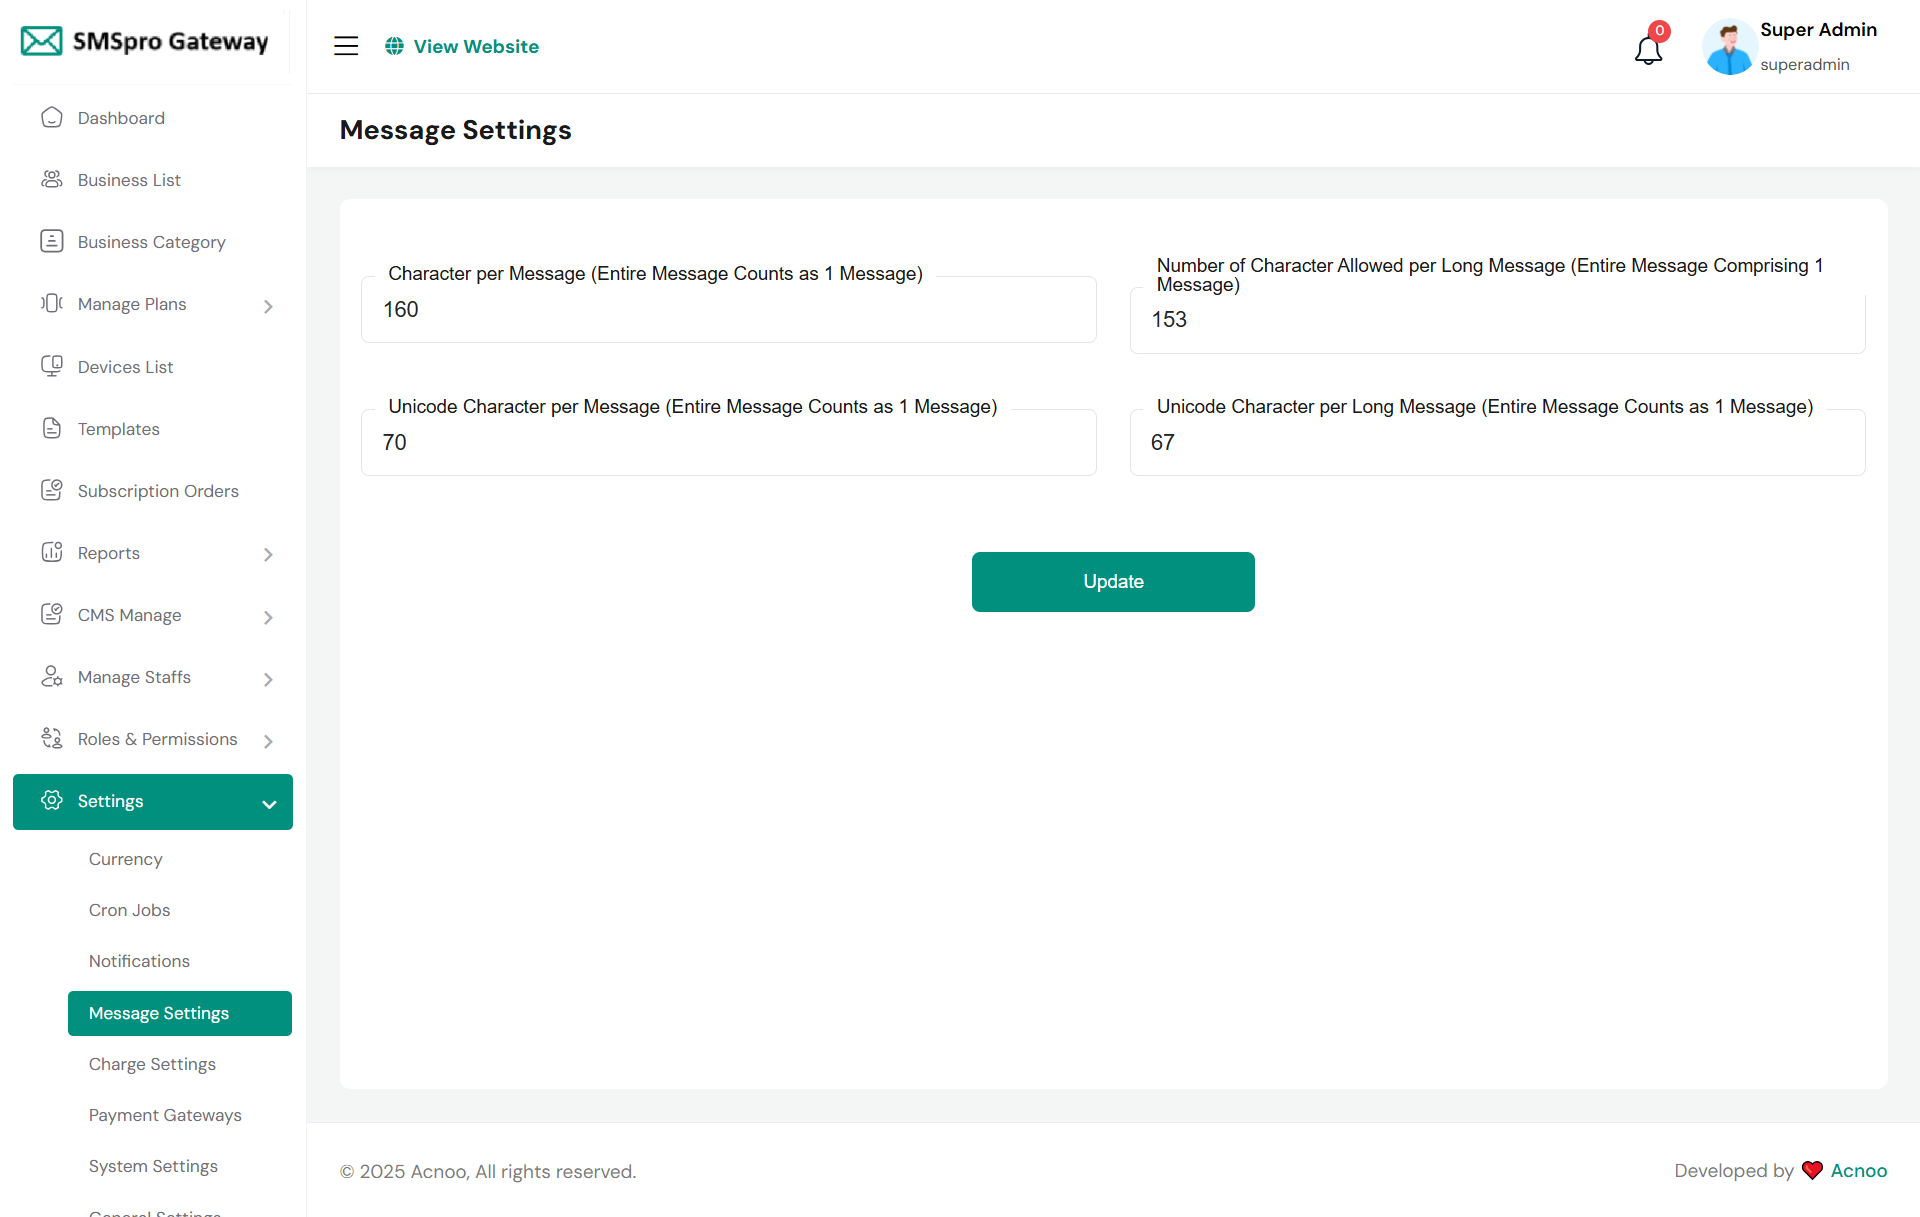
Message Setting
Here you can update message setting.
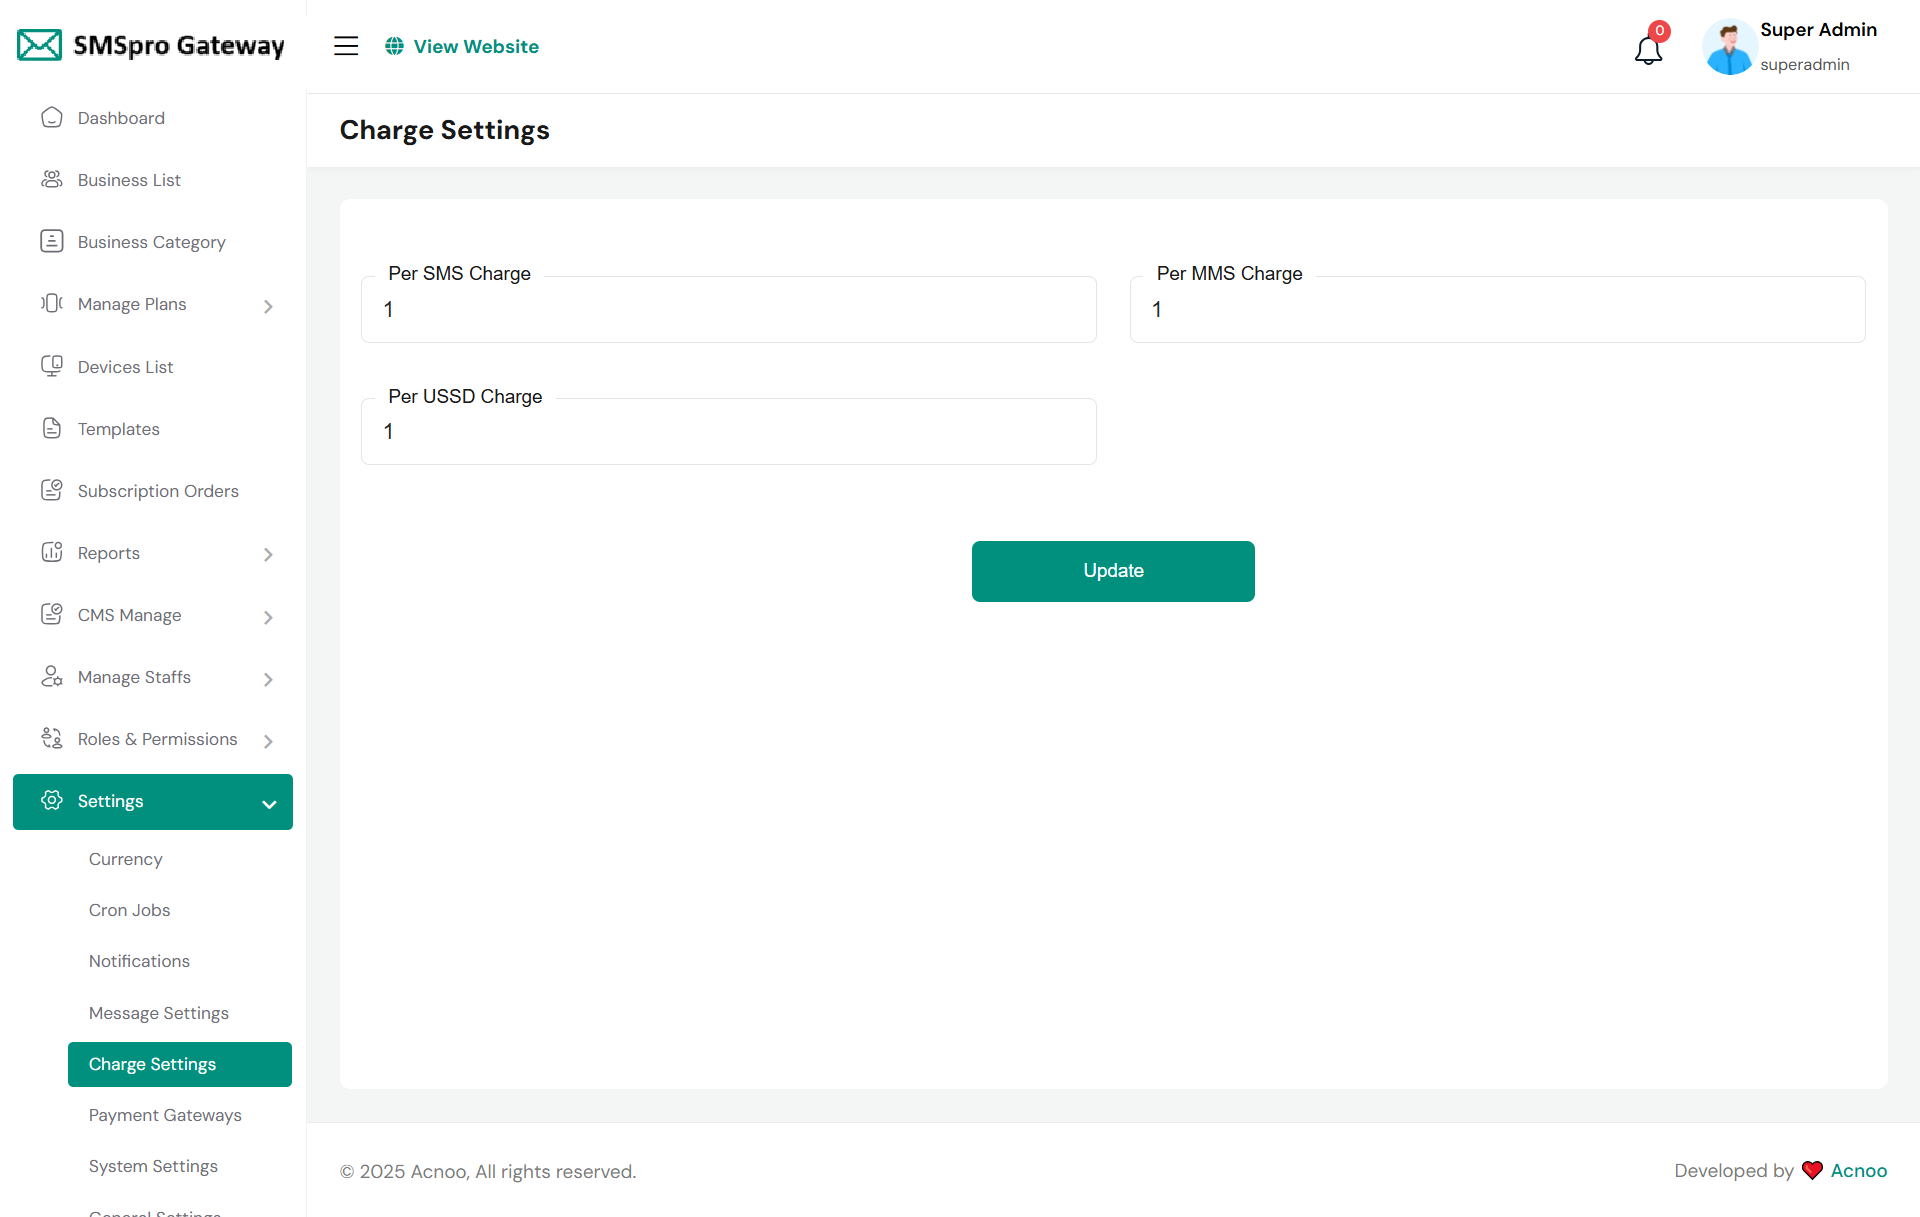
Charge Settings
Here you can update charge setting.
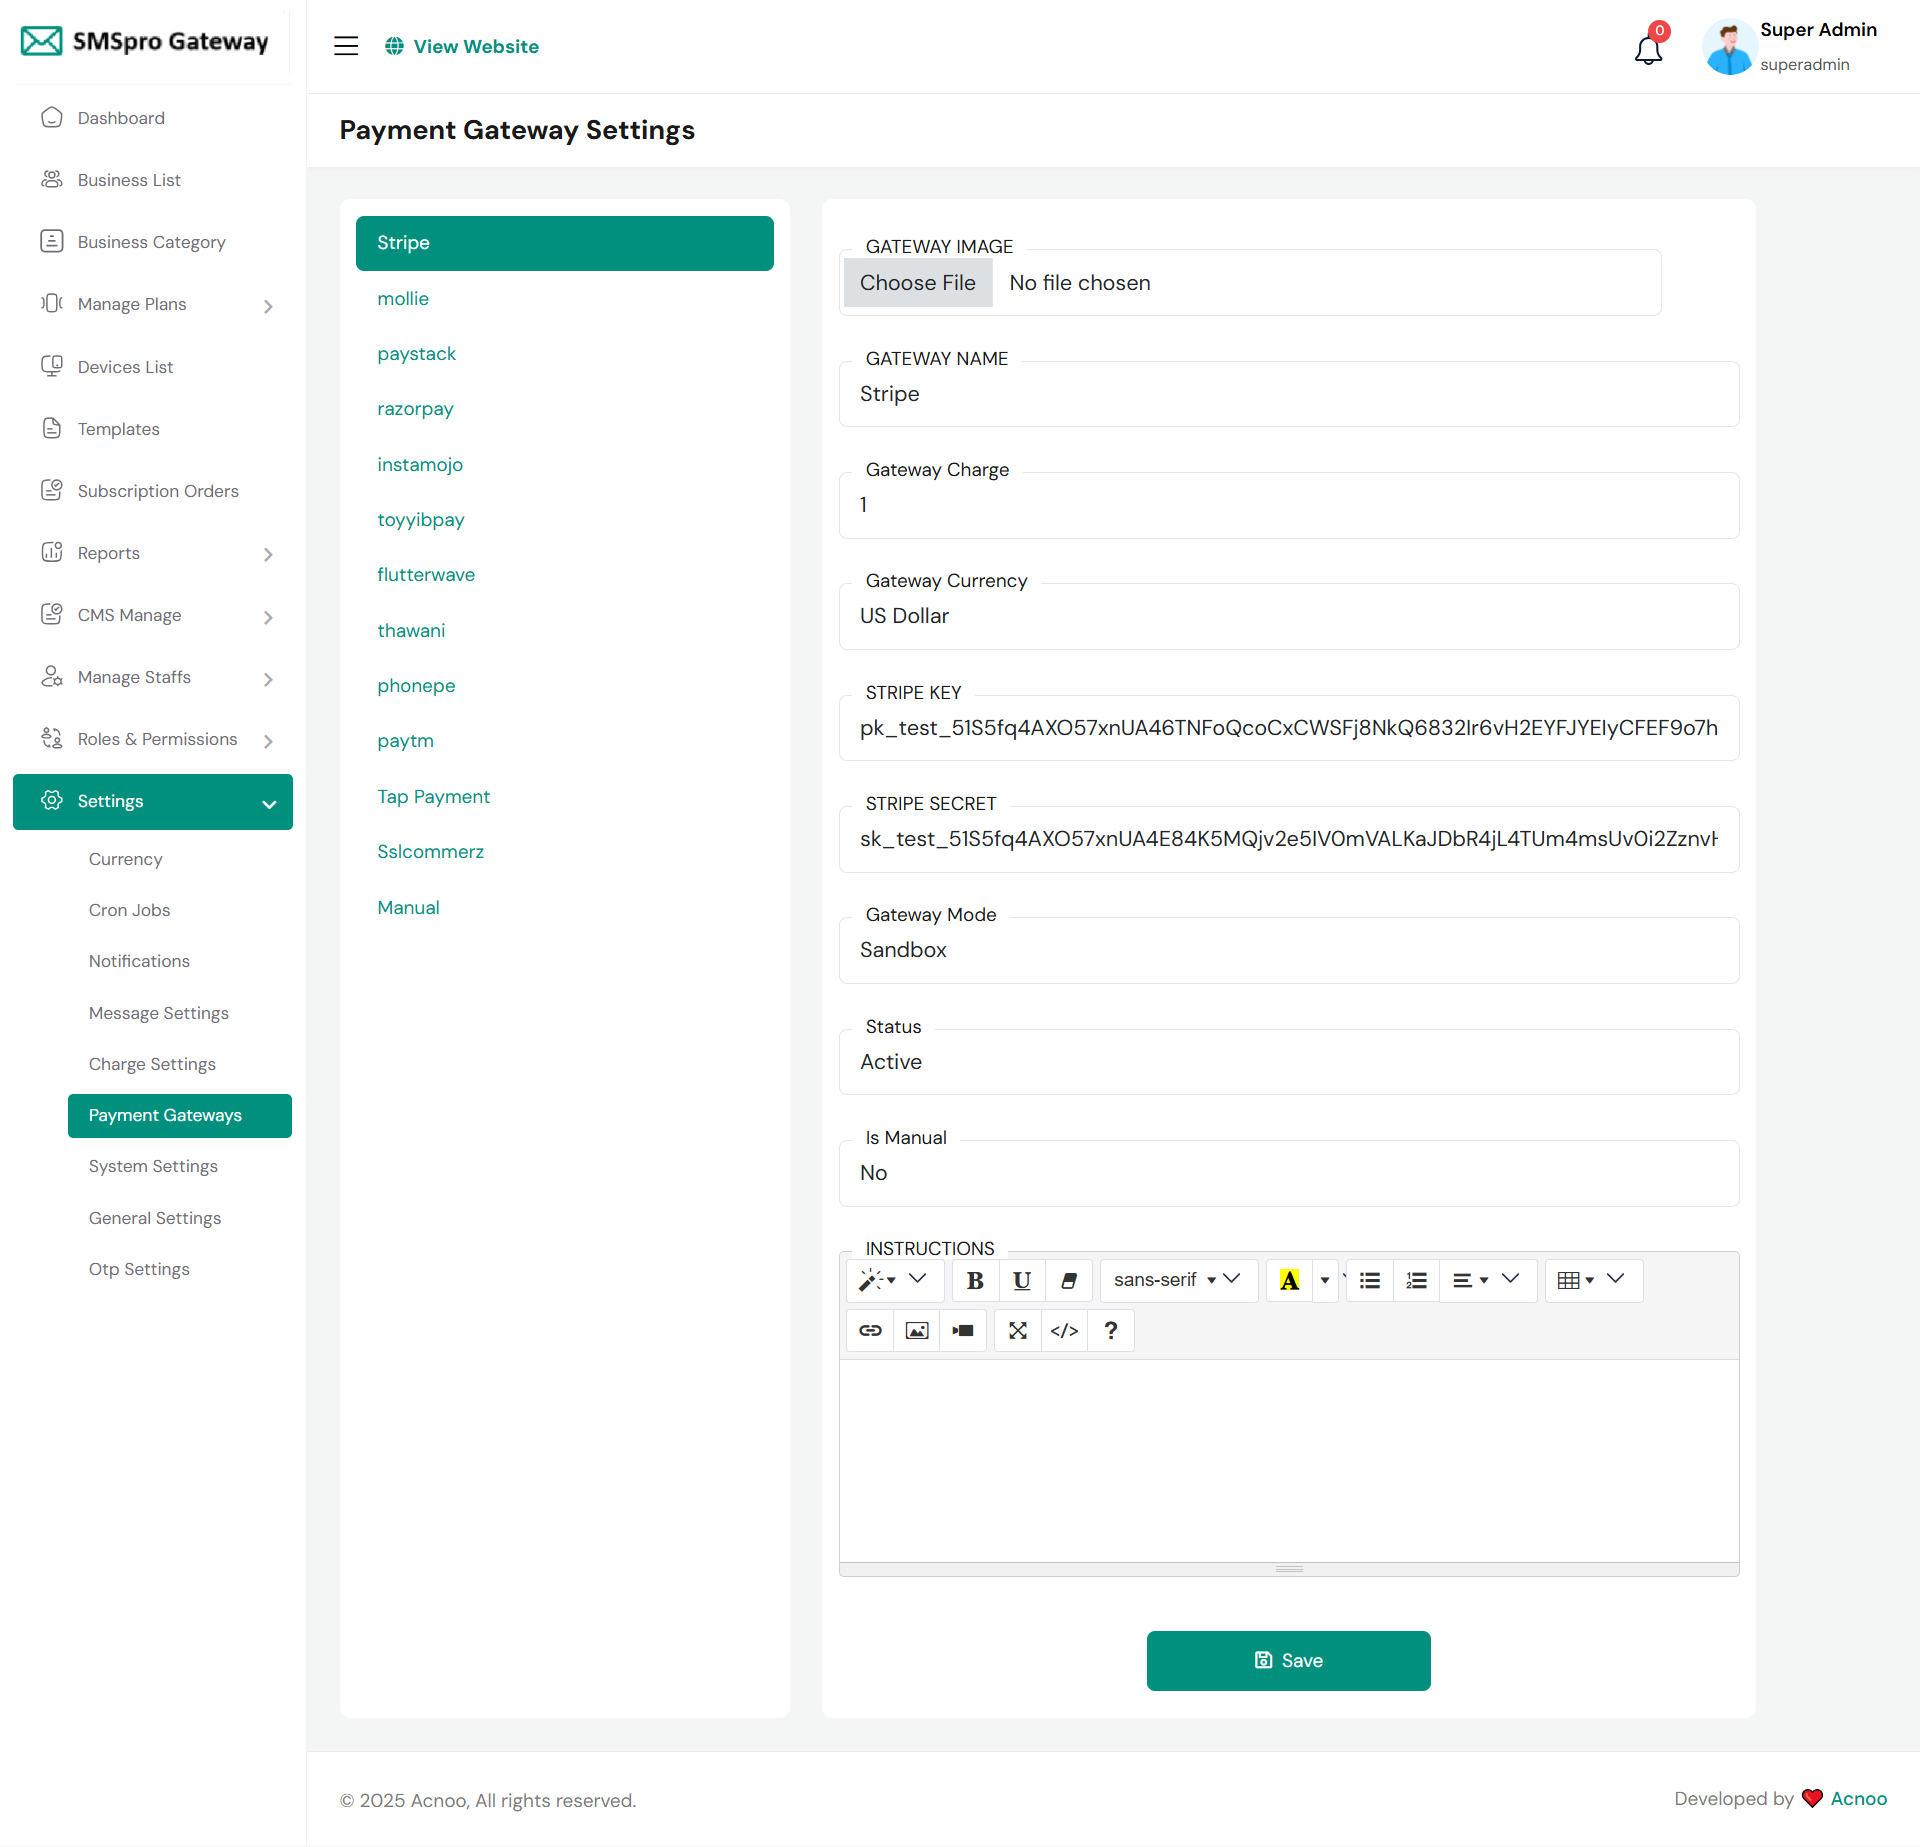
Payment Gateway Settings
Here, you can modify various payment gateways like Stripe, mollie, paystack, razorpay, instamojo, toyyibpay, flutterwave, thawani, phonepe, paytm, Tap Payment, Sslcommerz, Manual options.
Stripe
To configure Stripe payment gateway, navigate to the Payment Gateway Settings section in your admin panel. Under the Payment Gateways list, select Stripe from the available options. You'll need to upload a gateway image, set the gateway name as "Stripe," specify the gateway charge percentage, and select the currency (typically US Dollar). Enter your Stripe API credentials including the publishable key and secret key obtained from your Stripe dashboard. Choose the appropriate gateway mode between Sandbox for testing and Live for production, set the status to Active, and ensure "Is Manual" is set to No since Stripe is an automatic payment processor. After configuring all settings, click the Save button to apply your Stripe payment gateway configuration.
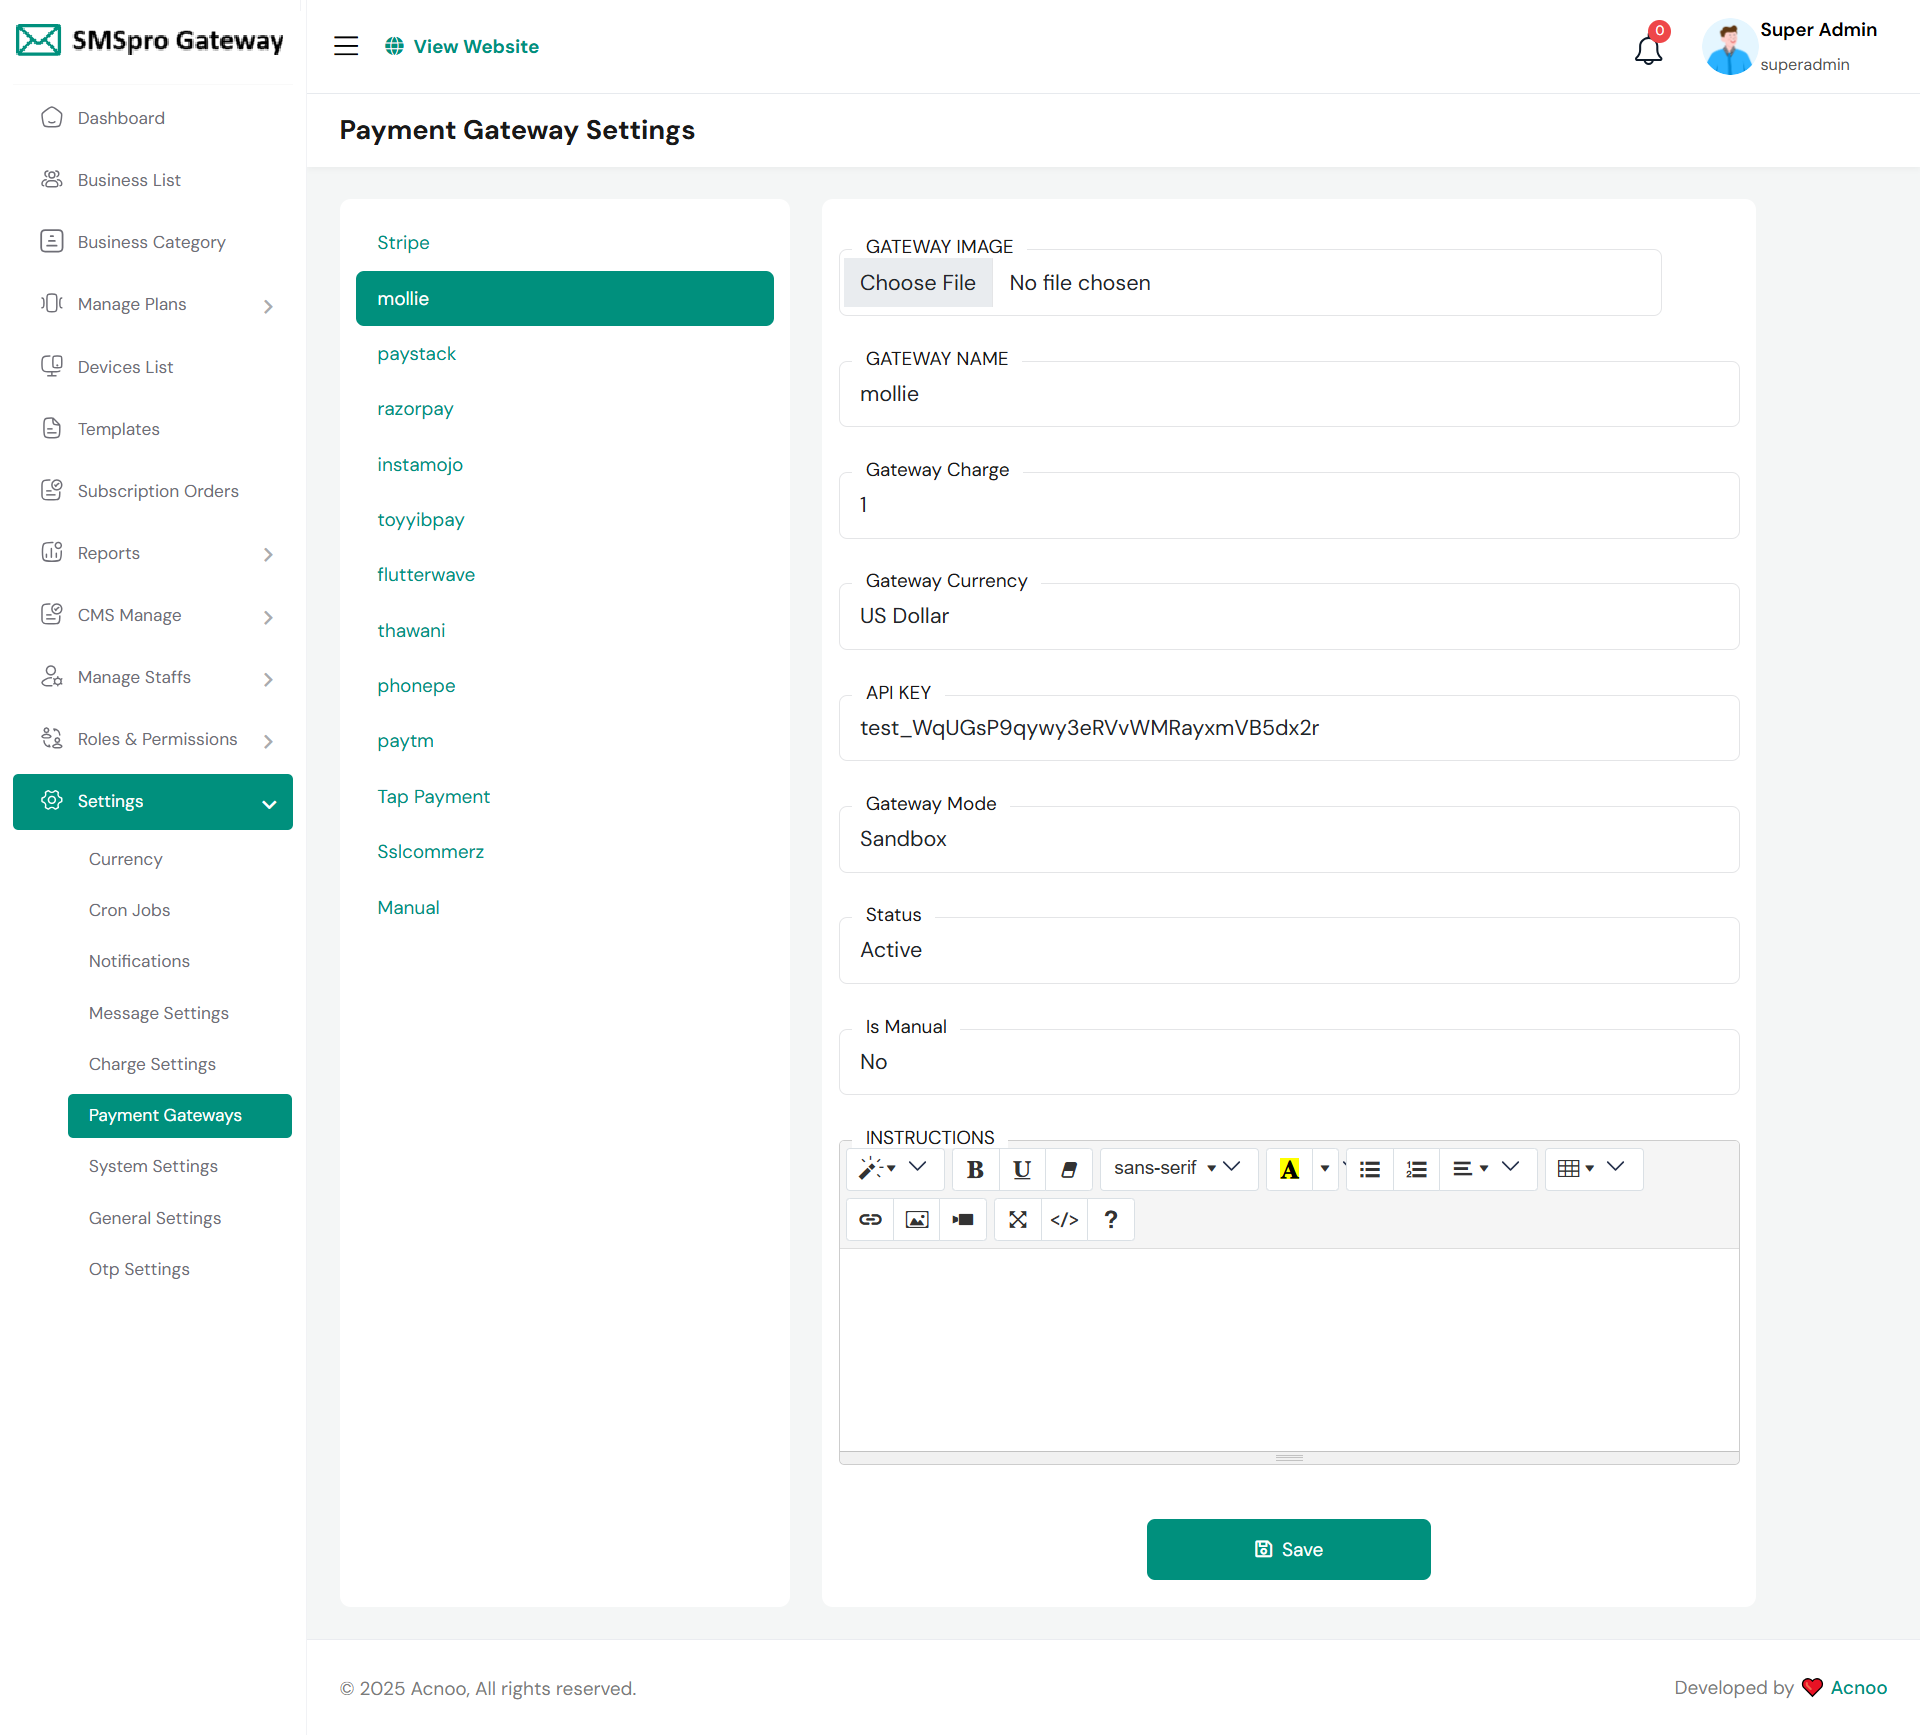
Mollie
To configure Mollie payment gateway, access the Payment Gateway Settings section in your admin panel and select Mollie from the list of available payment options. You'll need to upload a gateway image representing Mollie, set the gateway name as "Mollie," specify the gateway charge percentage (typically 1%), and select the currency as US Dollar. Enter your Mollie API key (which follows the format starting with "test_" for testing purposes) in the designated API key field. Choose the appropriate gateway mode between Sandbox for testing and Live for production use, set the status to Active to enable the gateway, and ensure "Is Manual" is set to No since Mollie processes payments automatically. The configuration interface also provides a rich text editor with formatting options for adding custom instructions that will be displayed to users during the payment process. Once all parameters are configured, save your settings to activate Mollie as a payment option for your mobile gateway system.
Paystack
To configure Paystack, navigate to Settings → Payment Gateways. Upload a gateway image, set the name to "Paystack," and define a Gateway Charge (e.g., 1%). The currency should be "Nigeria Naira." Input your Paystack dashboard credentials: the PUBLIC KEY and SECRET KEY. Set the Gateway Mode to "Sandbox" for testing or "Live" for production. Ensure Status is "Active" and "Is Manual" is set to "No" for automated processing. After adding any user instructions, click "Save" to activate the gateway, making it available for customers to use on your platform.

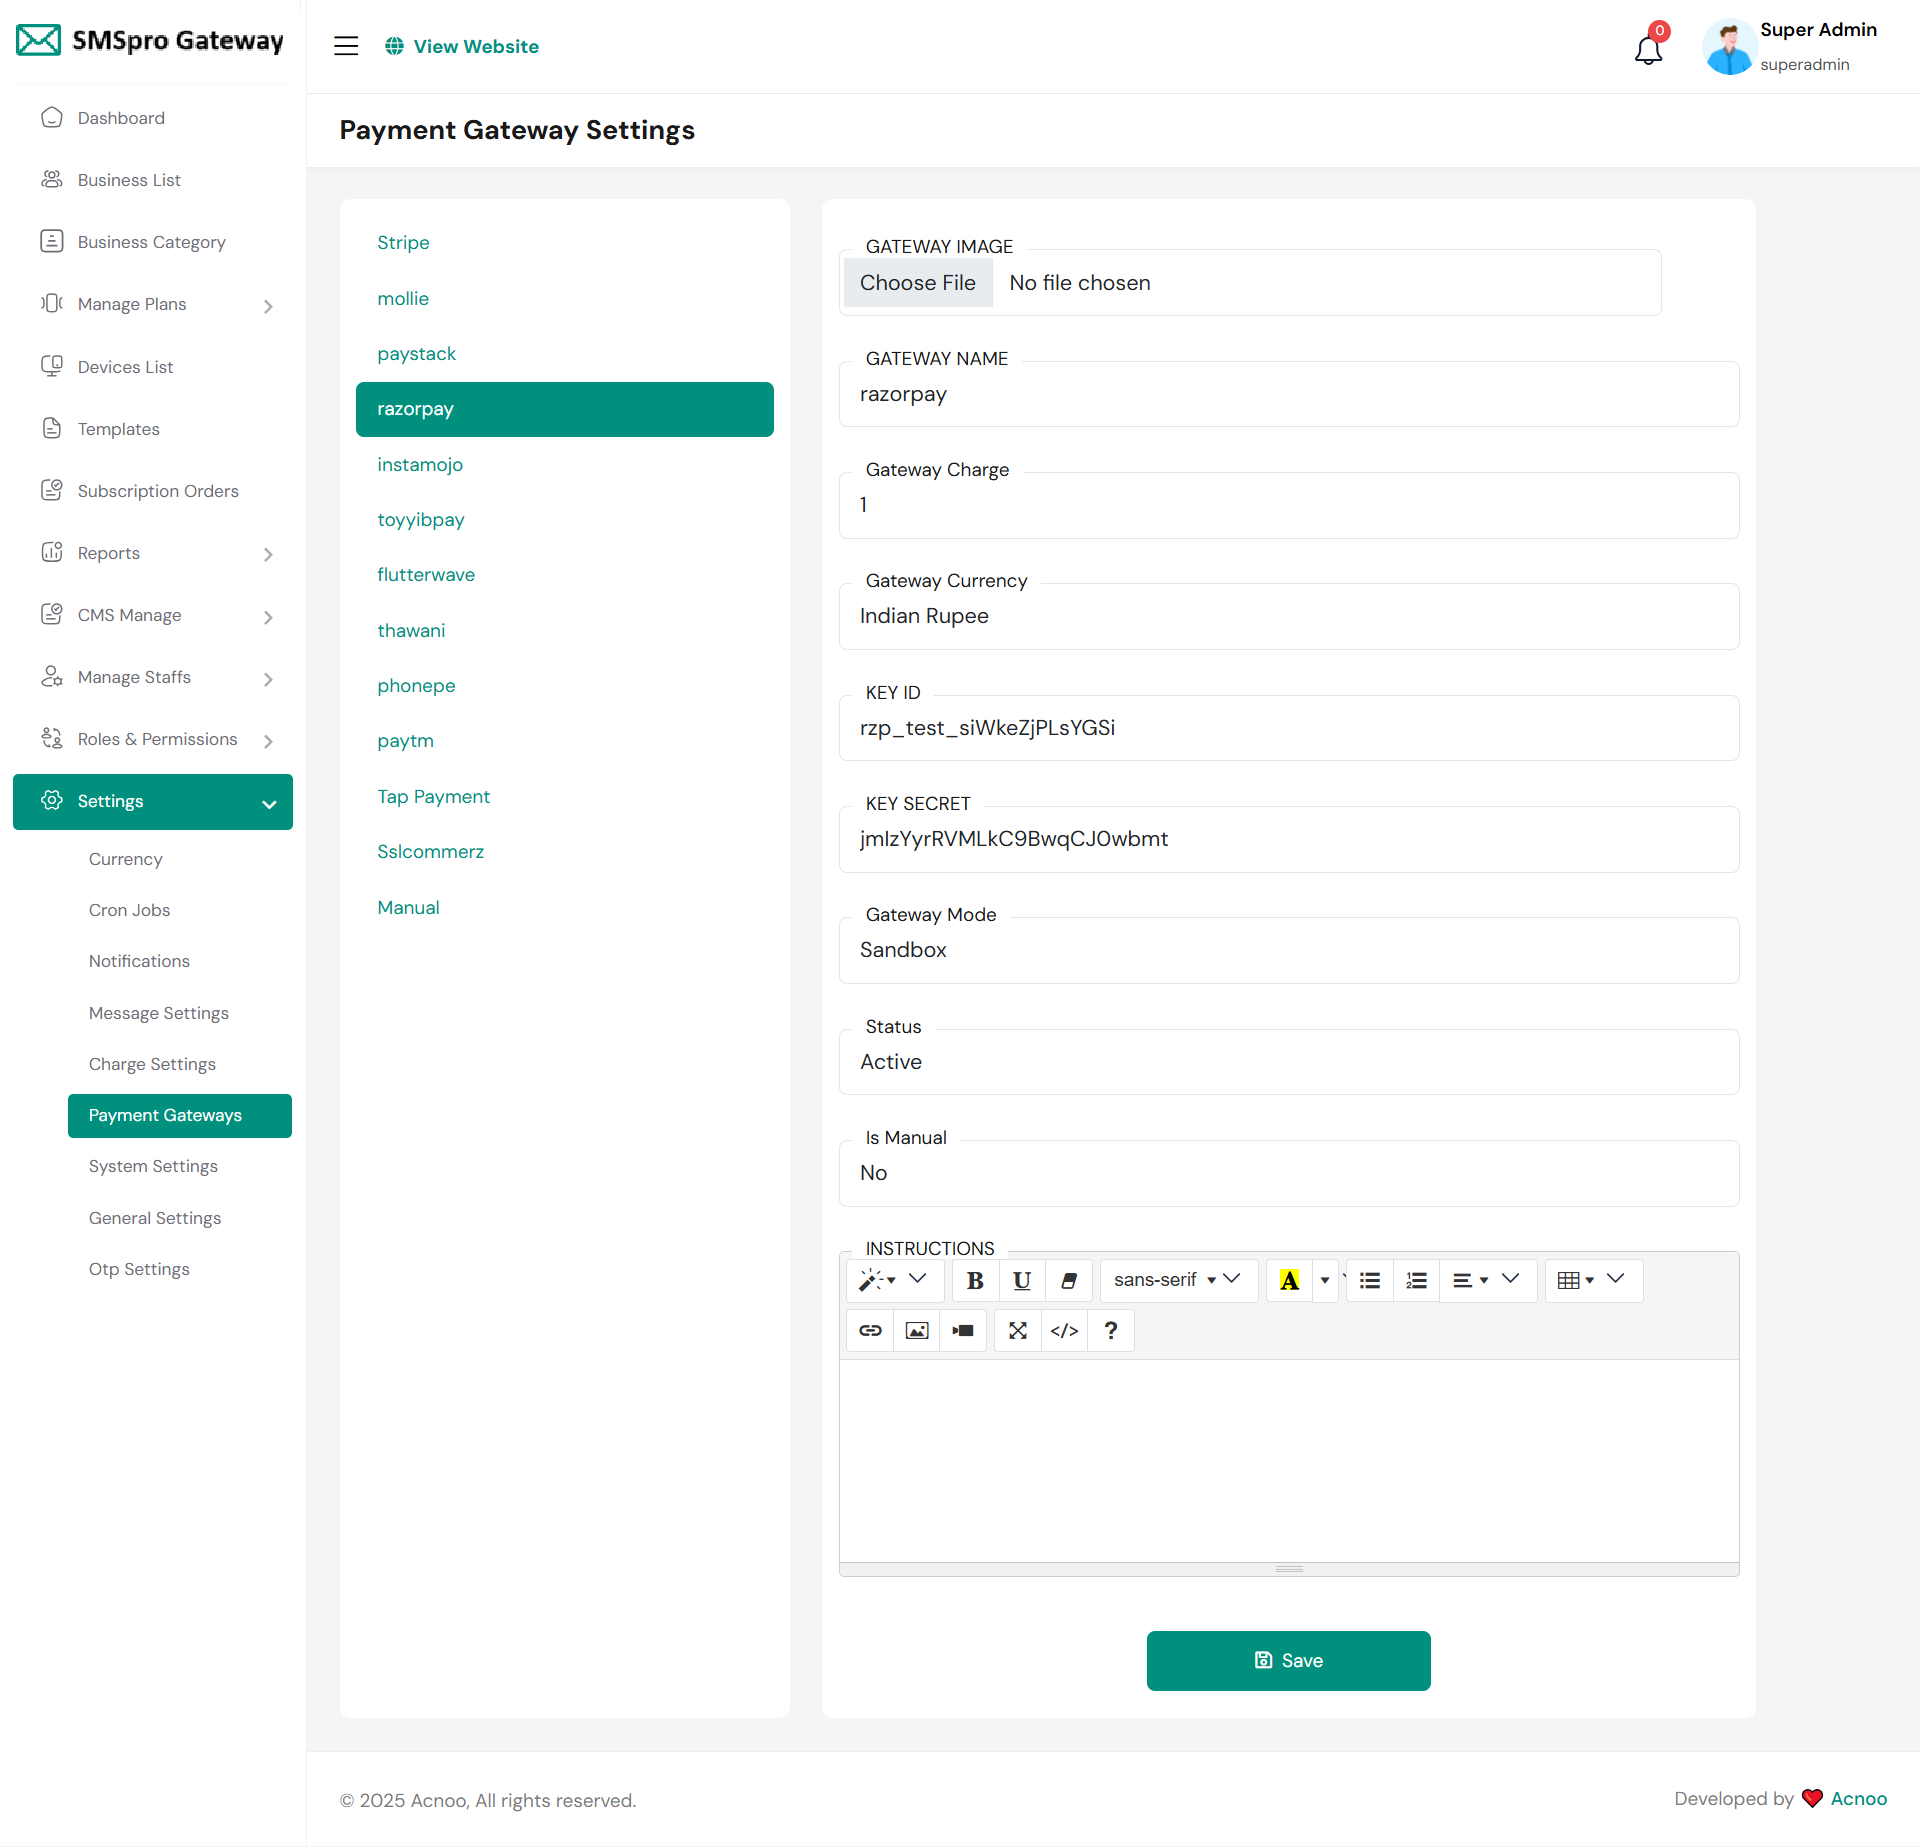
Razorpay
To configure Razorpay, navigate to Payment Gateways in your admin settings. Upload an image, set the name to "razorpay," and define a Gateway Charge (e.g., 1%). The currency must be "Indian Rupee." Input your Razorpay API credentials: the KEY ID and KEY SECRET from your dashboard. Set the Gateway Mode to "Sandbox" for testing or "Live" for production. Ensure the Status is "Active" and "Is Manual" is set to "No" for automated processing. After reviewing, click "Save" to activate Razorpay, enabling it as a payment option for your customers. This gateway is ideal for businesses processing payments in INR.
Instamojo
To configure Instamojo, access the Payment Gateways section in your admin panel. Upload a gateway image and set the GATEWAY NAME to "Instamojo." Specify the Gateway Charge as a percentage (e.g., 1%) and set the Gateway Currency to "Indian Rupee." Enter your Instamojo API credentials: the X API KEY and X AUTH TOKEN from your merchant dashboard. Select the Gateway Mode as "Sandbox" for testing or "Live" for production transactions. Ensure the Status is set to "Active" to enable the gateway and confirm "Is Manual" is set to "No" for automatic processing. Click "Save" to activate Instamojo as a payment option for your platform.

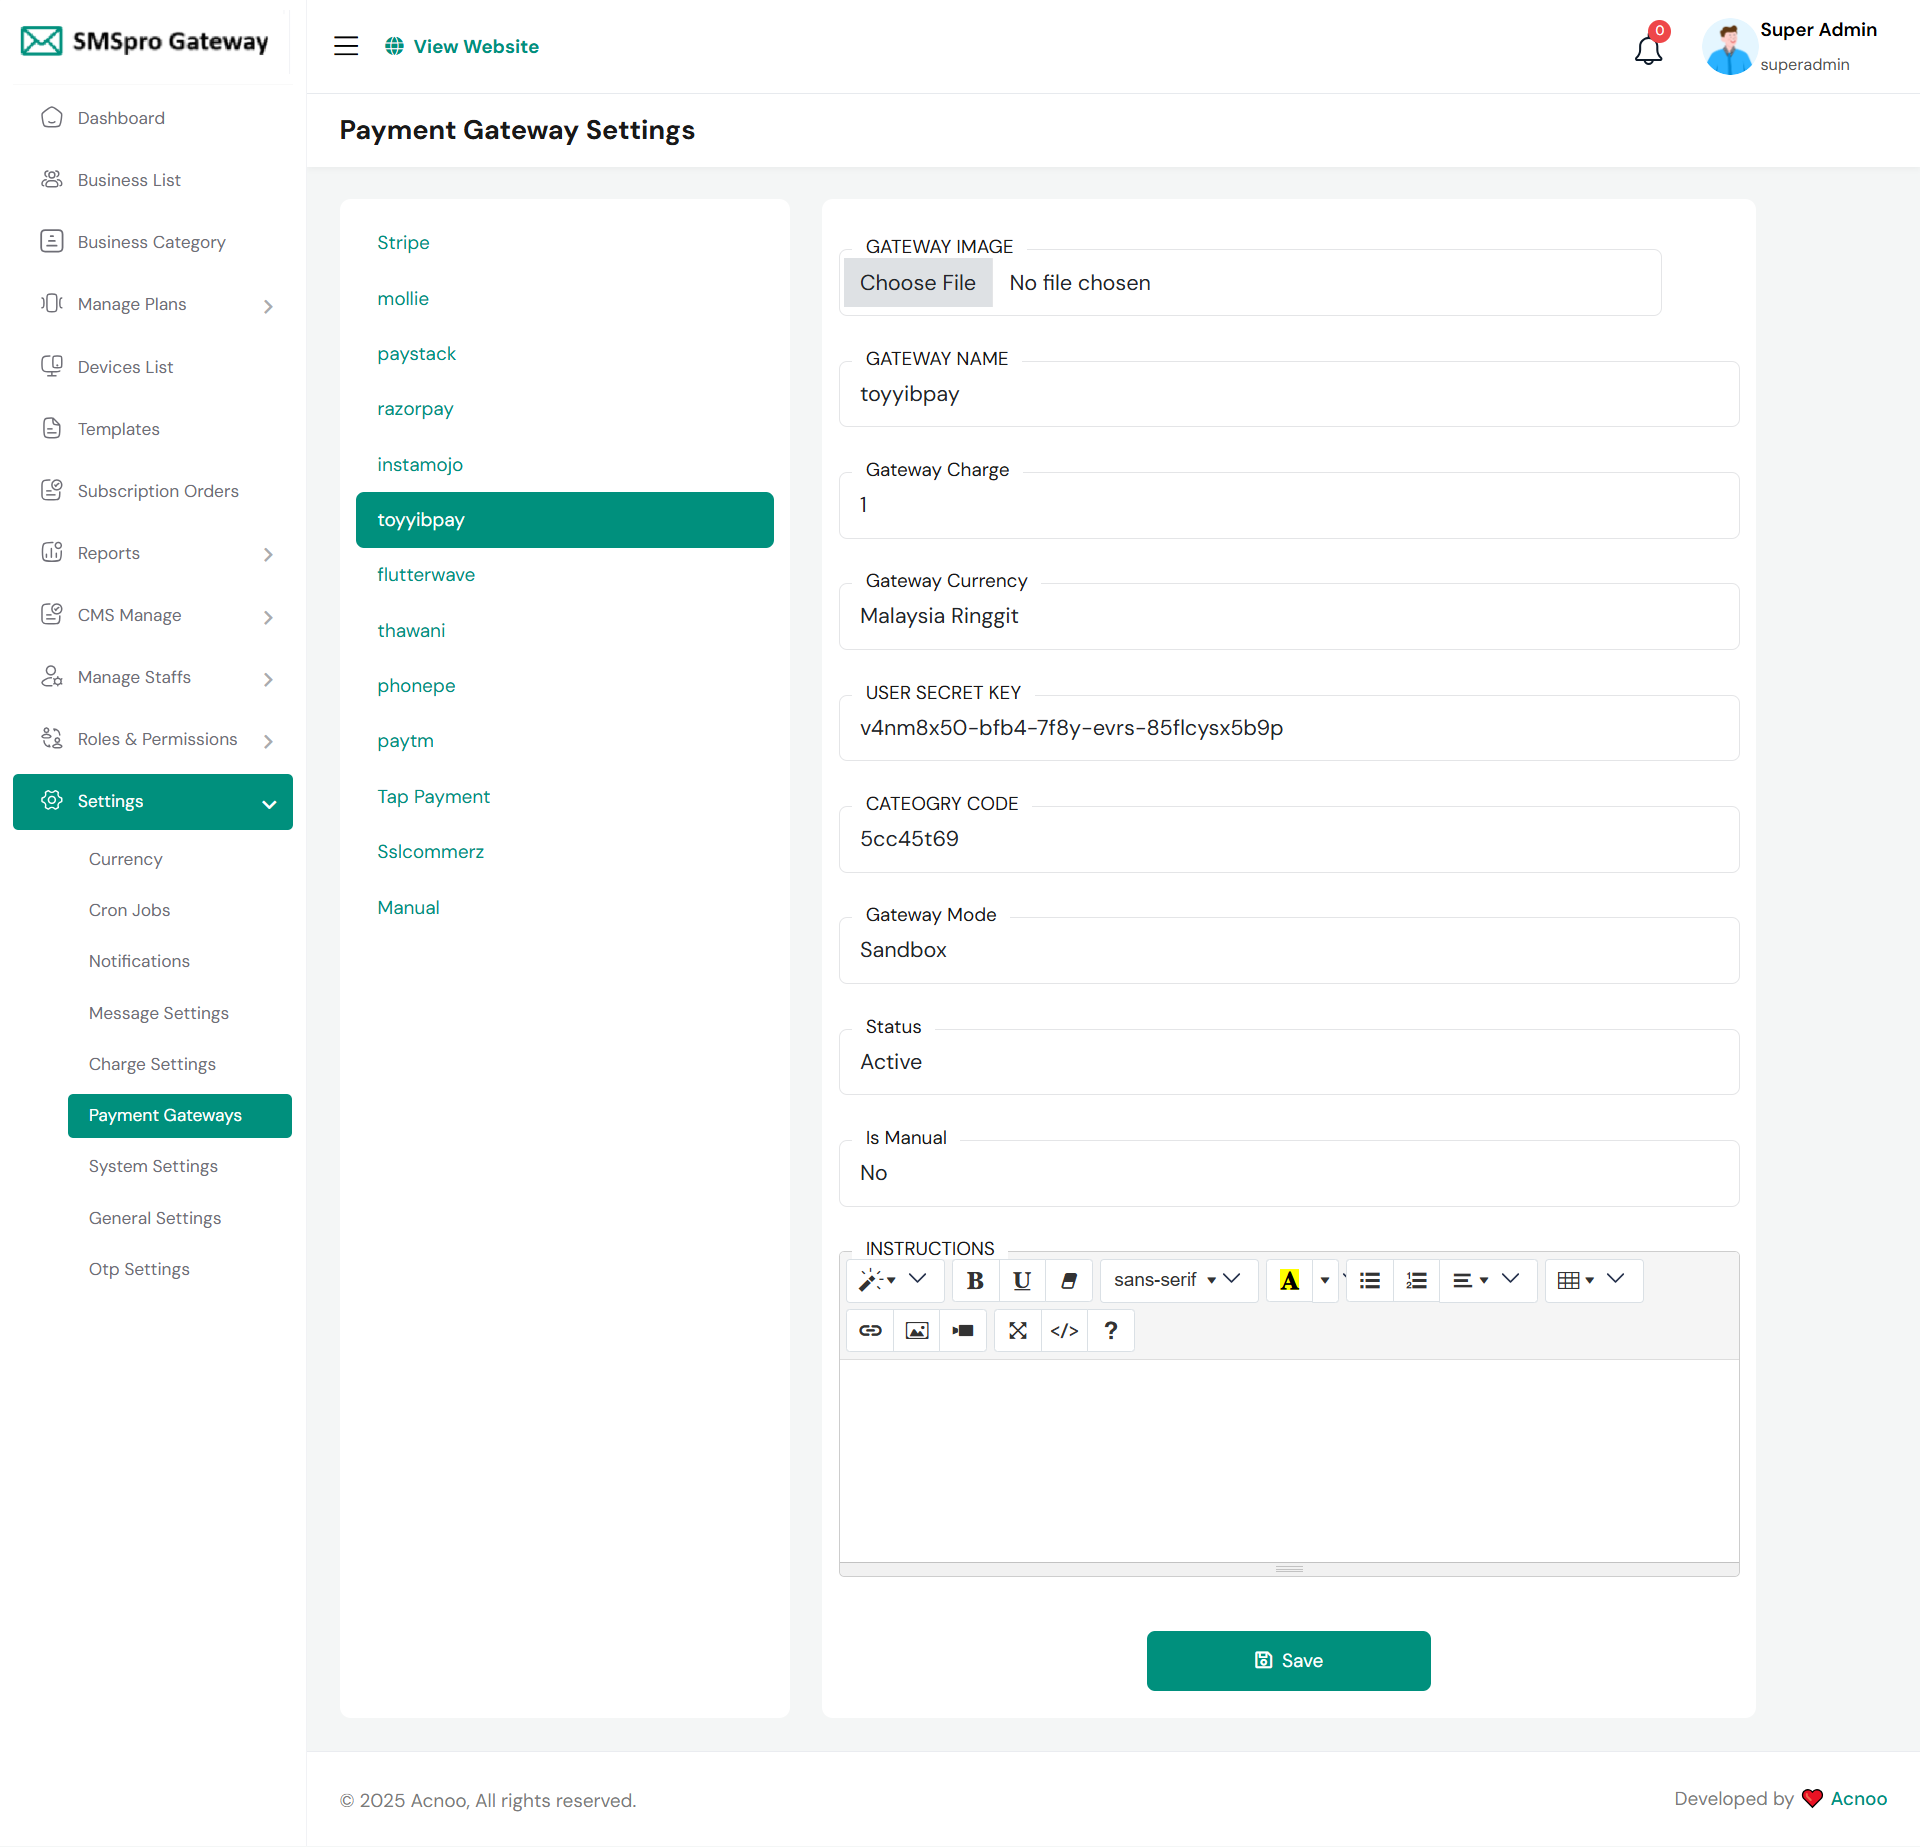
Toyyibpay
To configure ToyyibPay, navigate to the Payment Gateways section in your admin panel. Upload a gateway image and set the GATEWAY NAME to "toyyibpay." Specify the Gateway Charge as a percentage (e.g., 1%) and set the Gateway Currency to "Malaysia Ringgit." Enter your ToyyibPay merchant credentials: the USER SECRET KEY and your unique CATEGORY CODE. Select "Sandbox" mode for testing or switch to "Live" for real transactions. Ensure the Status is set to "Active" and "Is Manual" is set to "No" for automatic processing. Click the "Save" button to finalize the setup and activate ToyyibPay as a payment method on your platform.
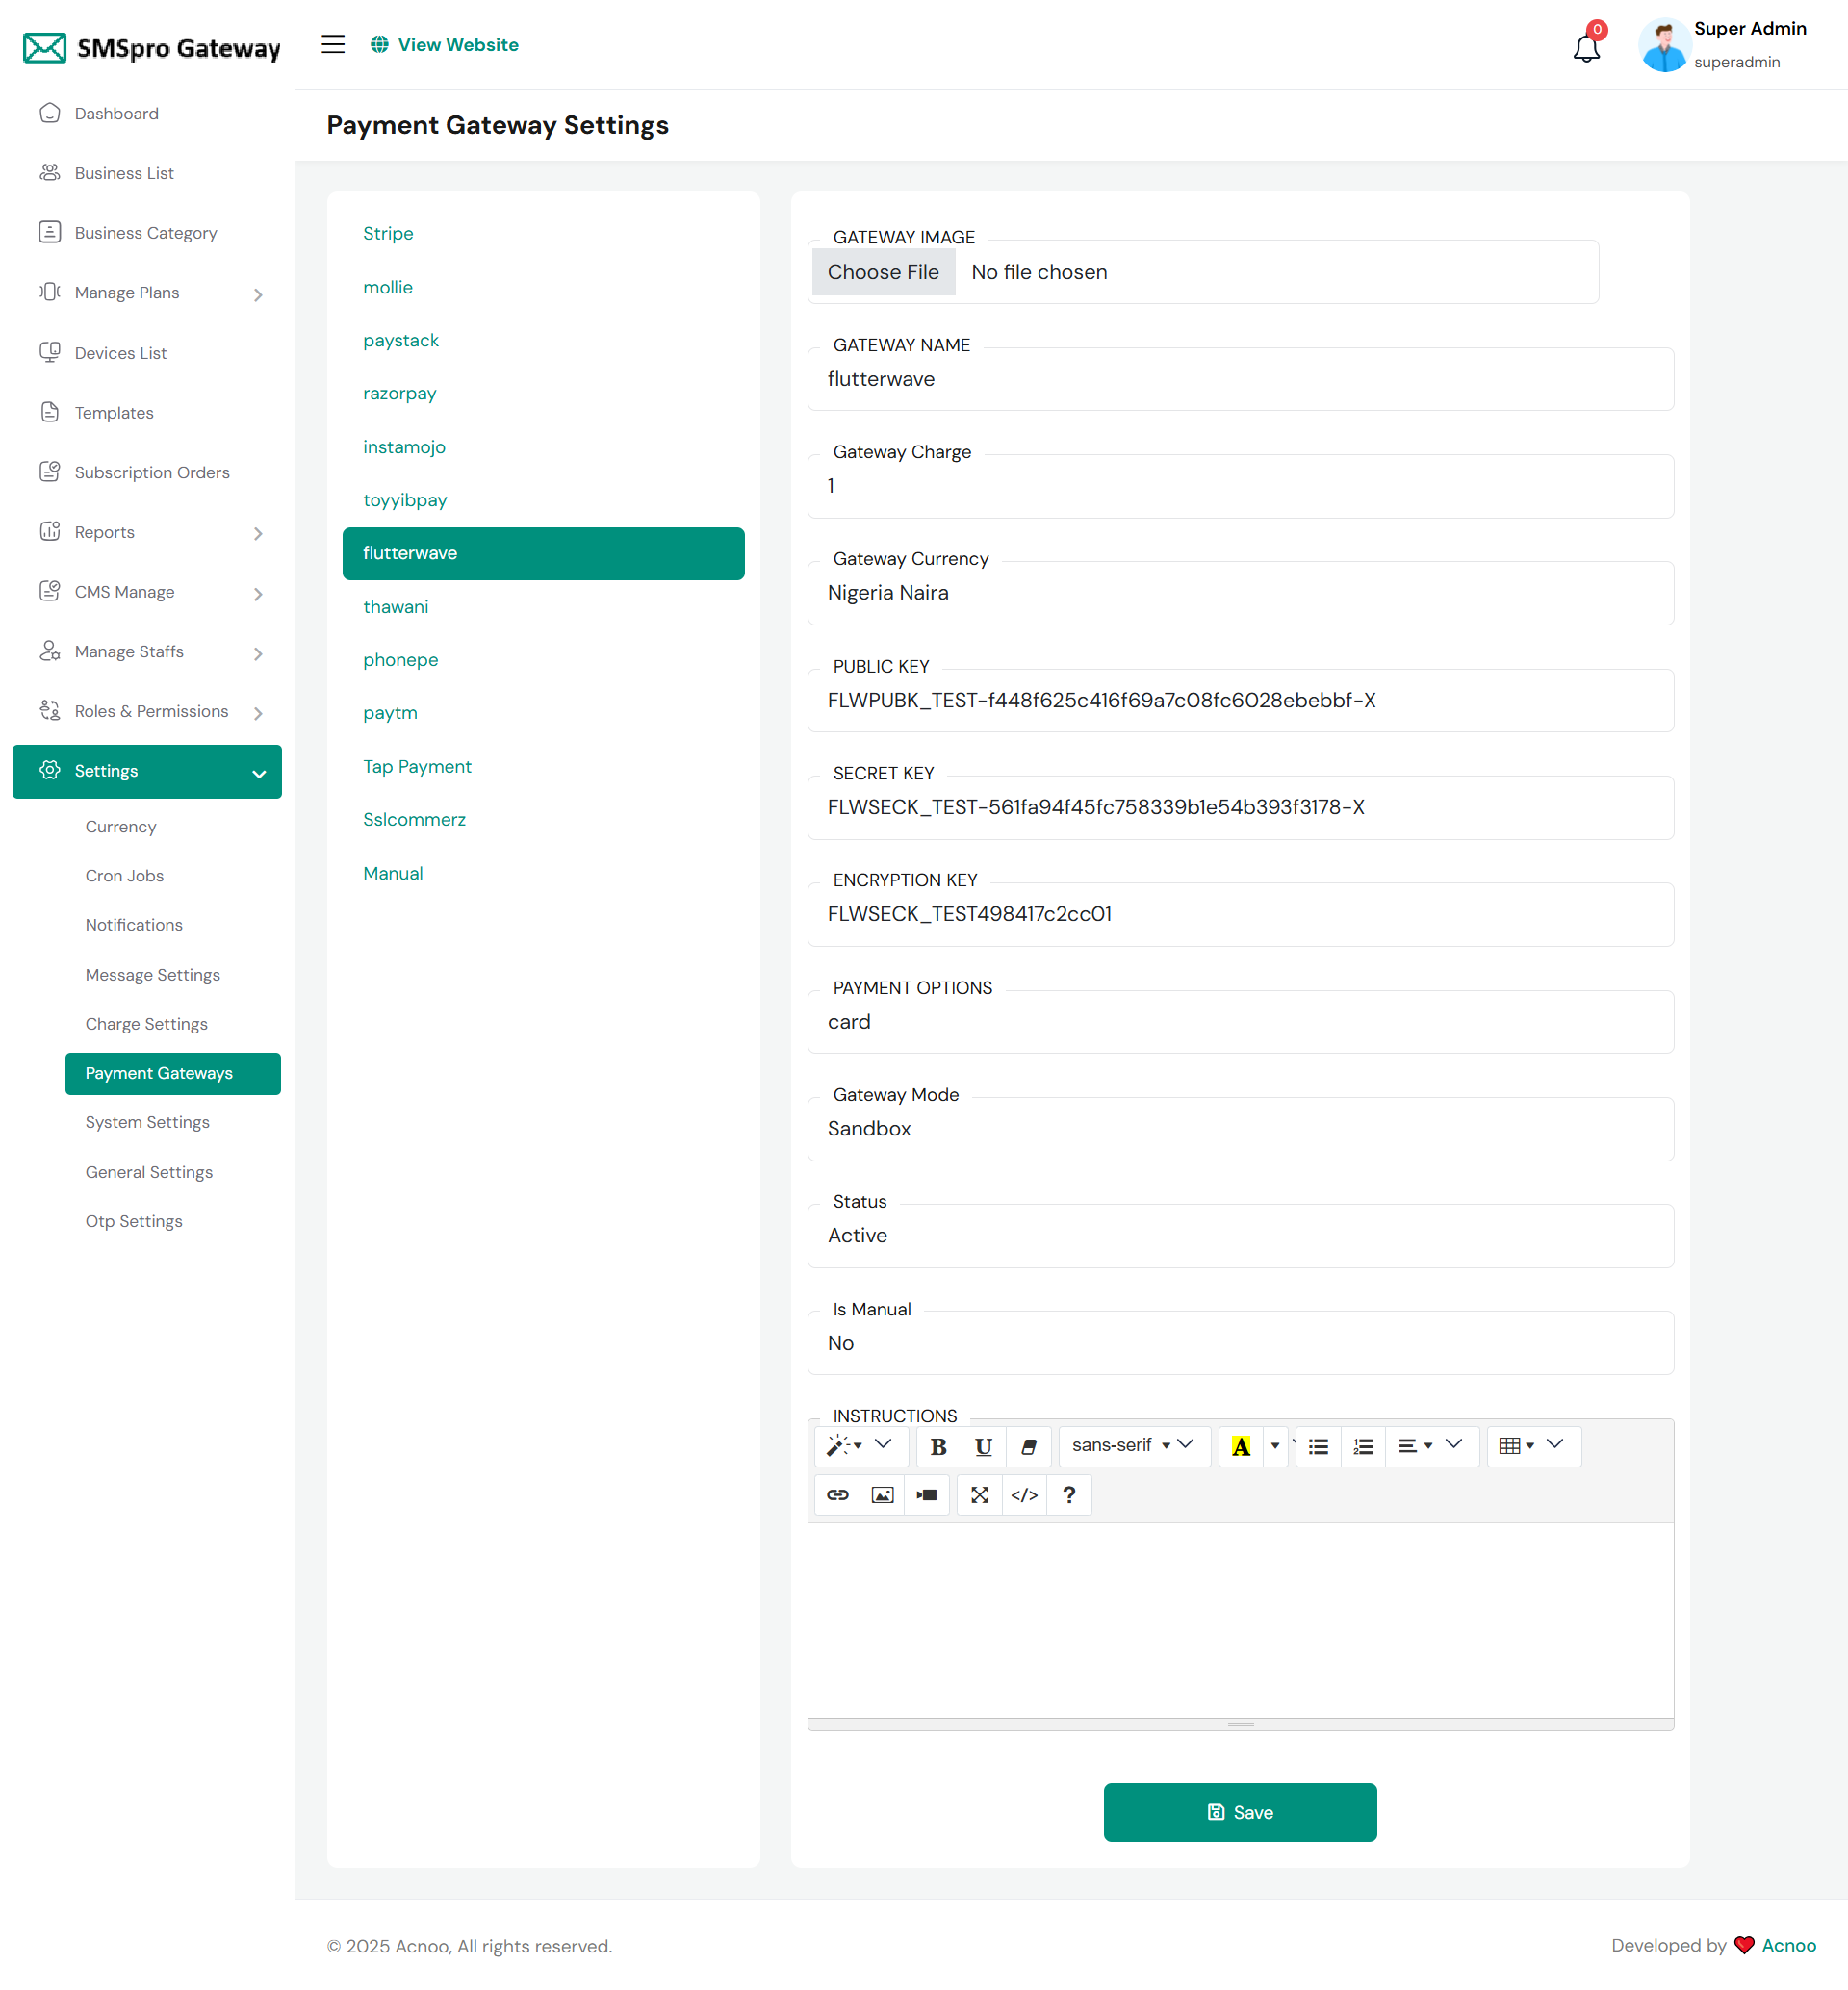
Flutterwave
To configure Flutterwave, go to Payment Gateways in your admin settings. Upload a gateway image and set the name to "flutterwave." Specify the Gateway Charge (e.g., 1%) and set the currency to "Nigeria Naira." Enter your Flutterwave API credentials: the PUBLIC KEY, SECRET KEY, and ENCRYPTION KEY from your dashboard. Select the payment method (e.g., "card") and set the Gateway Mode to "Sandbox" for testing or "Live" for production. Ensure Status is "Active" and "Is Manual" is set to "No" for automatic processing. Add any instructions and click "Save" to activate Flutterwave as a payment option for your platform.
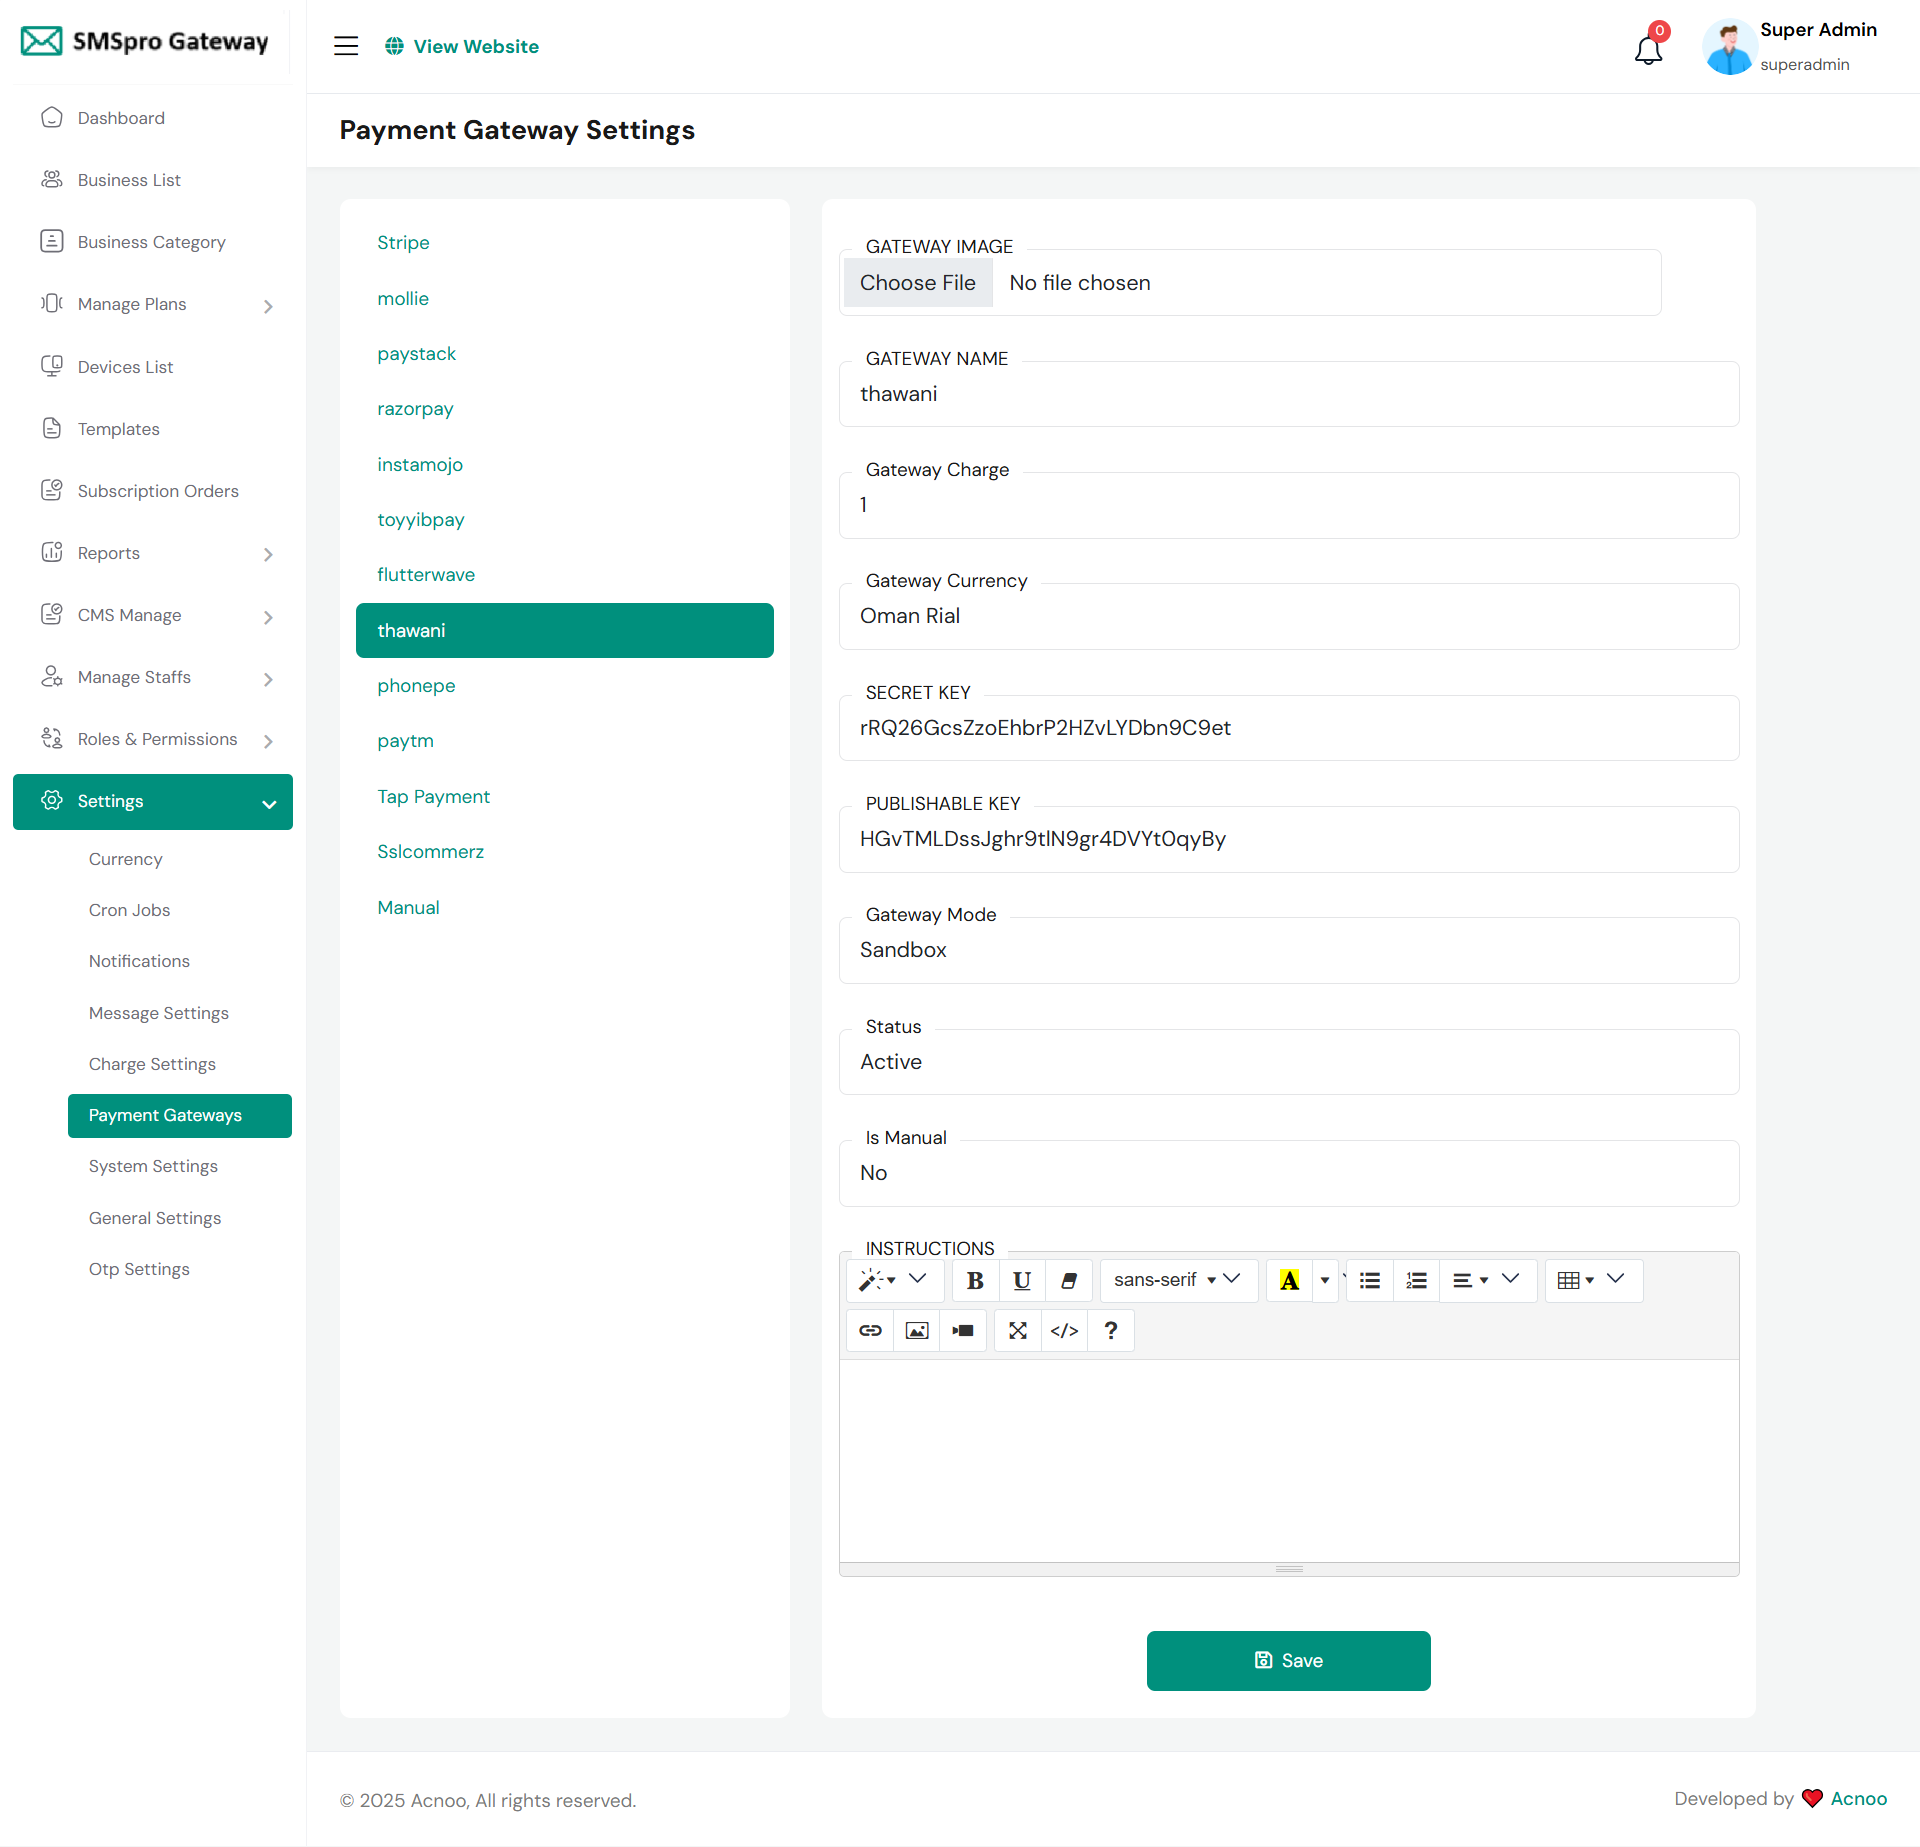
Thawani
To configure Thawani, access the Payment Gateways section in your admin panel. Upload a gateway image and set the GATEWAY NAME to "thawani." Specify the Gateway Charge as a percentage (e.g., 1%) and set the Gateway Currency to "Omani Rial." Enter your Thawani merchant credentials: the SECRET KEY and PUBLISHABLE KEY from your account. Select the Gateway Mode as "Sandbox" for testing or switch to "Live" for real transactions. Ensure the Status is set to "Active" and confirm "Is Manual" is set to "No" for automatic payment processing. Click the "Save" button to complete the setup and activate Thawani as a payment method on your platform.
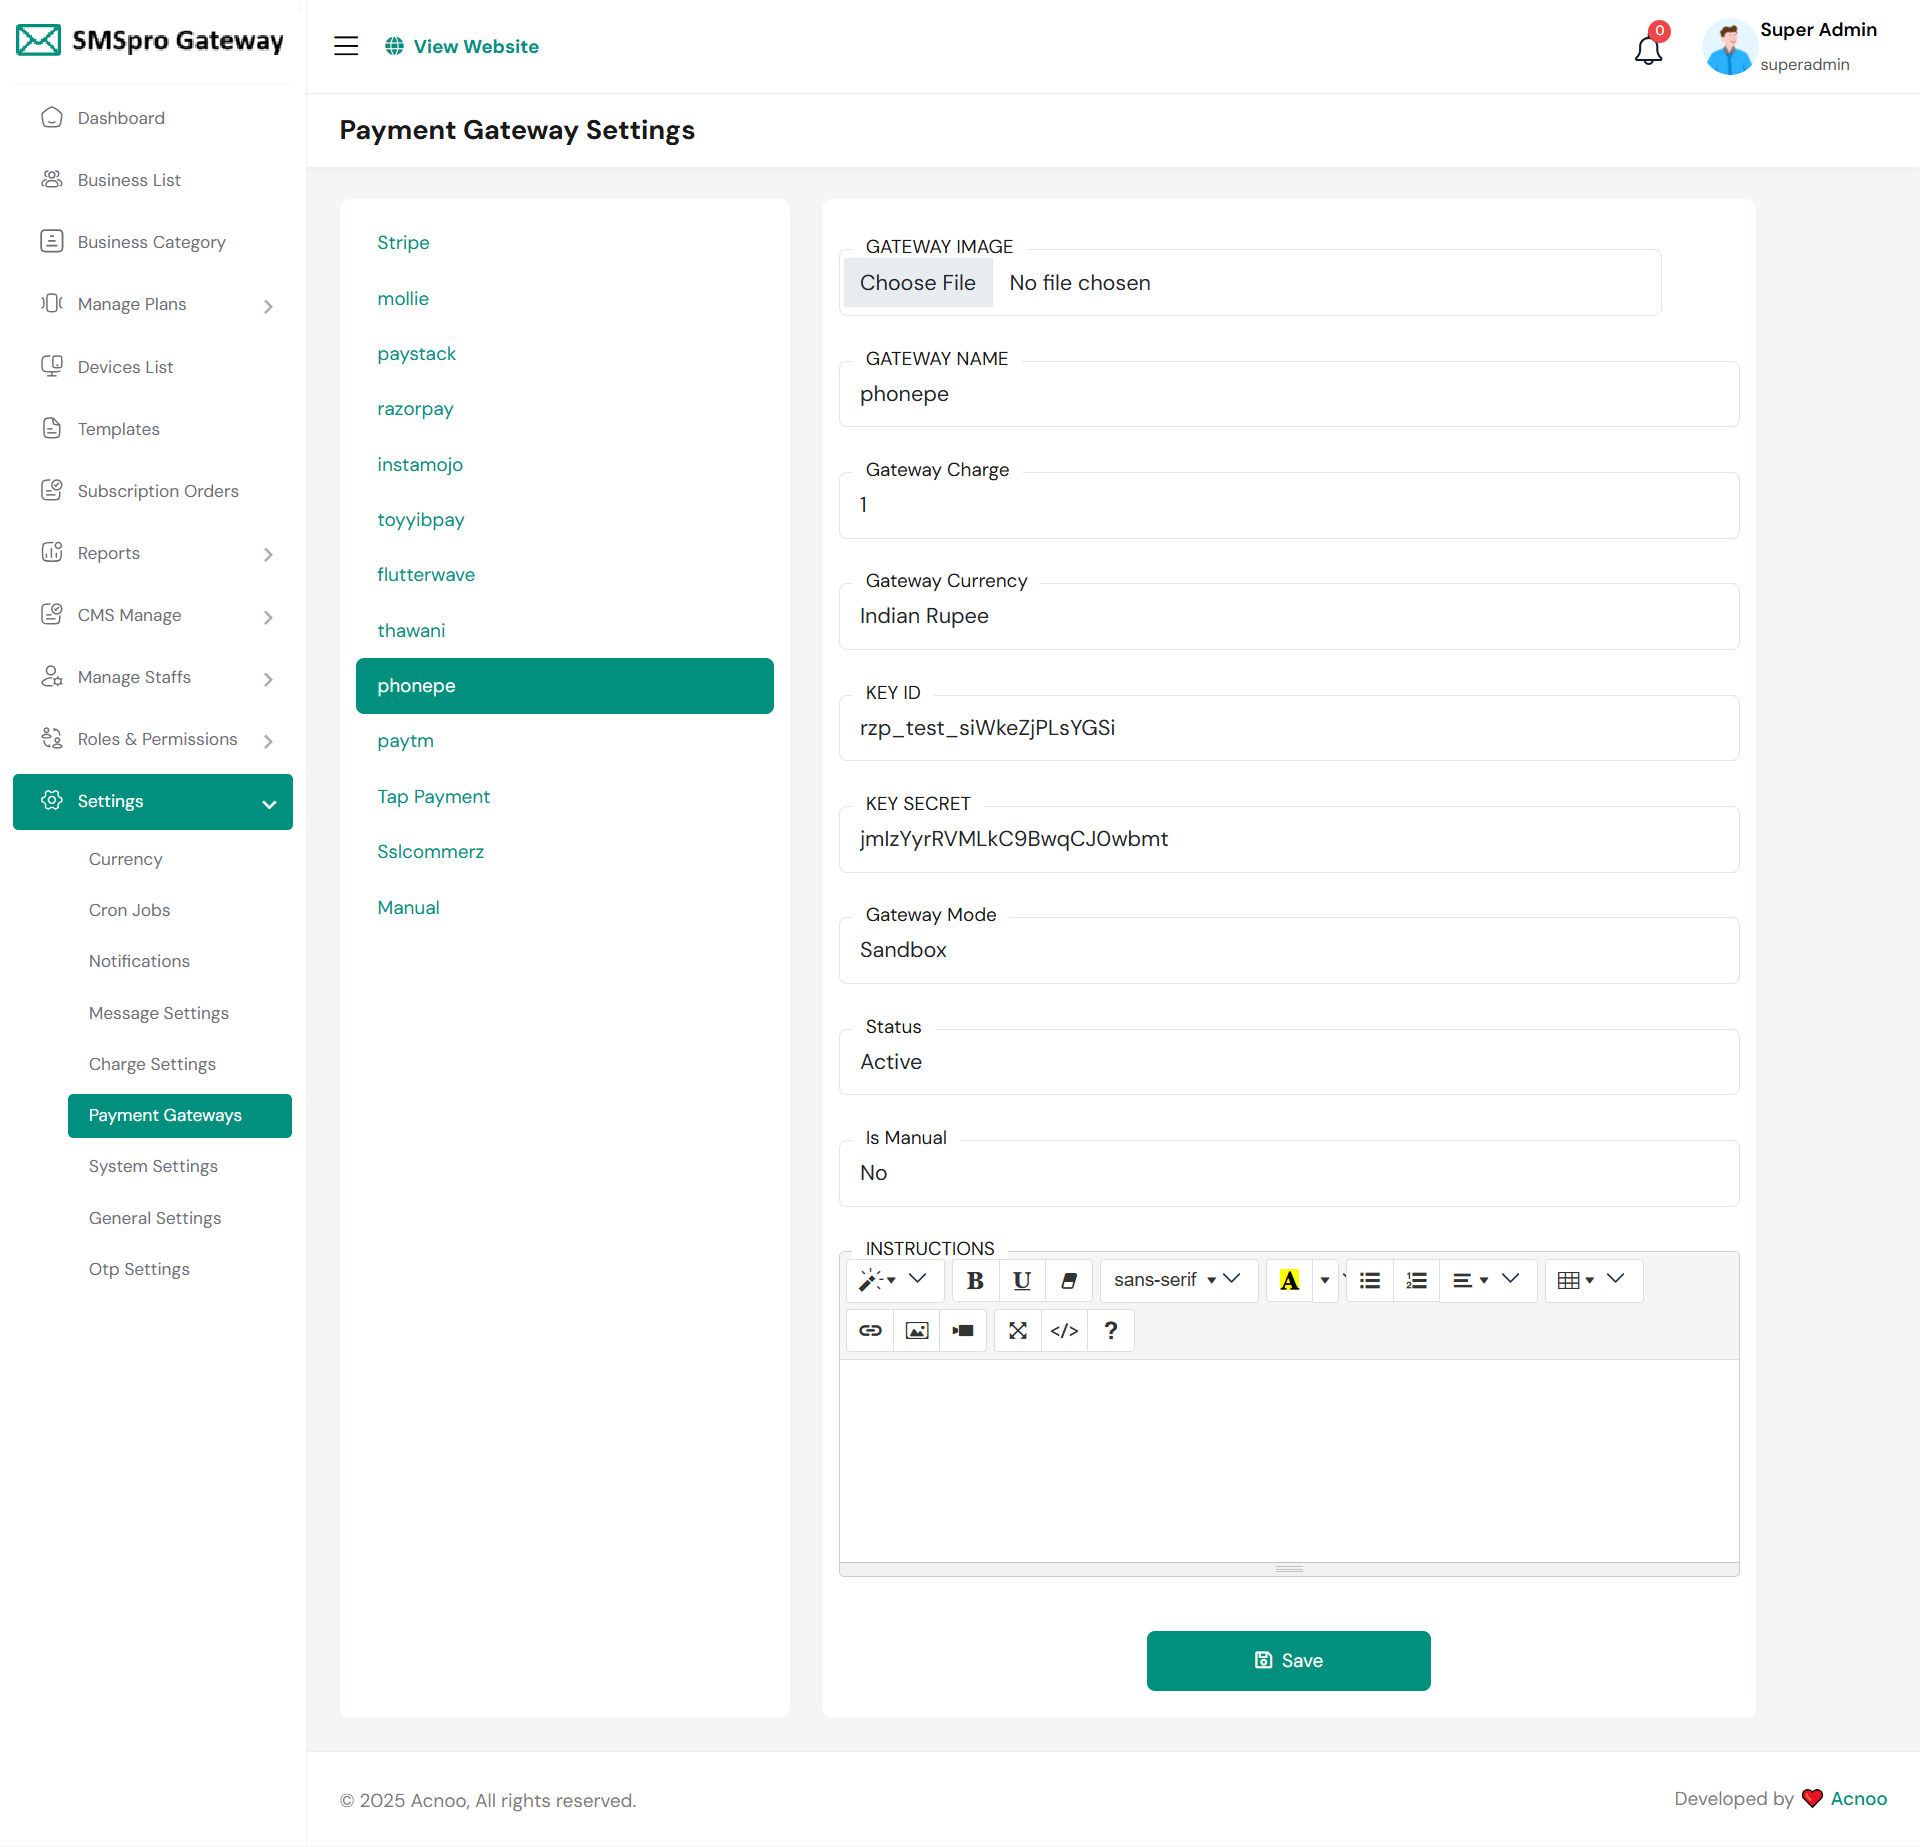
Phonepe
To configure PhonePe, navigate to the Payment Gateways section in your admin panel. Upload a gateway image and set the GATEWAY NAME to "phonepe." Specify the Gateway Charge as a percentage (e.g., 1%) and set the Gateway Currency to "Indian Rupee." Enter your PhonePe merchant credentials: the KEY ID and KEY SECRET provided by your payment gateway account. Select the Gateway Mode as "Sandbox" for testing or switch to "Live" for processing real transactions. Ensure the Status is set to "Active" and confirm "Is Manual" is set to "No" for automatic payment processing. Click the "Save" button to activate PhonePe as a payment method on your platform.
Paytm
To configure Paytm, access the Payment Gateways section in your admin panel. Upload a gateway image and set the GATEWAY NAME to "paytm." Specify the Gateway Charge as a percentage (e.g., 1%) and set the Gateway Currency to "Indian Rupee." Enter your Paytm merchant credentials: the MERCHANT ID and MERCHANT KEY from your business account. Configure additional parameters including CHANNEL (WEB), INDUSTRY TYPE (Retail), and WEBSITE name. Select the Gateway Mode as "Sandbox" for testing or switch to "Live" for production transactions. Ensure the Status is "Active" and "Is Manual" is set to "No" for automatic processing. Click "Save" to activate Paytm payments.

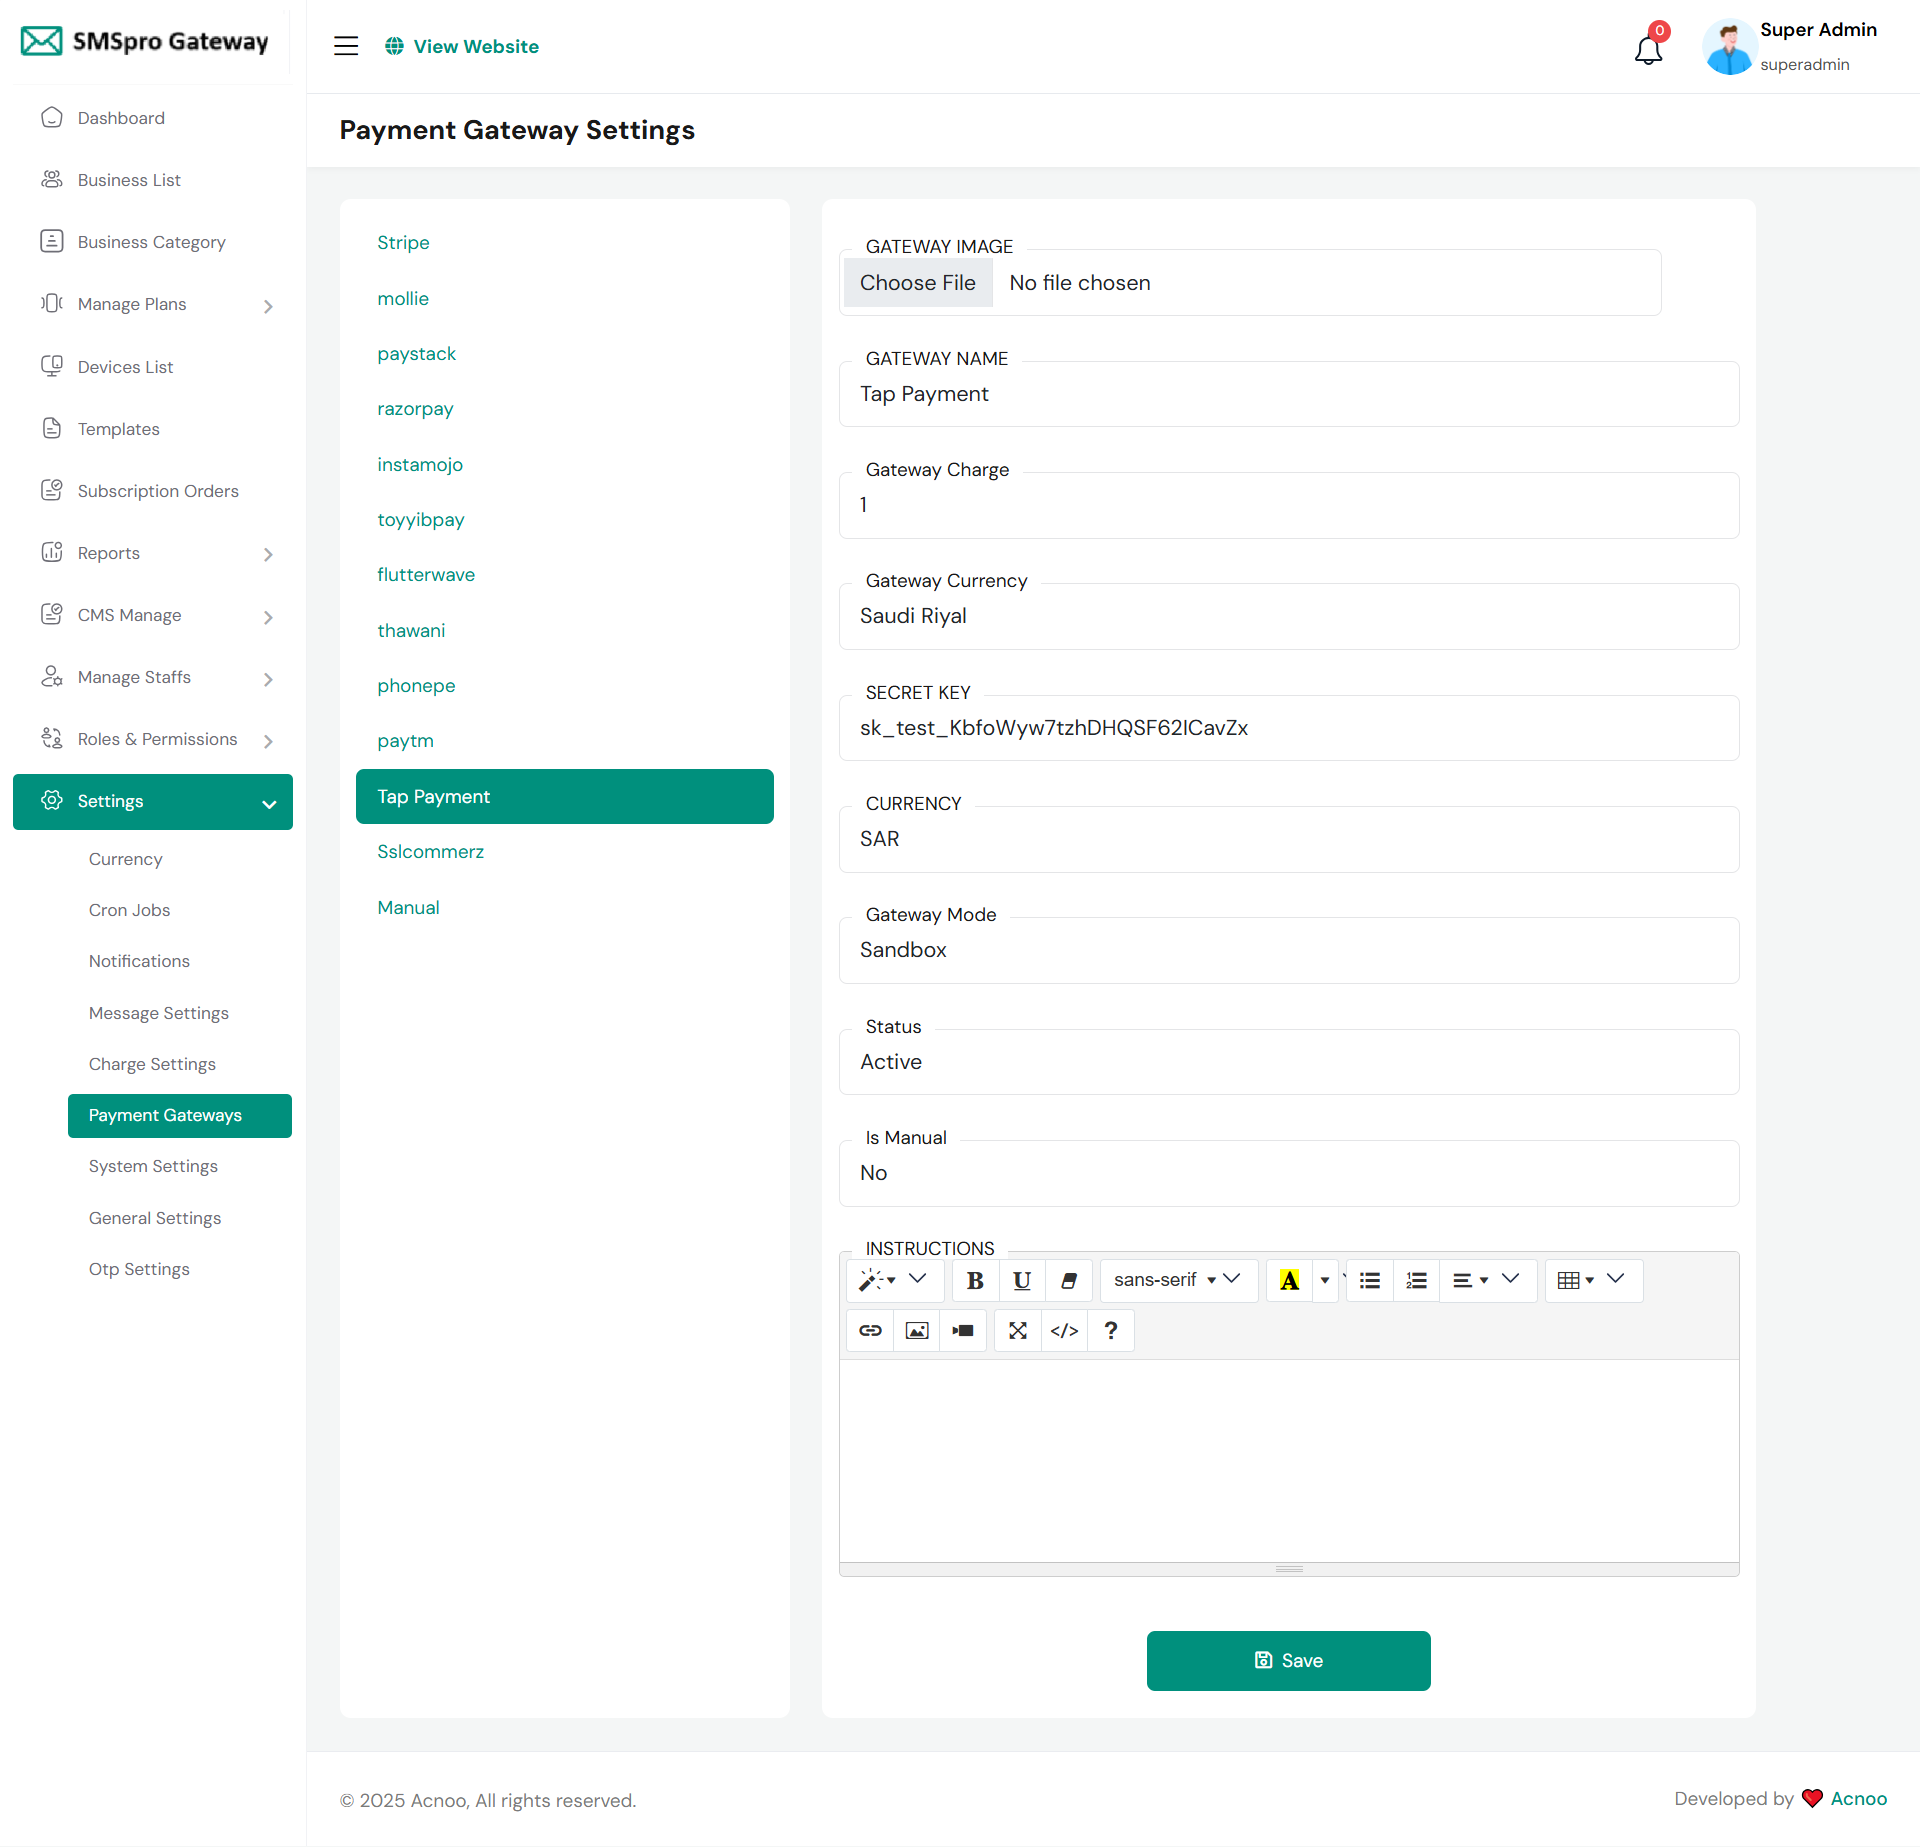
Tap Payment
To configure Tap Payment, navigate to the Payment Gateways section in your admin panel. Upload a gateway image and set the GATEWAY NAME to "Tap Payment." Specify the Gateway Charge as a percentage (e.g., 1%) and set the Gateway Currency to "Saudi Riyal." Enter your Tap Payment merchant credentials: the SECRET KEY from your business account and set the CURRENCY code to SAR. Select the Gateway Mode as "Sandbox" for testing or switch to "Live" for processing real transactions. Ensure the Status is set to "Active" and confirm "Is Manual" is set to "No" for automatic payment processing. Click the "Save" button to activate Tap Payment on your platform.
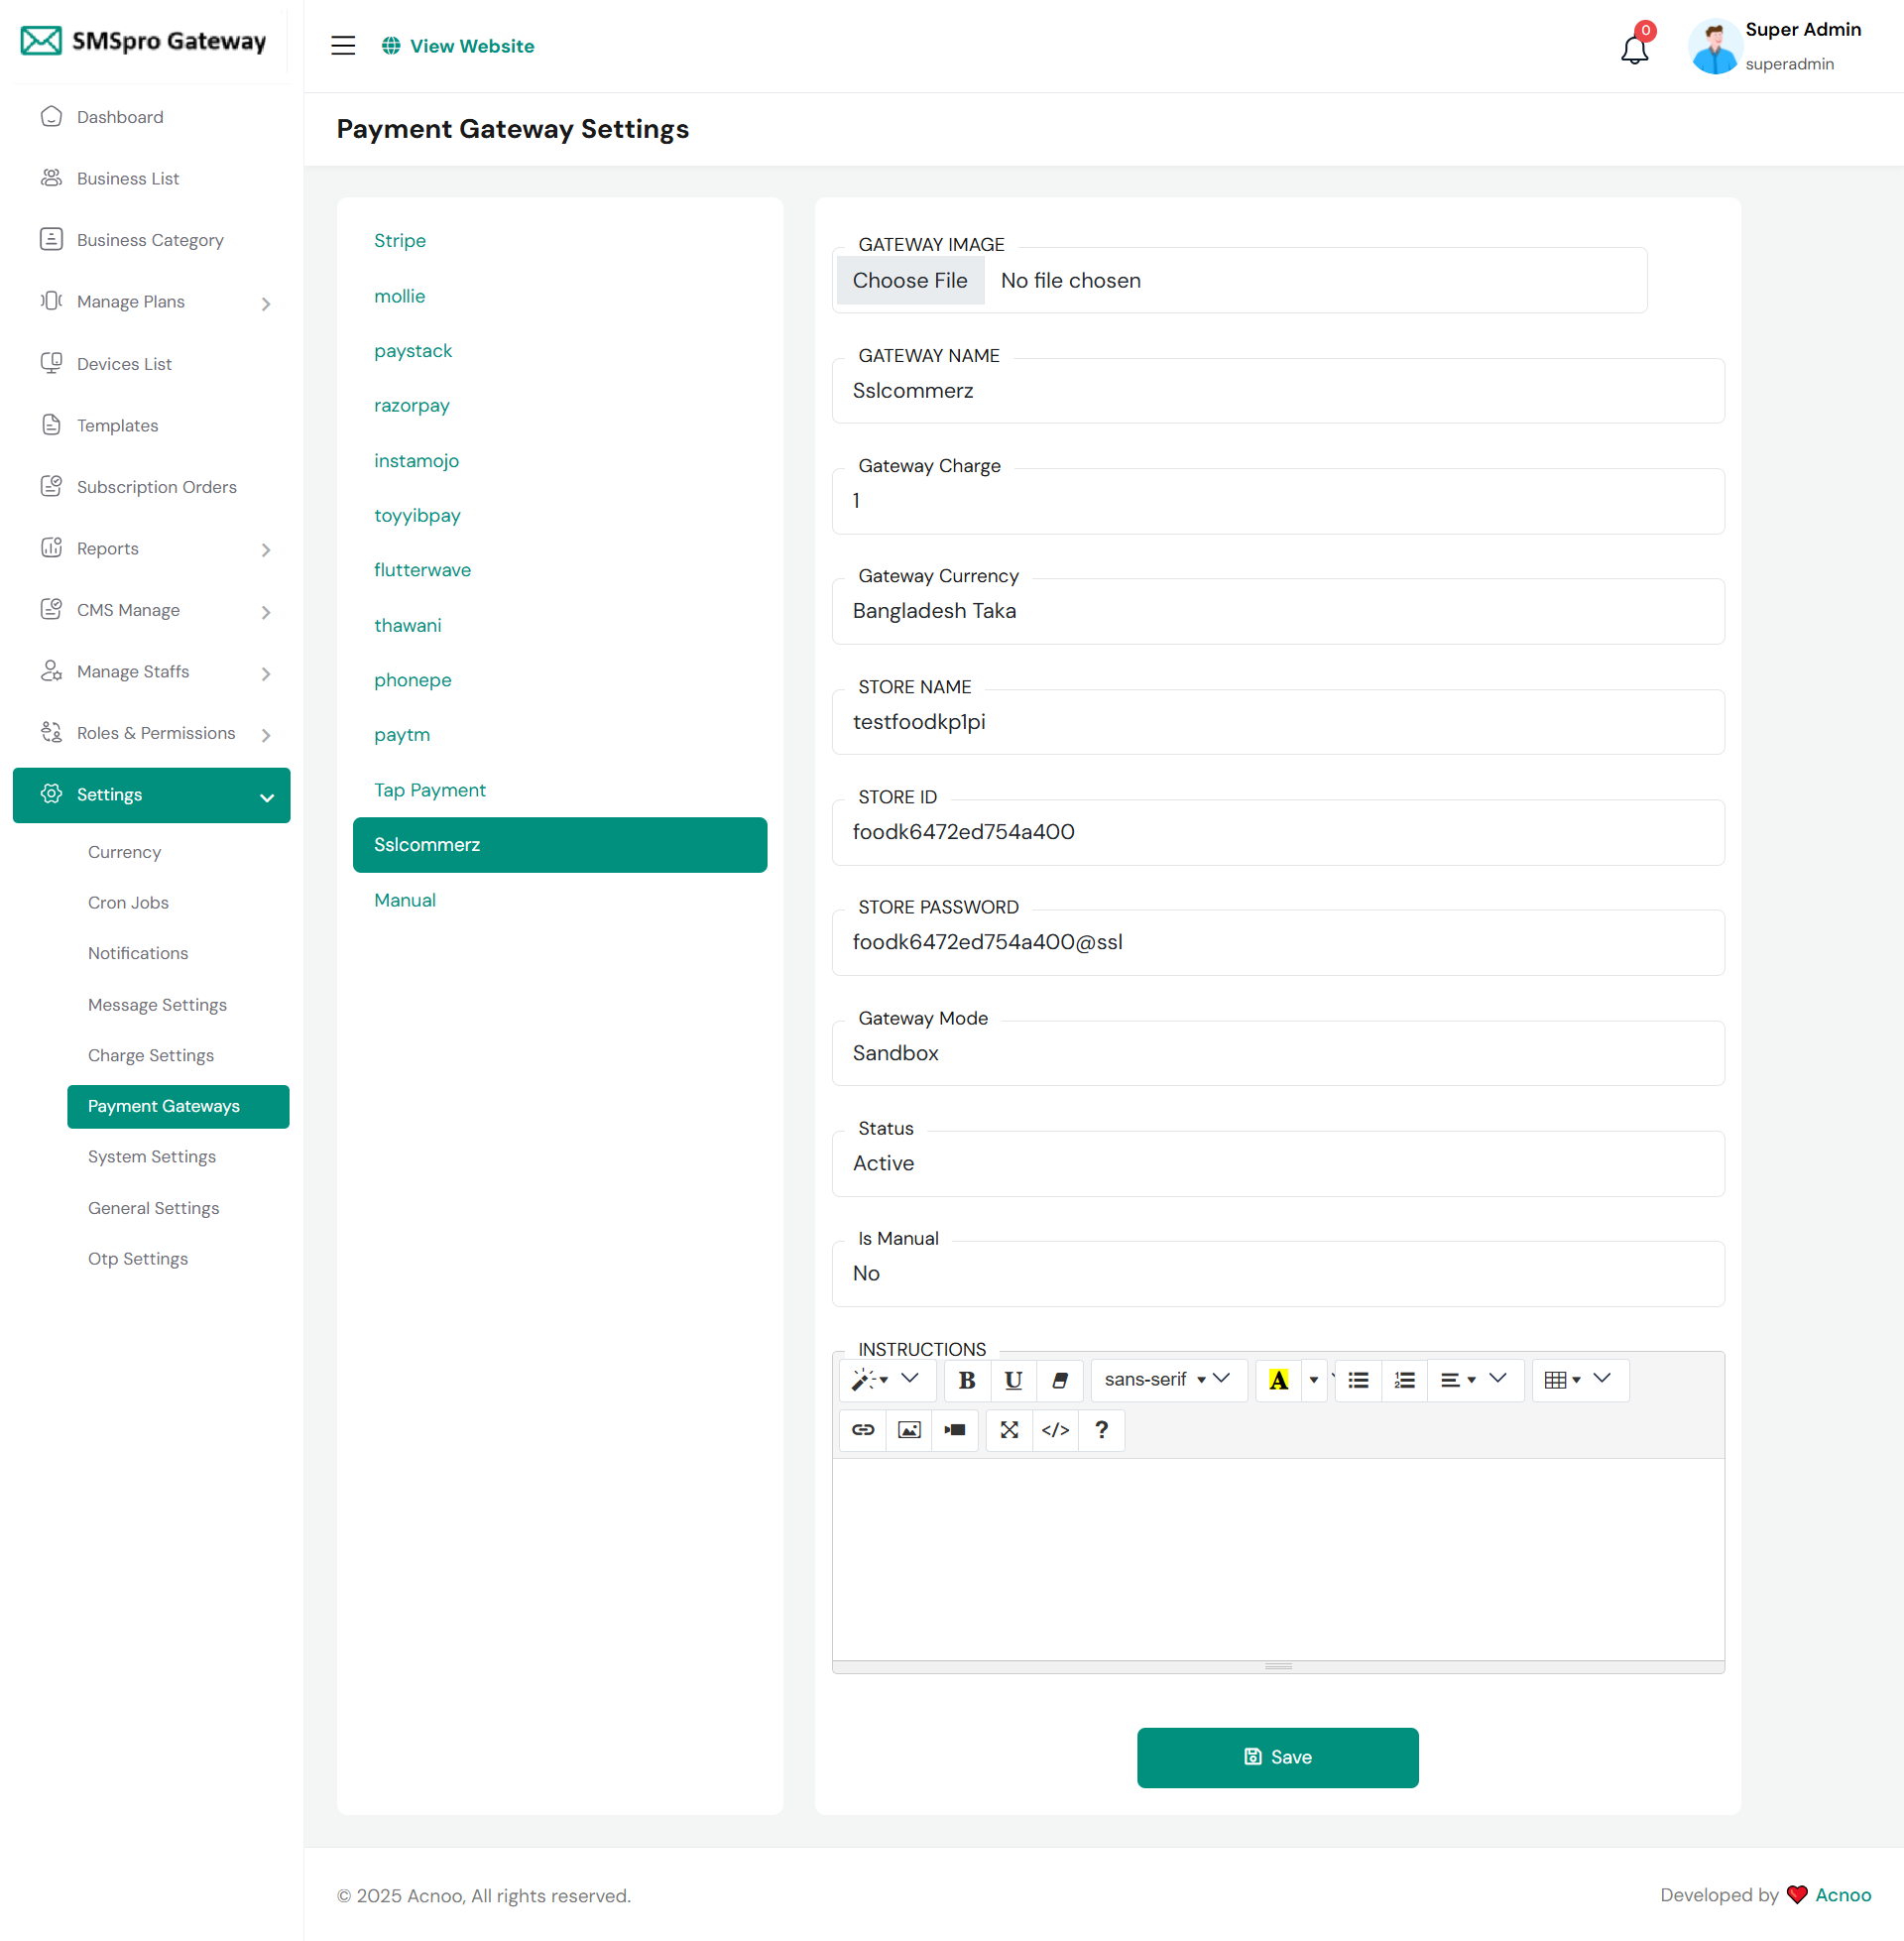
Sslcommerz
To configure SSLCOMMERZ, go to Payment Gateways in your admin settings. Upload a gateway image and set the GATEWAY NAME to "sslcommerz." Specify the Gateway Charge (e.g., 1%) and set the currency to "Bangladesh Taka." Enter your SSLCOMMERZ merchant credentials: the STORE NAME, STORE ID, and STORE PASSWORD from your business account. Set the Gateway Mode to "Sandbox" for testing or "Live" for production. Ensure Status is "Active" and "Is Manual" is set to "No" for automated processing. Add any instructions and click "Save" to activate SSLCOMMERZ, enabling it as a payment option for customers in Bangladesh.
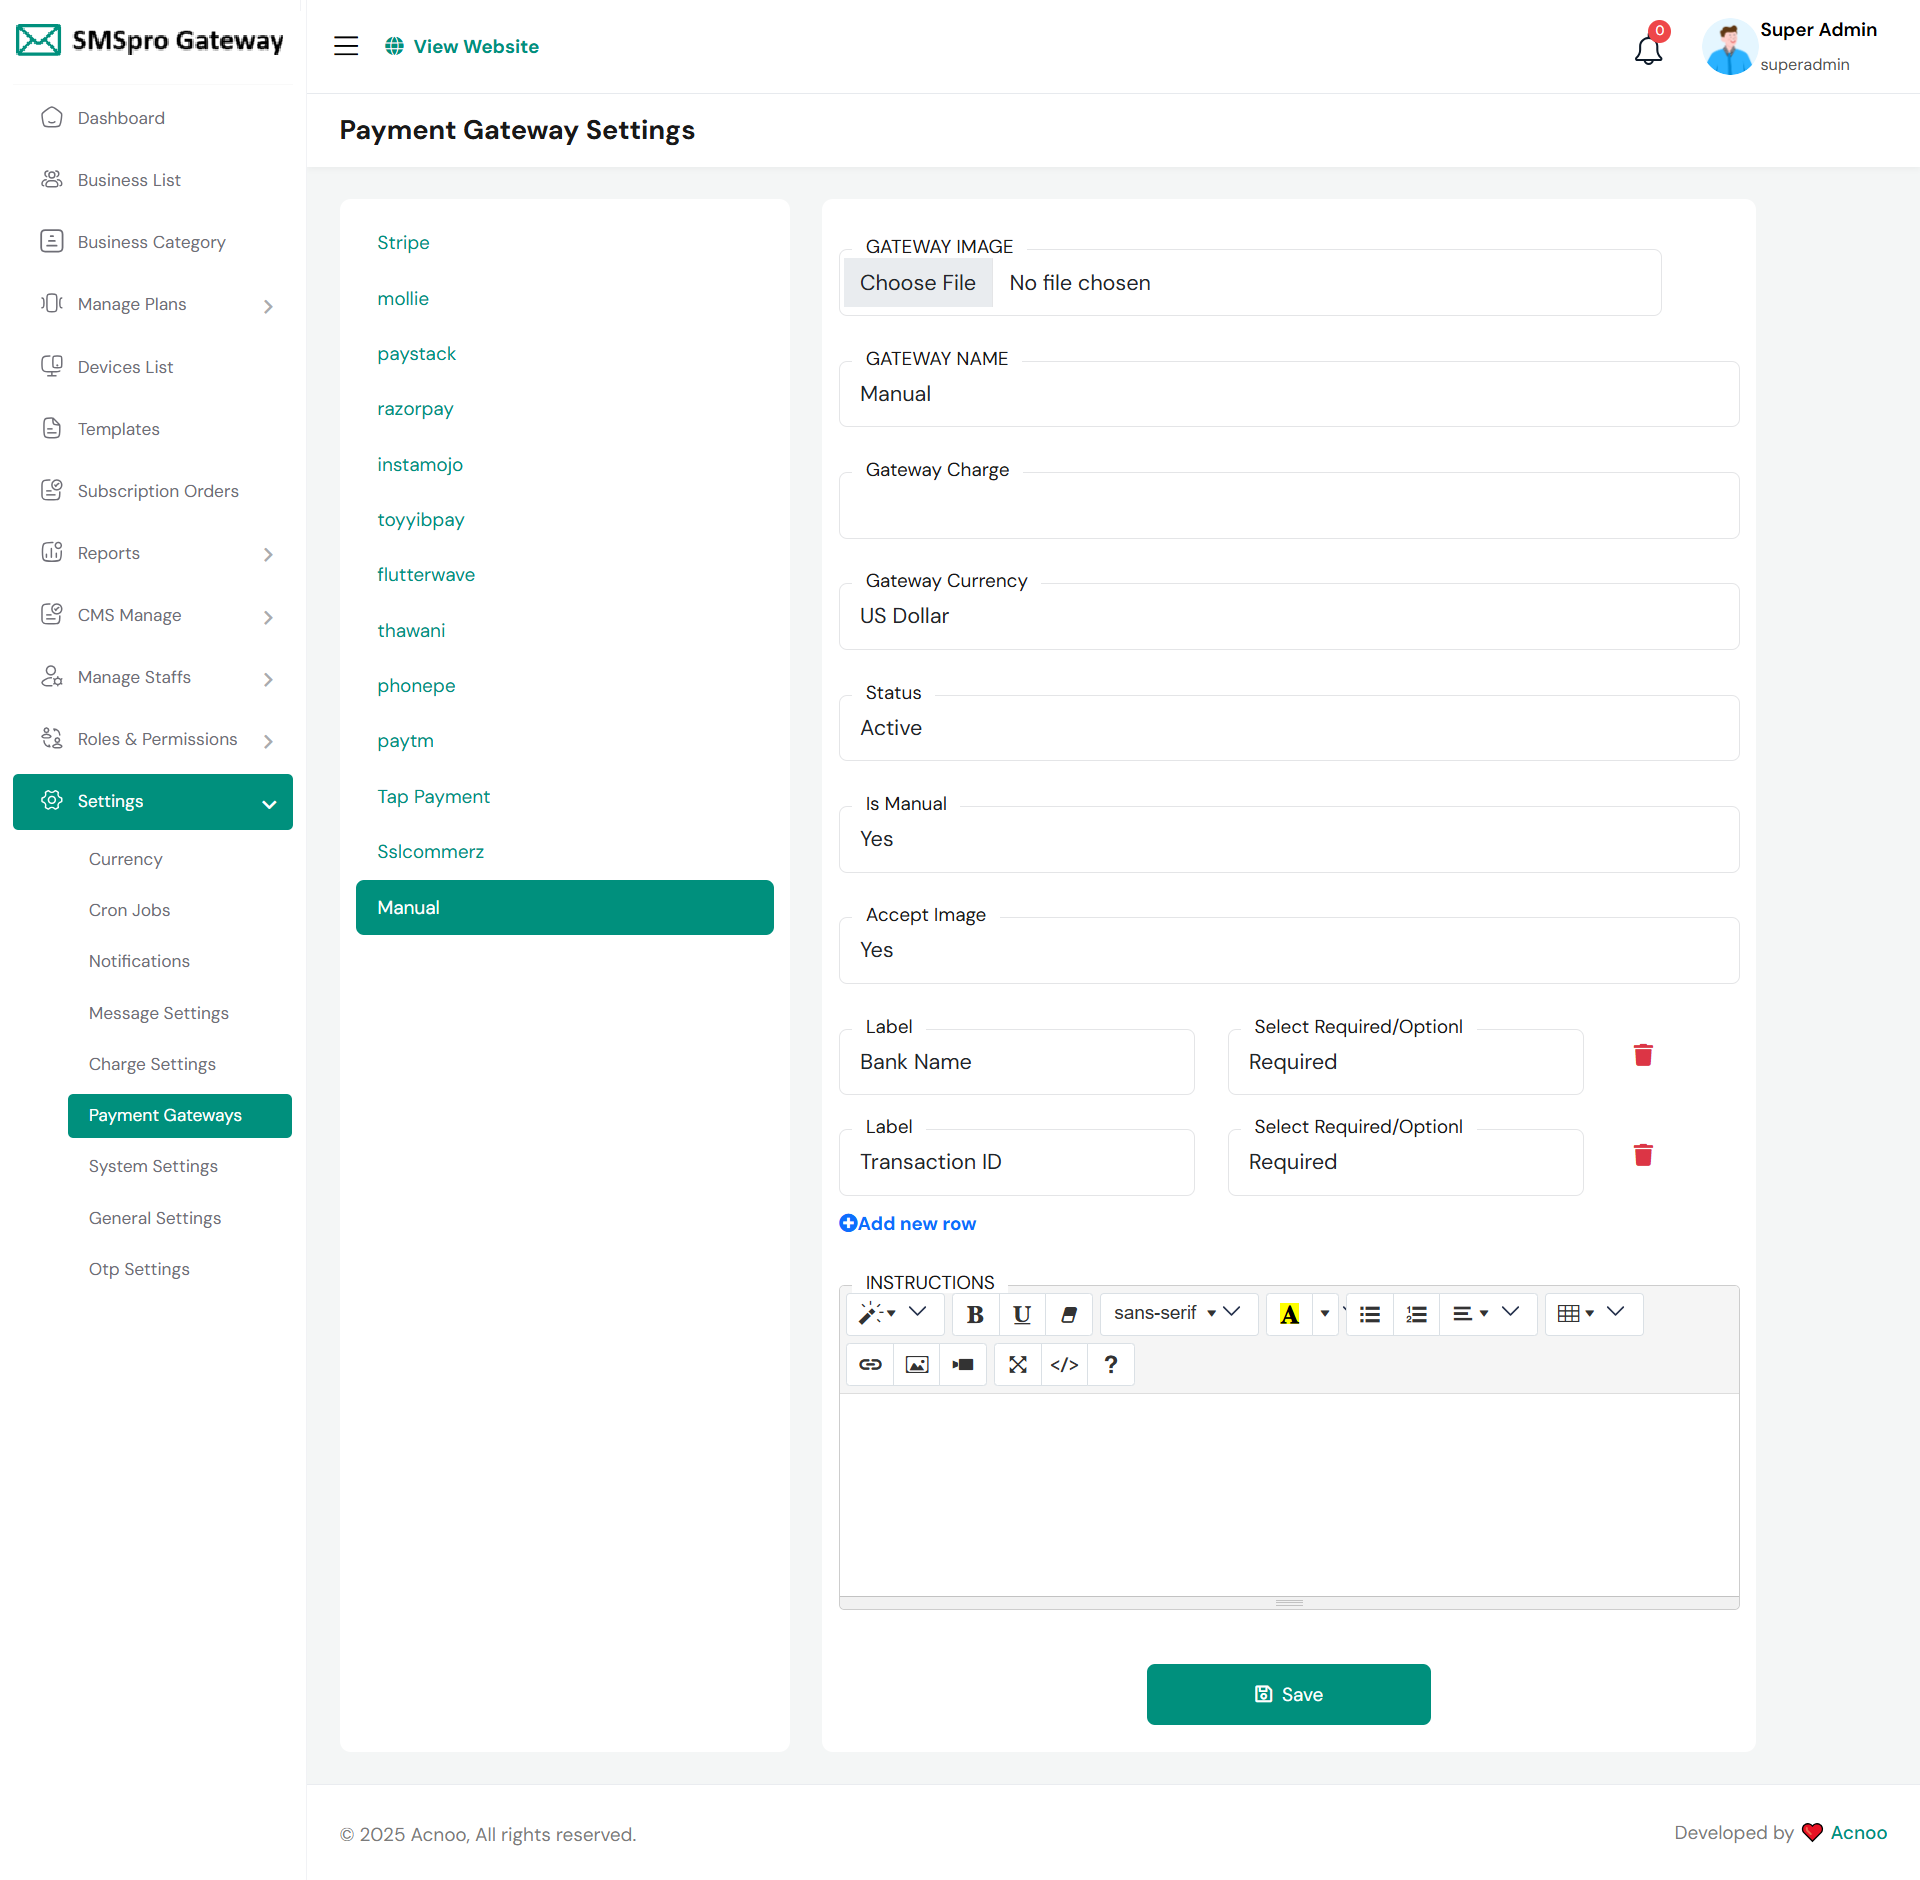
Manual
To configure Manual payment, select it from the Payment Gateways list. Set the GATEWAY NAME to "Manual" and specify the Gateway Charge and Currency (e.g., US Dollar). Unlike automated gateways, set "Is Manual" to "Yes" and "Accept Image" to "Yes" to allow proof uploads. Configure required fields for bank transfers by setting Labels like "Bank Name" and "Transaction ID" as "Required" using the "Add new row" option. Set Status to "Active" and add any payment instructions. This method requires manual verification of payments by an administrator before order confirmation is completed.
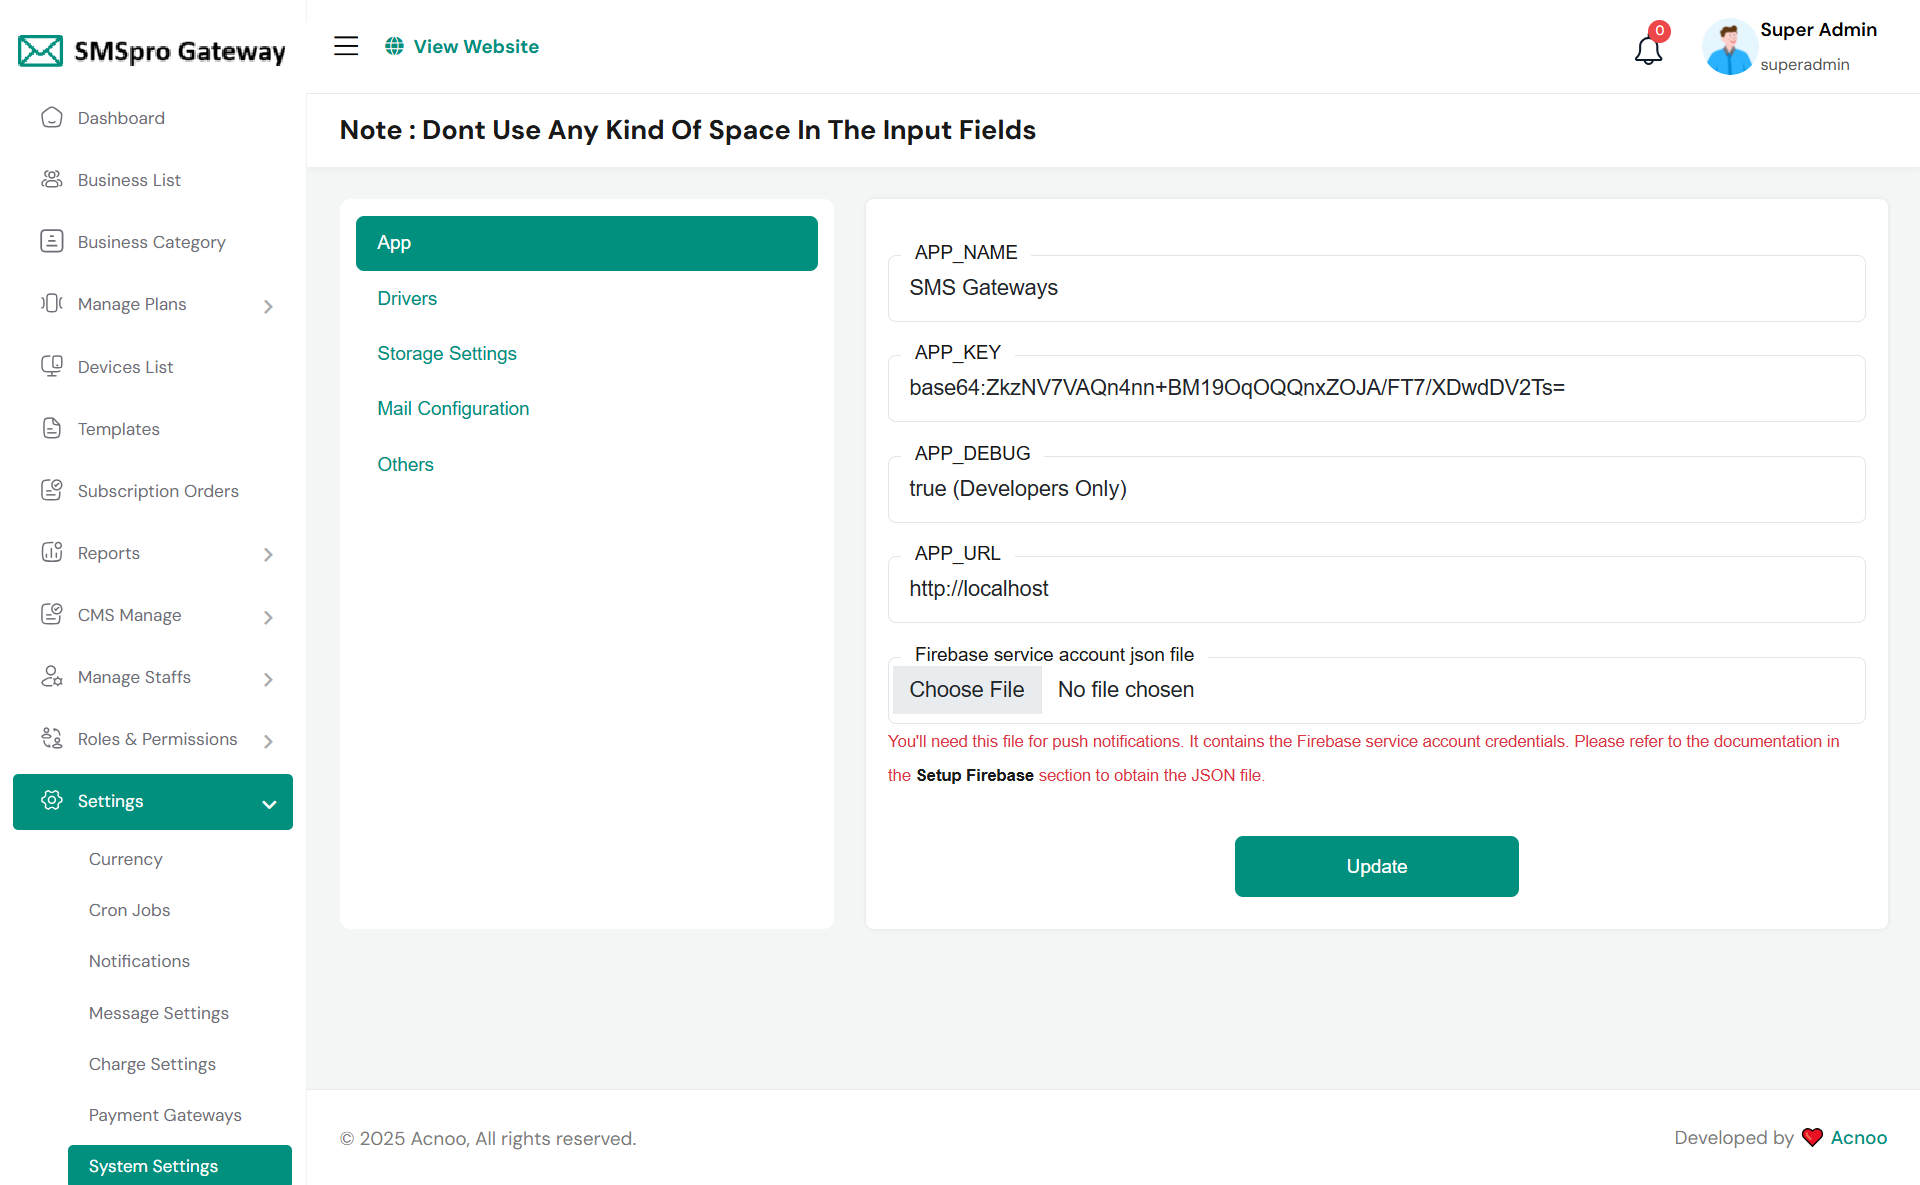
System Settings
In this section, you can configure various backend settings for the project, including application setup, driver configurations, mail settings, storage configurations, and other essential components. It's crucial to handle these configurations with care as they impact the functionality and security of the system.
App
Drivers

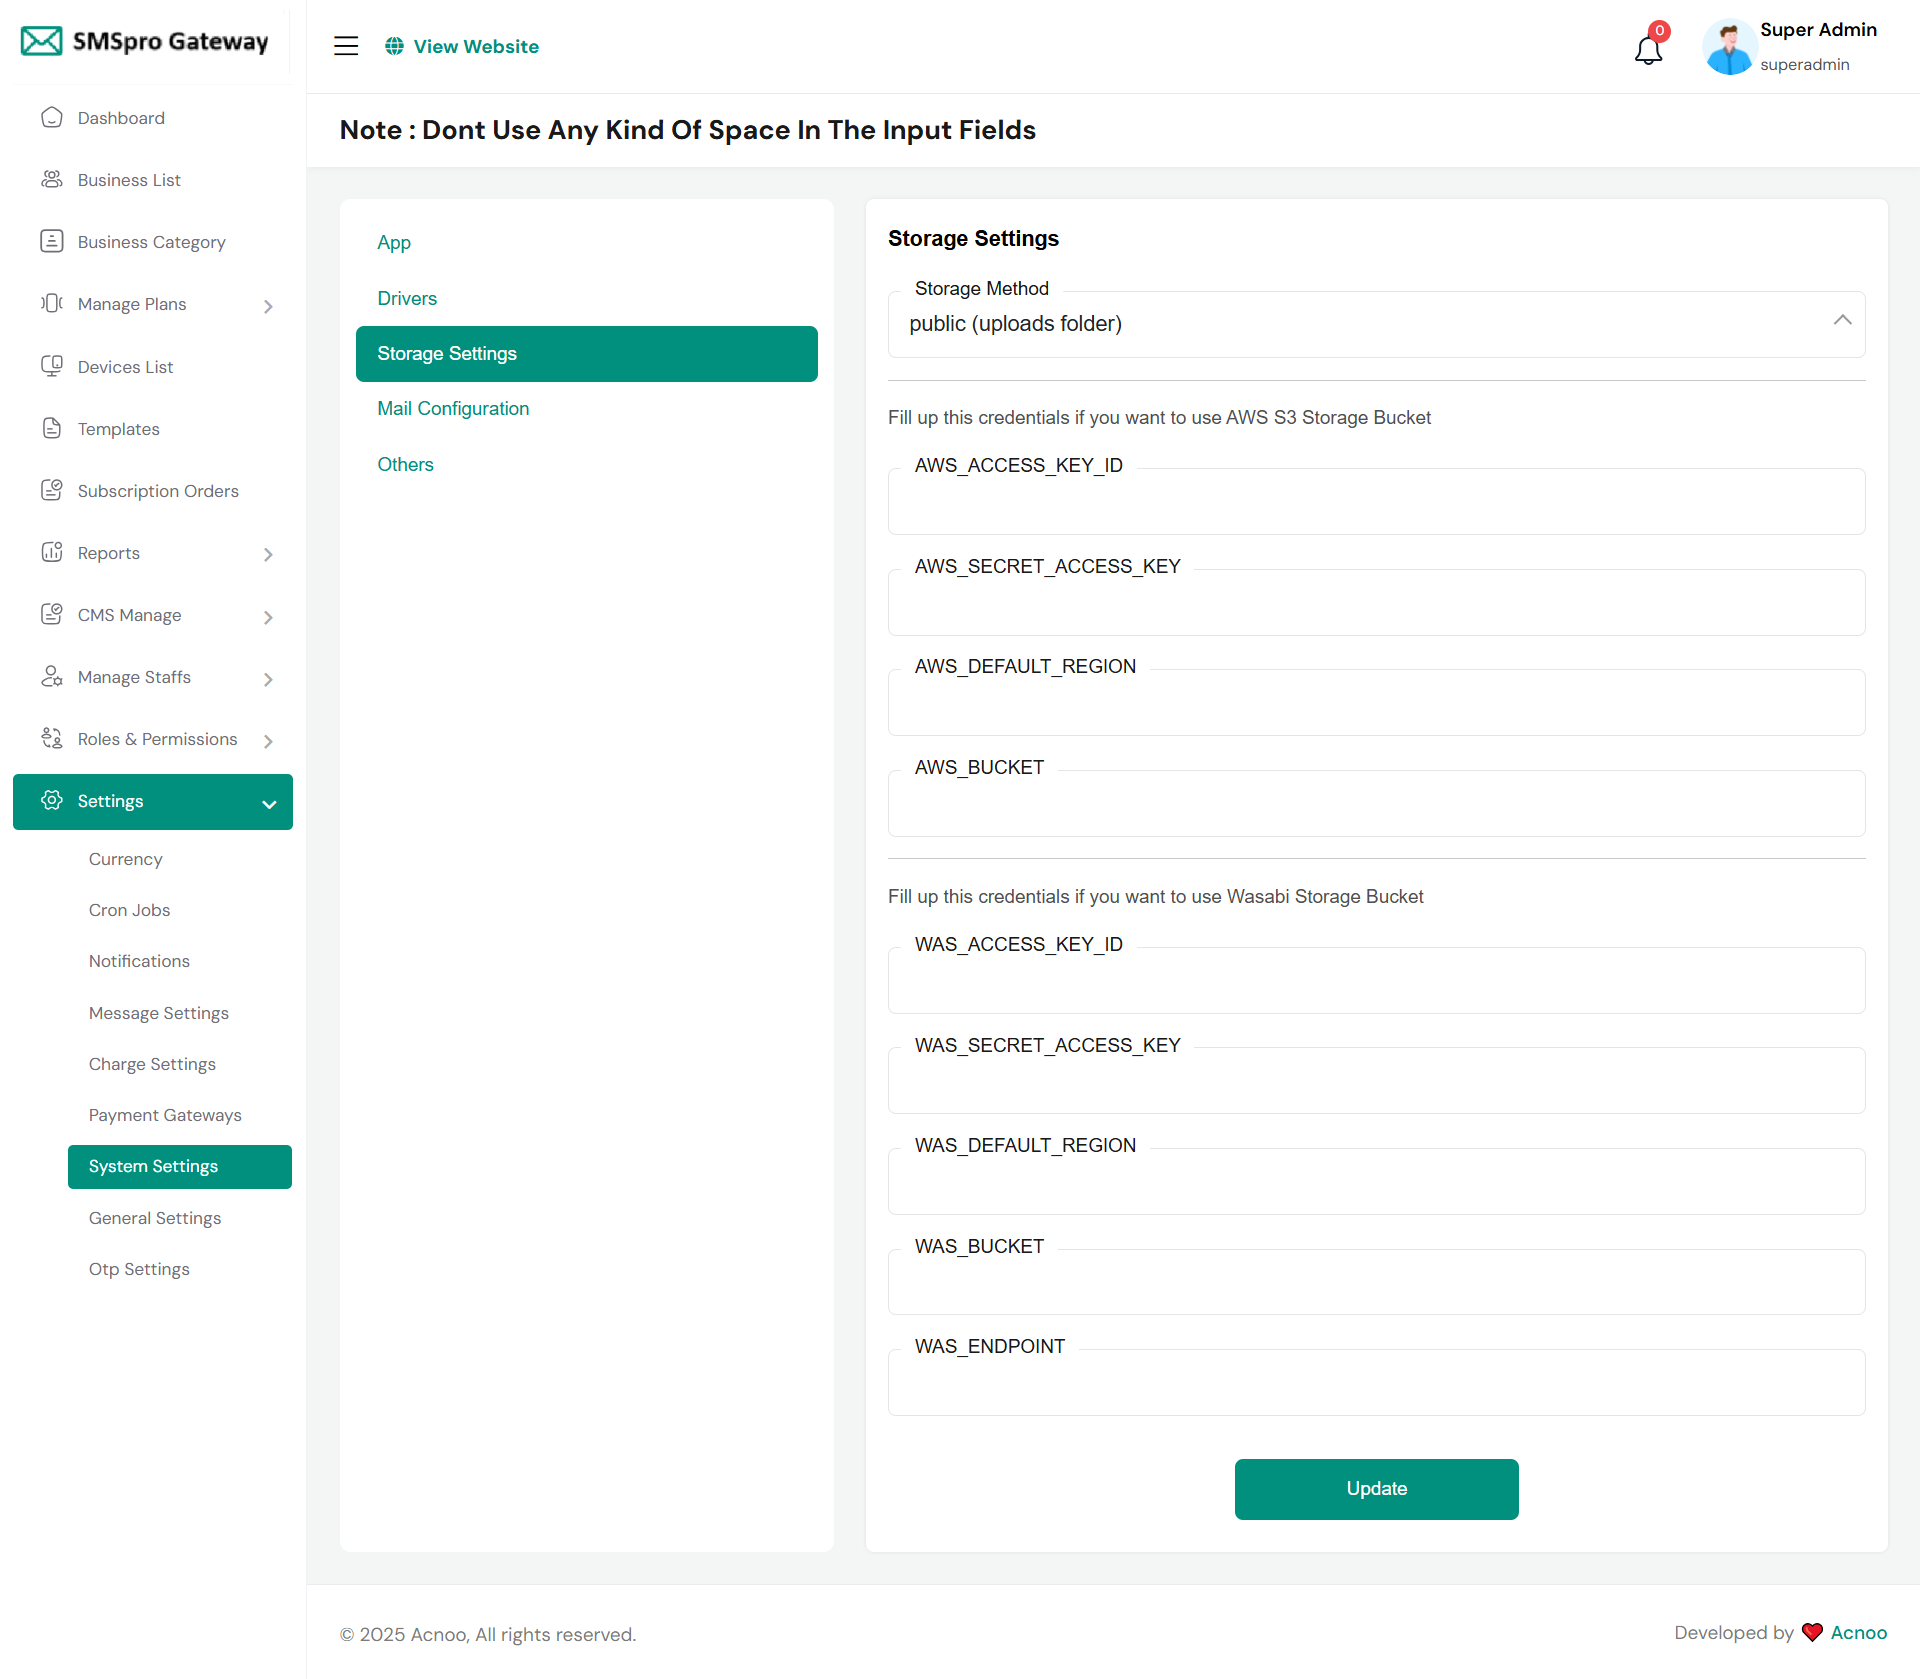
Storage Settings
Mail Configuration

Note: Please note that if you change QUEUE_MAIL from false to true, you need to run the following command: php artisan queue:work. Remember: The command path should be: /home/u186958312/domains/yourdomain.com/public_html. Make sure you're in the correct path.
Note: If you're not familiar with running the command, there's another option. Simply visit yourdomain.com/queue-work and it will be executed automatically.
Note: If you select QUEUE_MAIL as true but do not run the command or visit the URL, email functionality will not work properly.
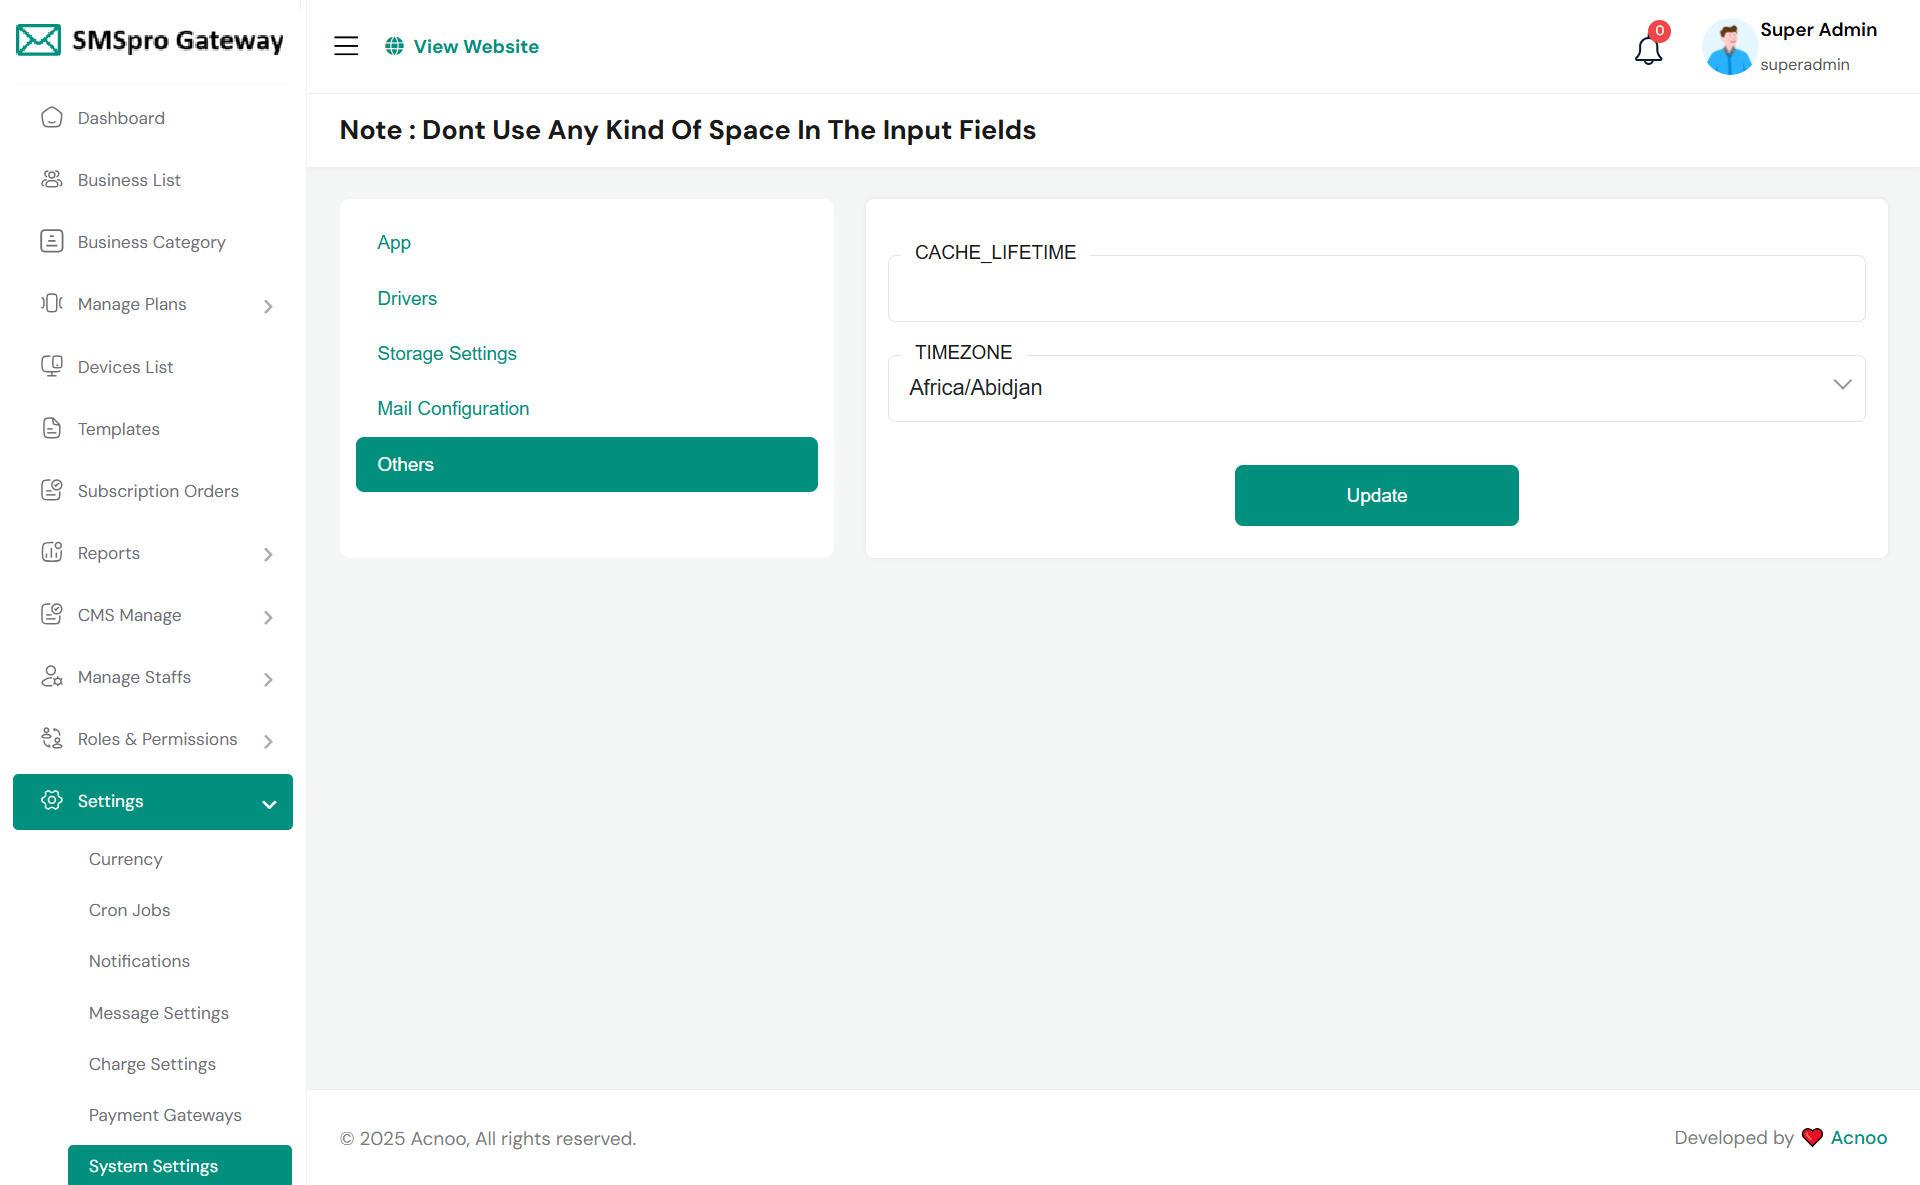
Others
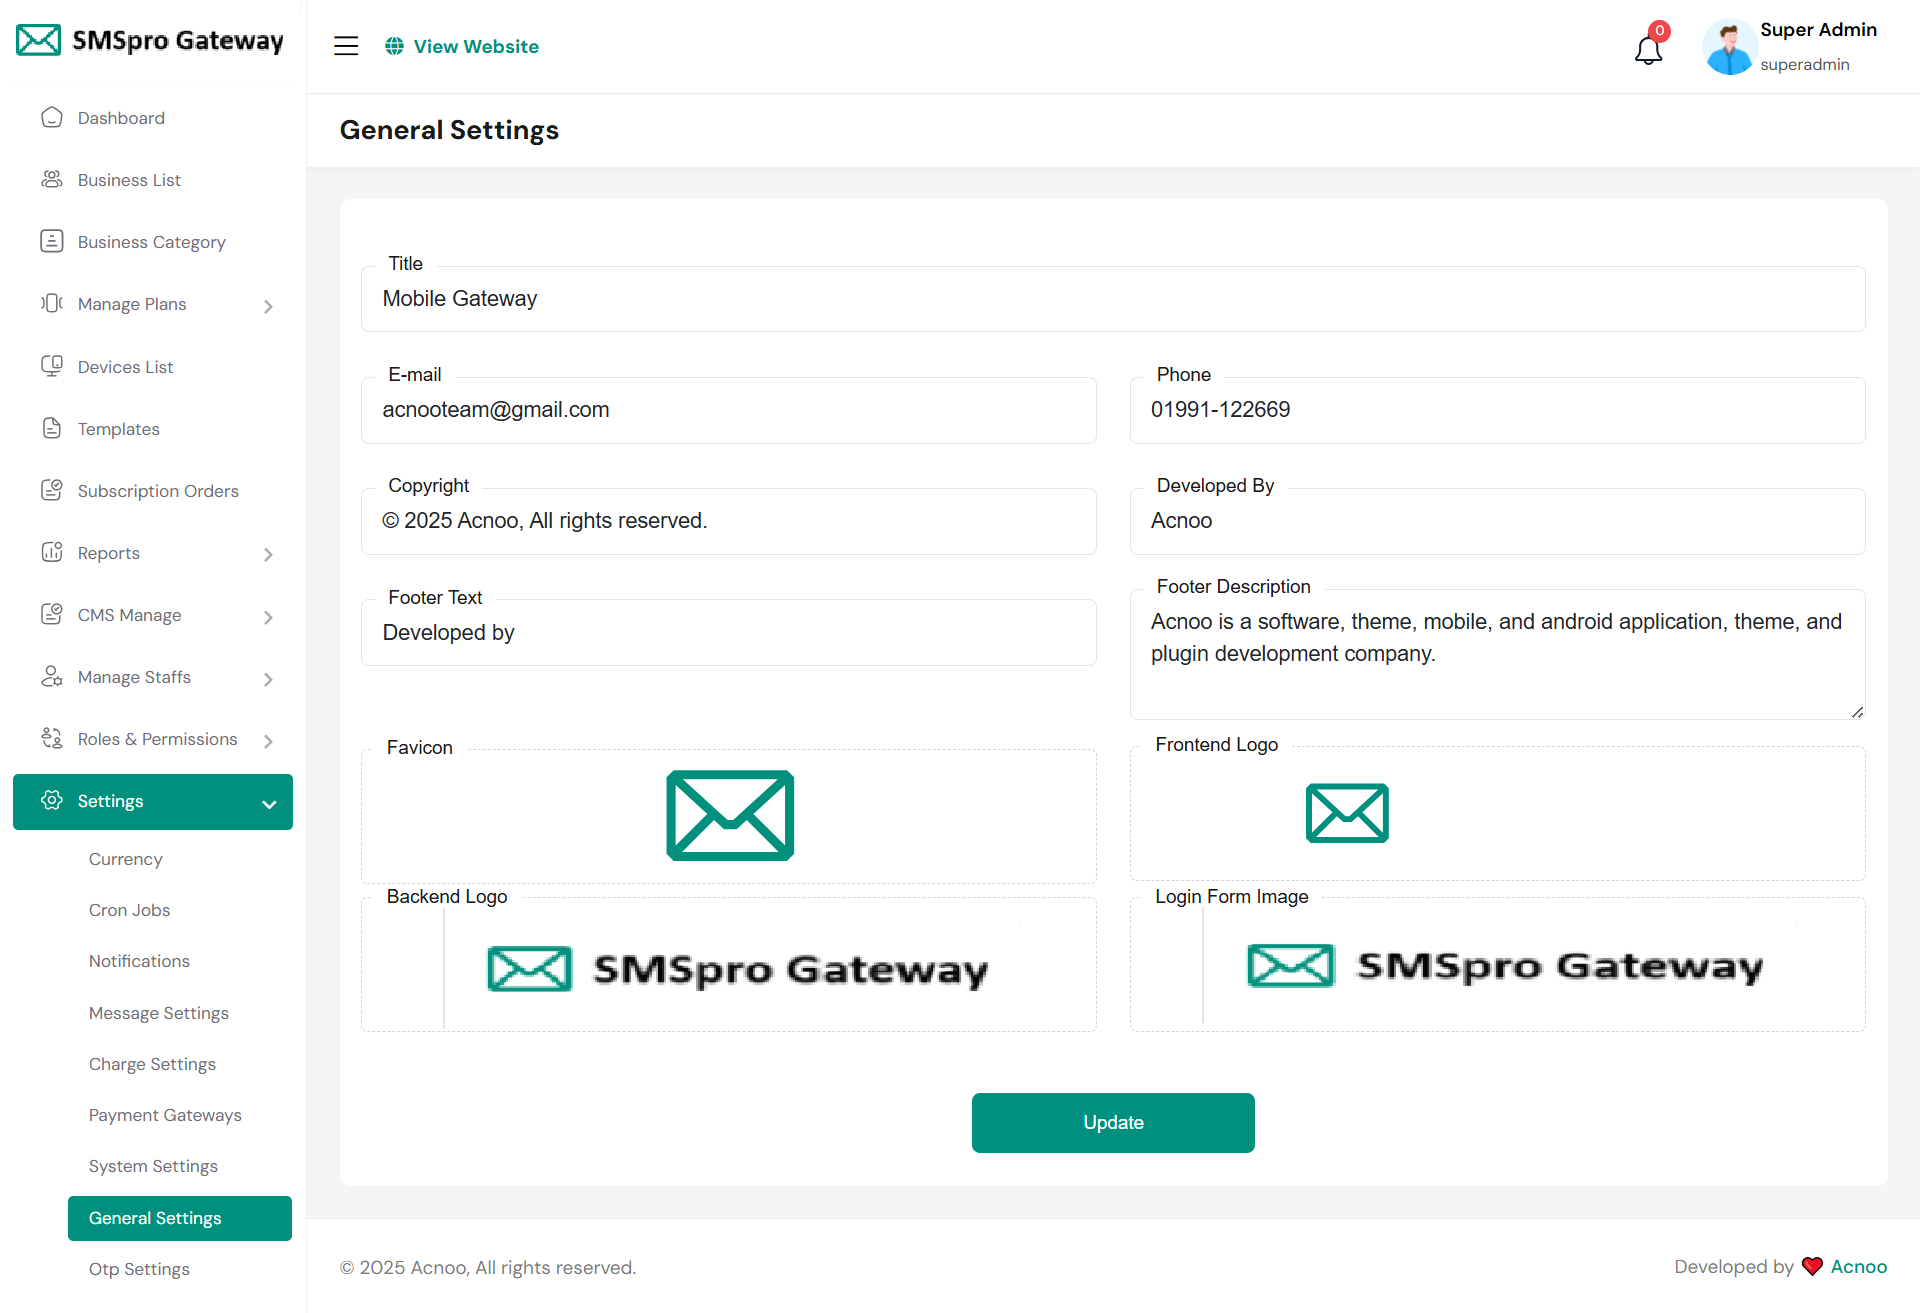
General Settings
You have the capability to modify the general project information.
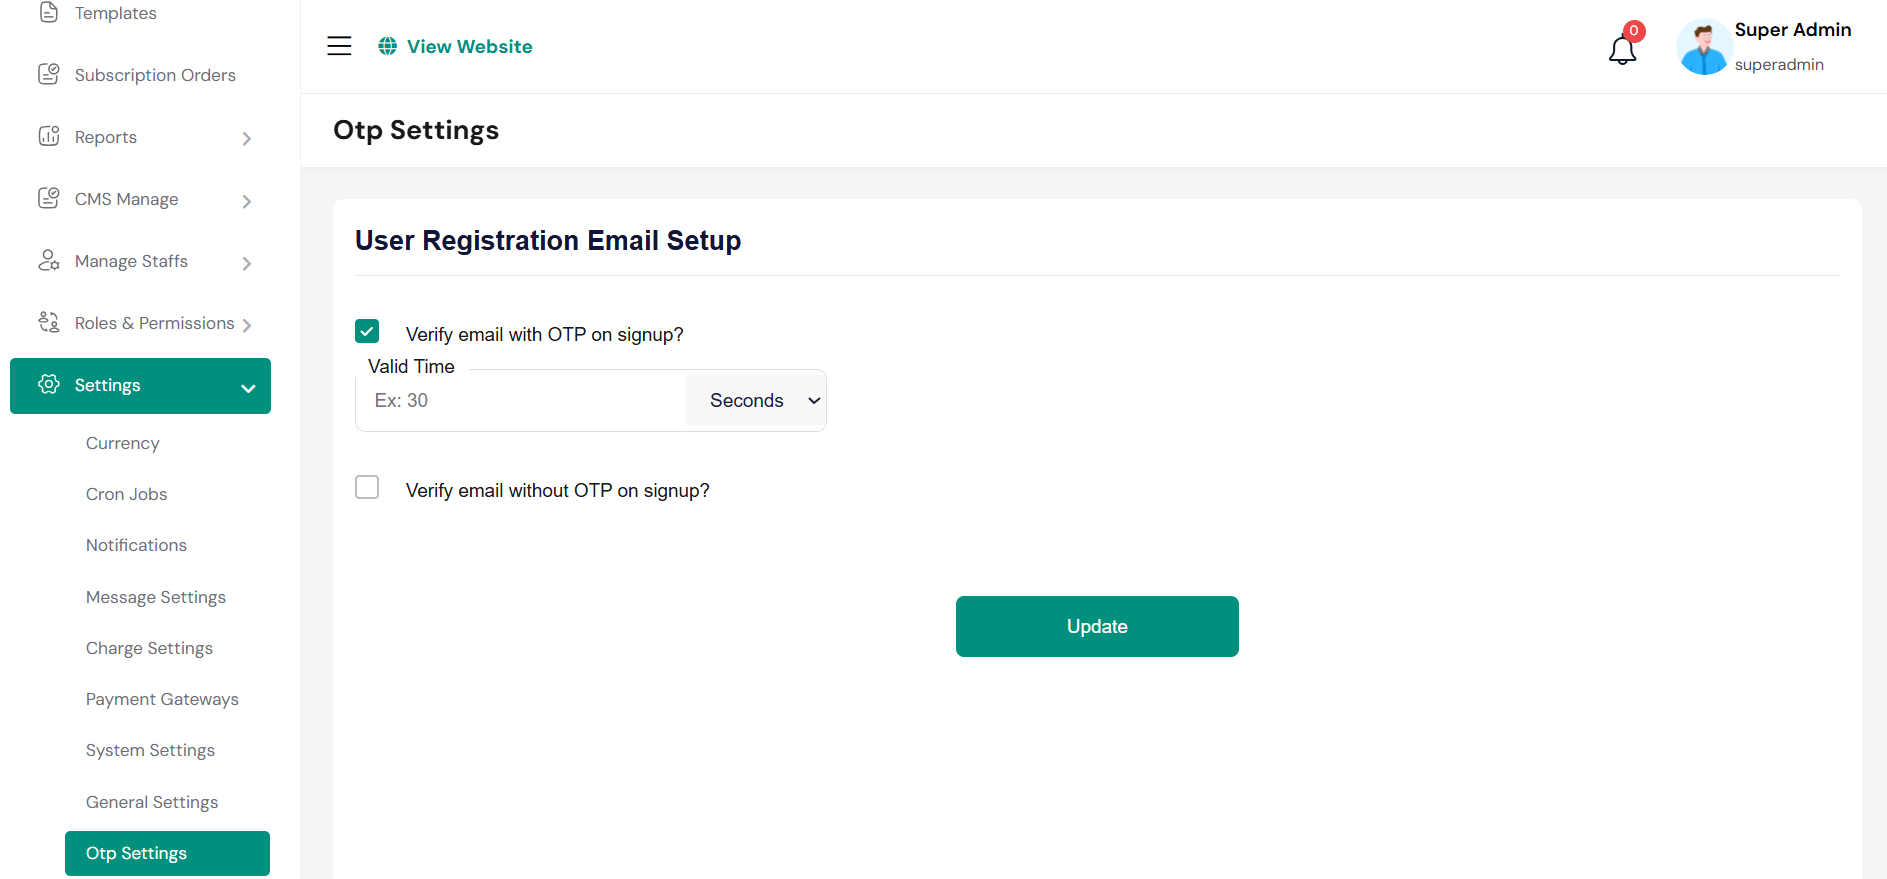
User Sign Up
During signup, you can choose whether the user must verify their email with an OTP or sign up without it. If you check "Verify email with OTP on signup," you will see options to set the OTP validity time, which can be configured in minutes or seconds. By default, users can sign up without OTP verification.

Admin Change Logs & Update Guide
Note: Before updating to the new version, please ensure you have a database and full project backup, and that your project is already updated to the latest version. This is extremely important!
Version: 3.2 ( 06/11/2025 )
- Bulk SMS issue fixed.
- Group uniqueness issue fixed.
- Design issues fixed.
- Installer updated.
- Message gateway settings issue fixed.
- Language translation fixed.
- Device priority automatically generated.
Note: Please replace the following folders and files: app, database, lang, public → assets (not the entire public folder, just update the assets folder), resources, routes,. After replacing them, visit yourdomain.com/update to install the new version. Without visiting the URL, your project will not function correctly, so ensure you complete this step.
Note: If you face any issues with the update, please contact us.
Version: 3.1 ( 02/11/2025 )
- Fixed gateway settings update issues.
- Resolved gateway issue during business creation.
- Updated notification system.
- Optimized overall codebase.
- Fixed device-related issues.
- Added device update option.
- Resolved device login issue.
- Fixed SMS request and status update issues.
- Fixed credit handling issue during business creation.
- Added device priority option.
Note: Please replace the following folders and files: app, database, resources, routes. After replacing them, visit yourdomain.com/update to install the new version. Without visiting the URL, your project will not function correctly, so ensure you complete this step.
Note: If you face any issues with the update, please contact us.
Version: 3.0 ( 09/10/2025 )
- Updated project structure for better performance.
- Multiple languages added.
- Added new responsive landing pages.
- Landing pages now dynamic from admin panel.
- Optimized code for faster performance.
- Fixed admin panel installation issues.
- Fixed product code bugs.
- Added Income Module.
- Improved design and UI.
- Fixed minor bugs in several modules.
- Added user activity logs.
- Increased overall system stability.
Note: This is a major update, and you need to update almost the entire project. You can either perform a fresh installation or replace the following folders and files: app, config, database, lang, public → assets (not the entire public folder, just update the assets folder), resources, routes, vendor, and composer.json. After replacing them, visit yourdomain.com/update to install the new version. Without visiting the URL, your project will not function correctly, so ensure you complete this step.
Note: If you face any issues with the update, please contact us.
Version: 2.1 ( 03/02/2025 )
- Tap payment gateway added.
- 150+ Currencies Added.
- System settings issues fixed.
- Fixed payment gateways bugs.
- Fixed some issues.
- Notes section added for payments gateways.
- Payment gateway enable and disable issues fixed.
- Installer updated.
Version: 2.0 ( 29/11/2024 )
- Add bulk contact add option.
- Add bulk SMS sending option.
- Fixed system settings issue.
- Optimize and improve some codes.
- Fixed service details page issue.
- Fixed design issue.
Note: This version is not for the admin panel.
Version: 1.4 ( 21/11/2024 )
- Fixed user create and update issues when update with plan.
- User balance issue fixed.
- New smspro gateway added (Route Mobile)
UPDATE GUIDE: Download the new file and replace app folder.
Version: 1.3 (11/10/2024)
- Remove auto login button.
- Optimize some codes.
Version: 1.2 ( 24/08/2024 )
- Campaign sms issue fixed.
- Improve and optimize some codes.
- System Settings issue fixed.
Version: 1.1 ( 23/08/2024 )
- Added purchase code verification
- Performance improved
Version: 1.0.0
- Initial Release
User Panel
This is the user panel, where users can access their account details. They can also send messages to their customers or recipients. They have the option to send quick SMS messages or group SMS messages. Additionally, they can send campaign requests from their panel.
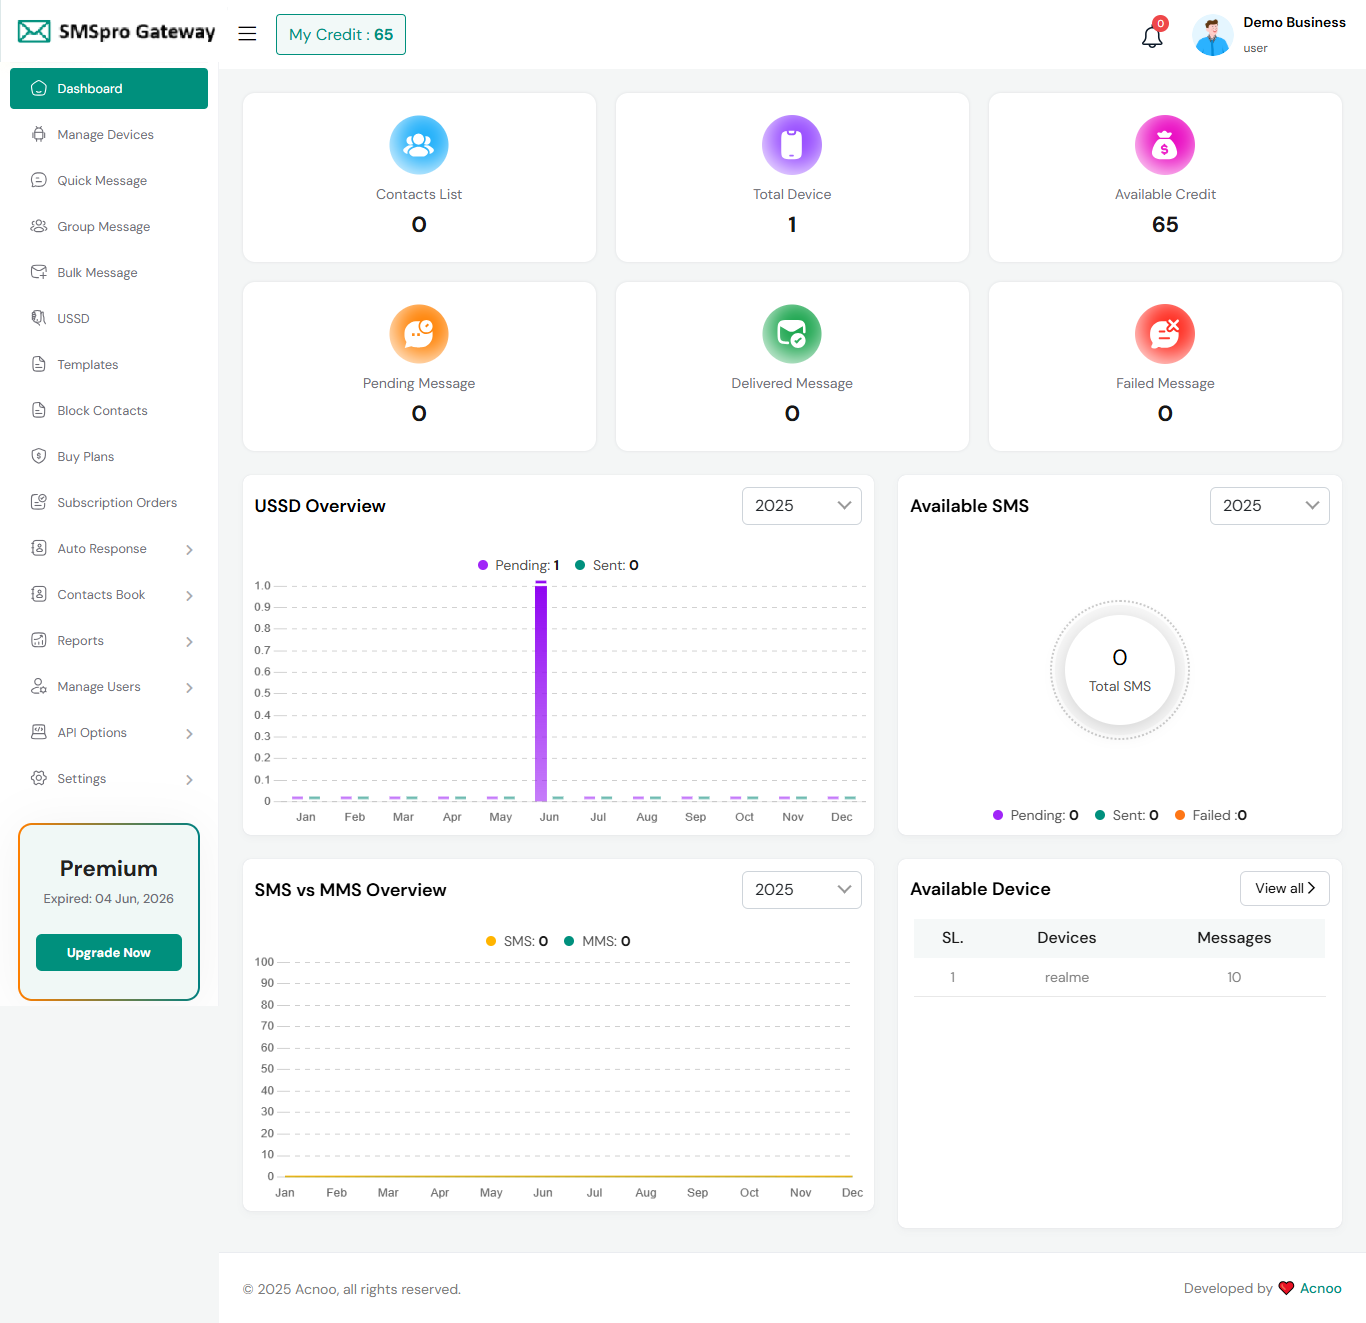
Dashboard
This is the dashboard page. The essential information regarding the project are displayed here.
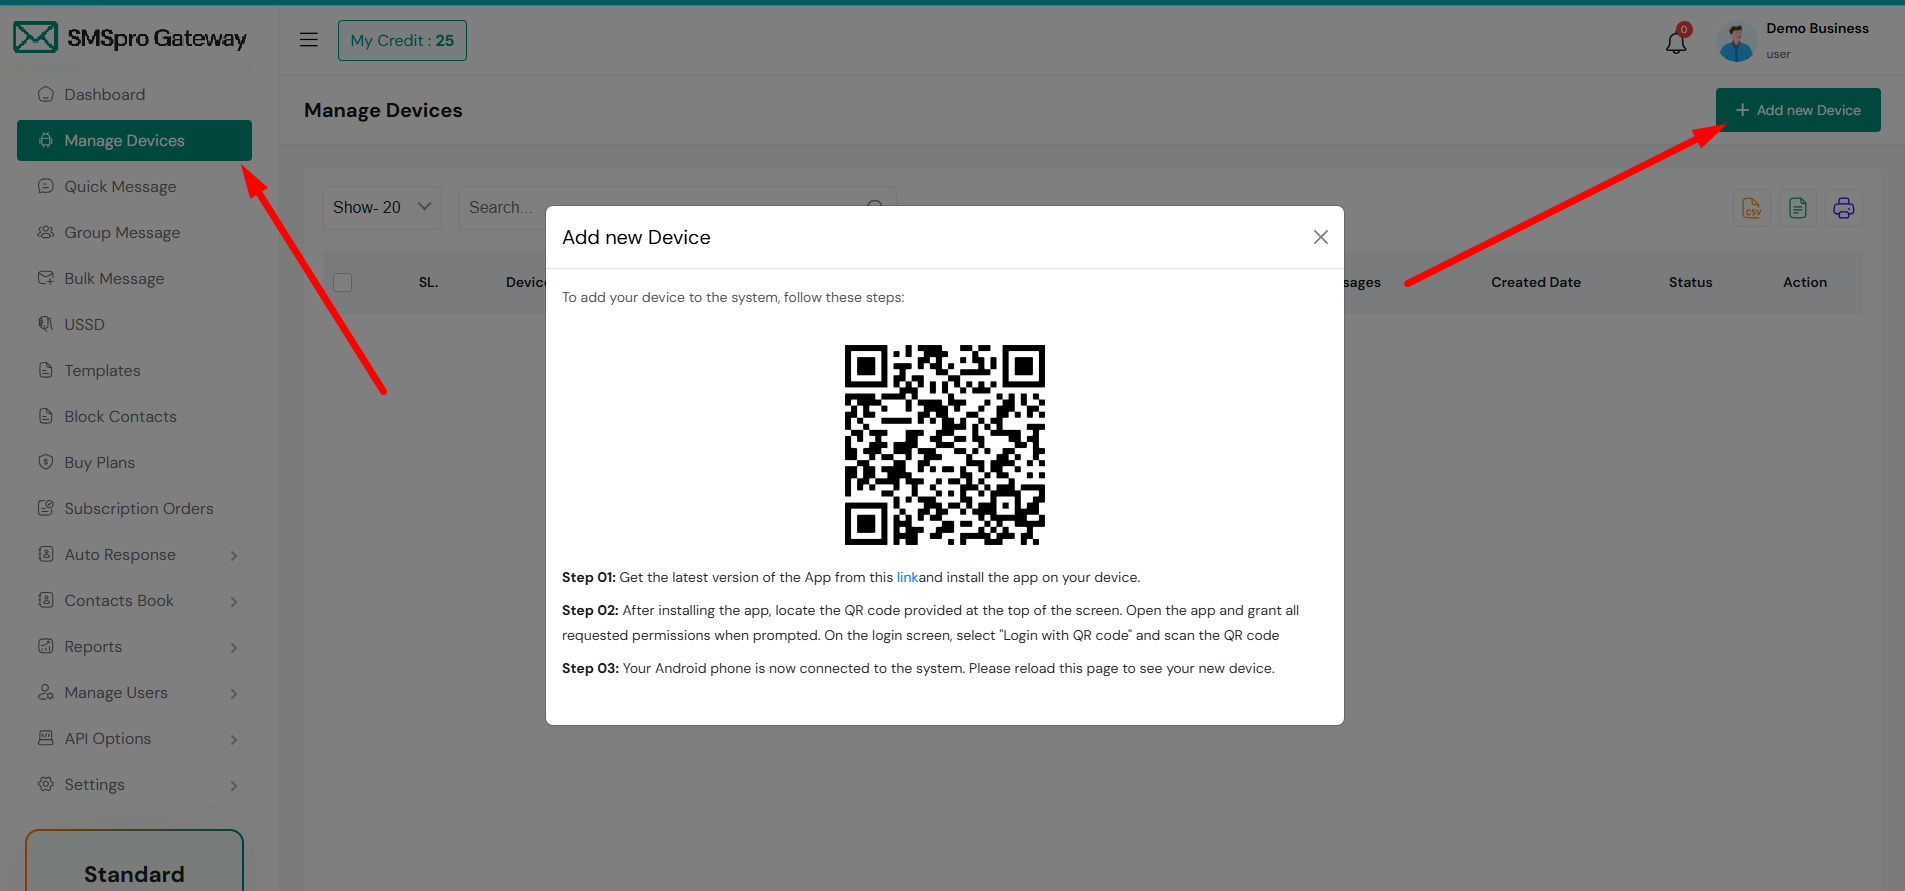
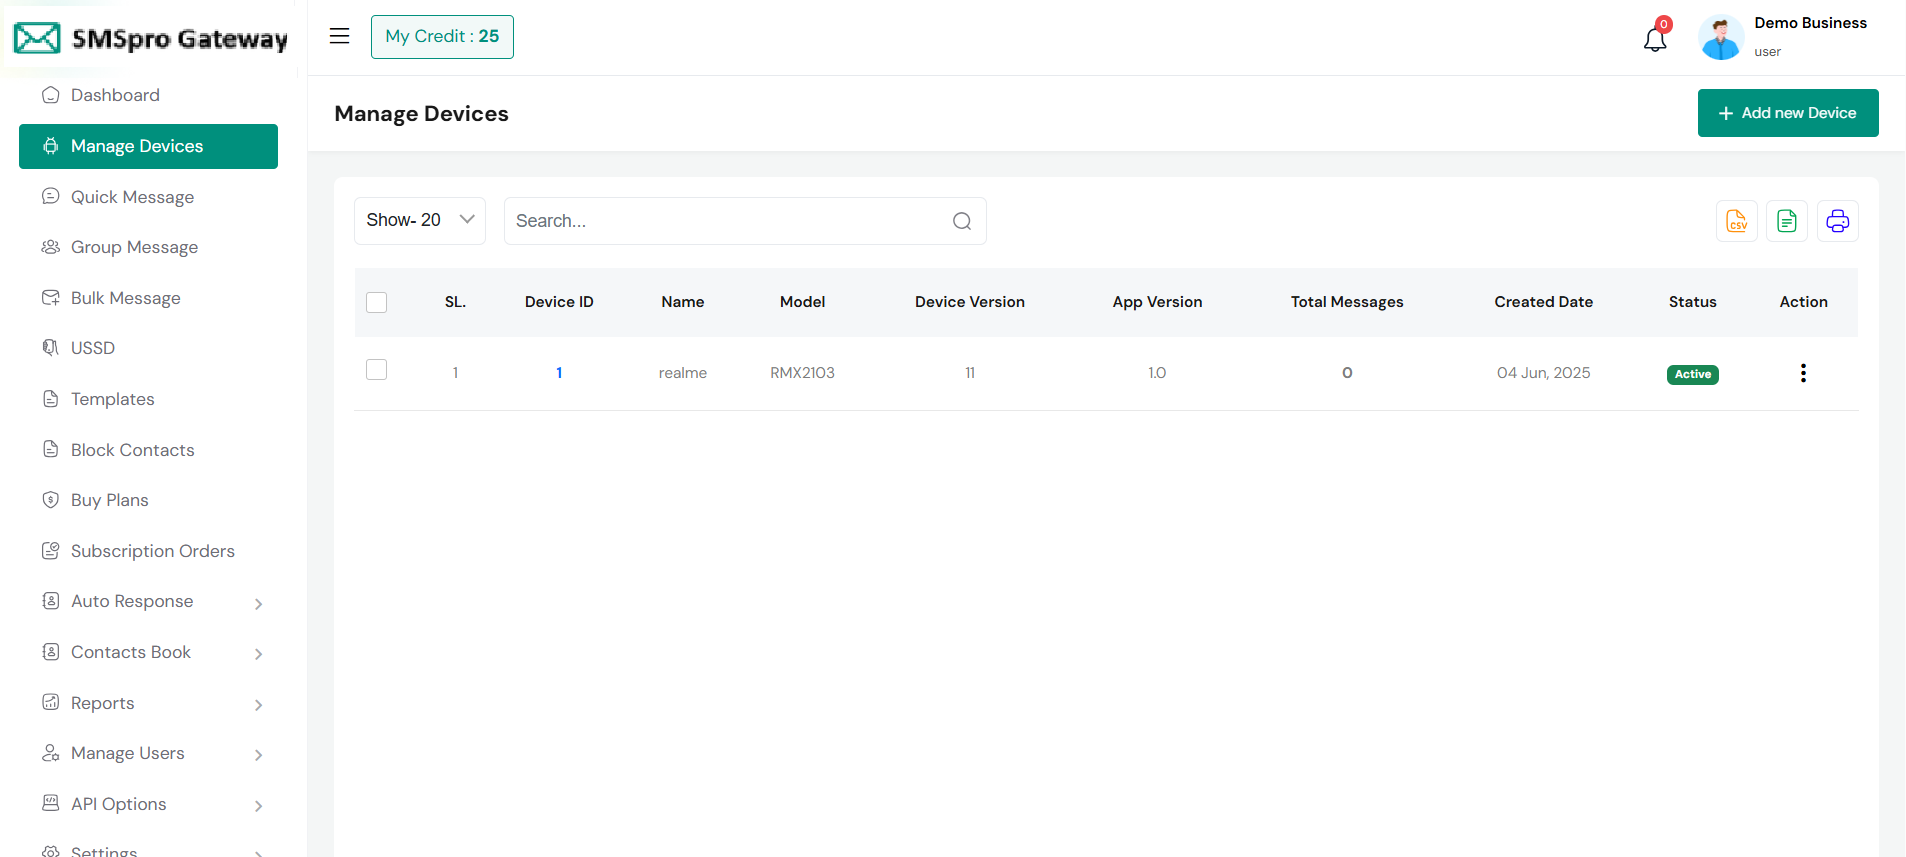
Manage Devices
Add new Device
Before you can start sending messages, you must first add your device to the system. To do this, click the + Add New Device button. A popup will appear as shown in the image below. Follow the on-screen instructions in the popup to complete the device registration process.
Device List
After successfully registering a device, it will appear in the device list as shown in the image below.
From this list, you can also perform actions such as deleting a single device or selecting and deleting multiple devices at once.
Quick SMS
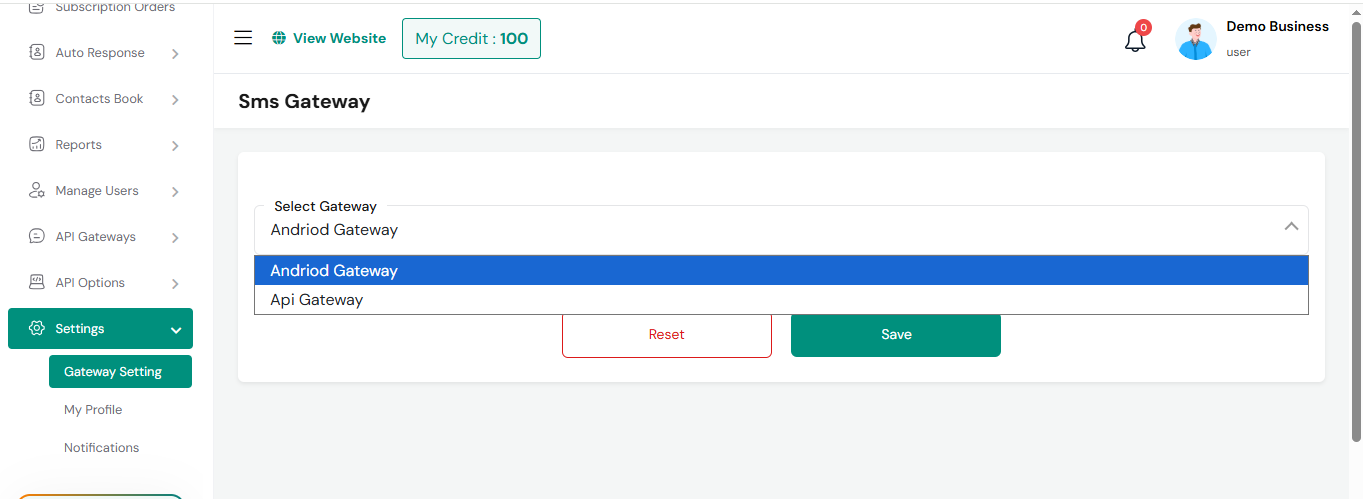
In this section, you can send messages using an SMSpro Gateway. From Gateway Settings, you can change the SMSpro Gateway. The process differs depending on the type of gateway selected. Below, we discuss the two available scenarios:
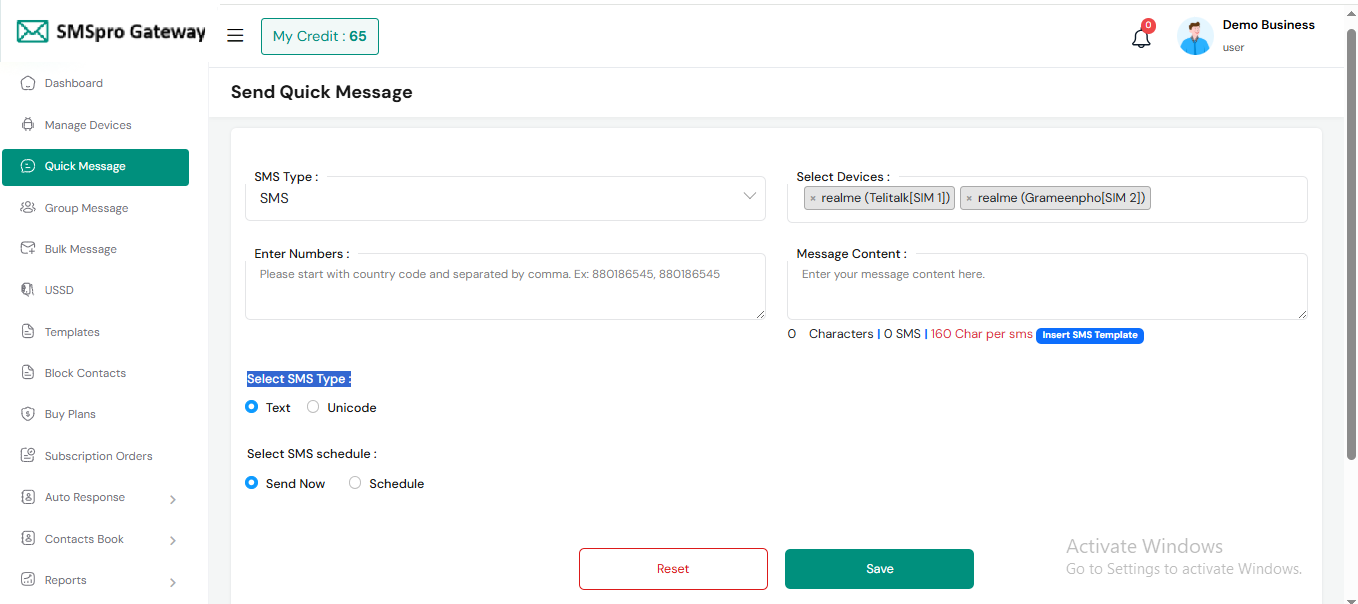
Android Gateway
If you select Android Gateway, you can send both SMS and MMS. On the right side, you must select a device. If no device has been added yet, go to Manage Device and add one first.
API Gateway
If you select API Gateway, you can only send SMS. On the right side, choose your preferred API Gateway. If no API Gateway has been added yet, go to API Gateway and add one first.
For both gateways, you can choose to send SMS immediately or schedule it for a specific time. You can enter a single number or multiple numbers separated by commas. SMS messages can be sent in either Text or Unicode format. By clicking the "Insert SMS Template" button, you can also use your predefined templates for faster message creation.
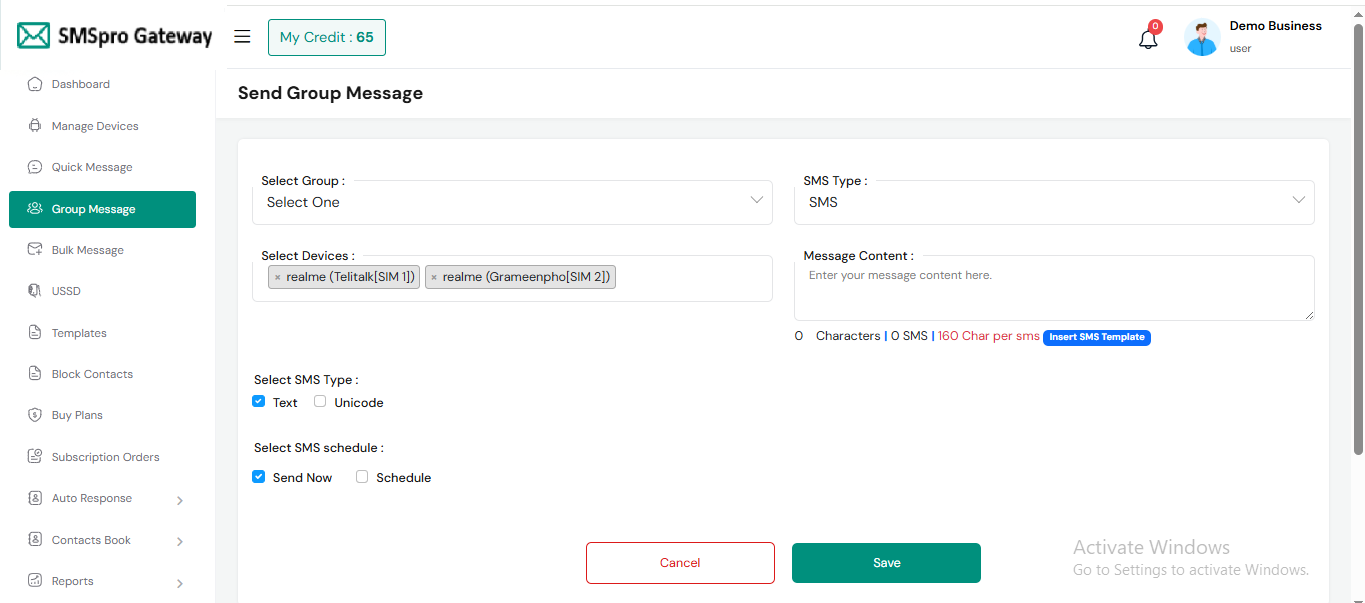
Group SMS
Similar to the Quick SMS section, you have the option to send SMS messages here. However, you can select a group from a list instead of manually inserting multiple numbers. This feature streamlines the process, especially if you have predefined groups for your recipients.
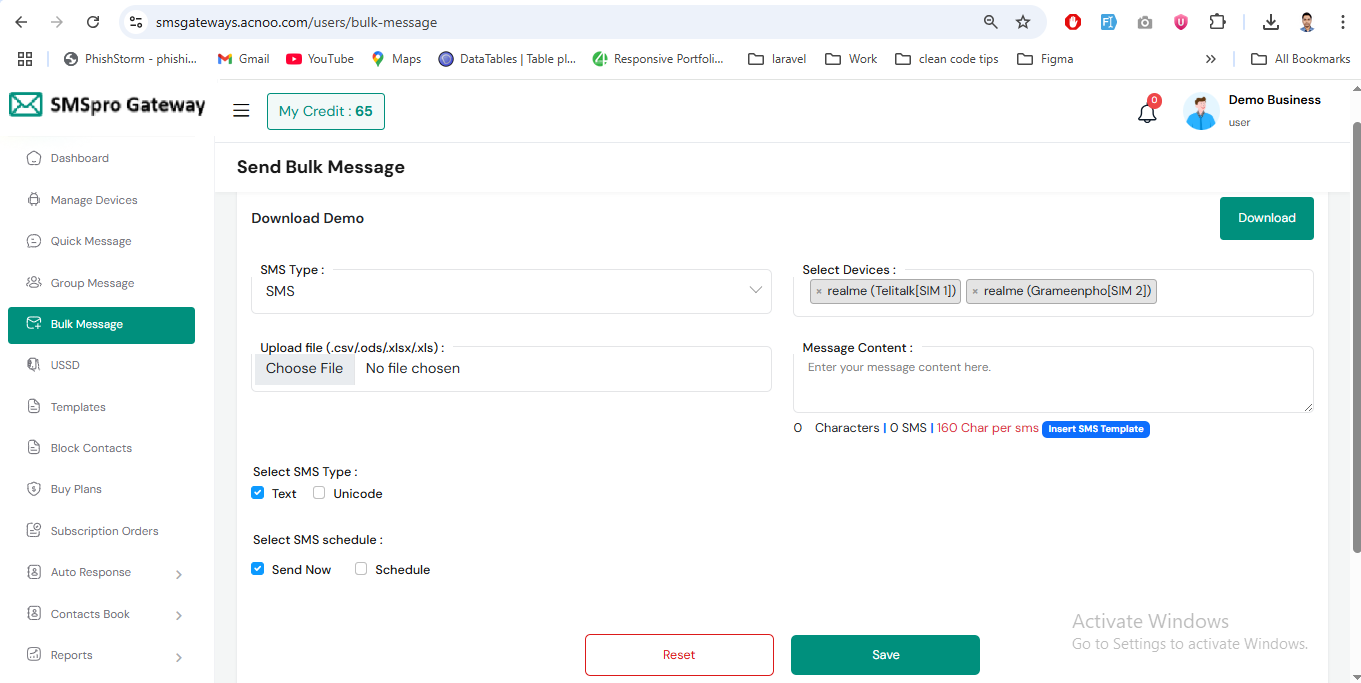
Bulk SMS
Here you can send bulk SMS.For this, first download the Excel template. Fill in the information in the downloaded Excel file. After completing the form, upload the file and provide the other required fields.
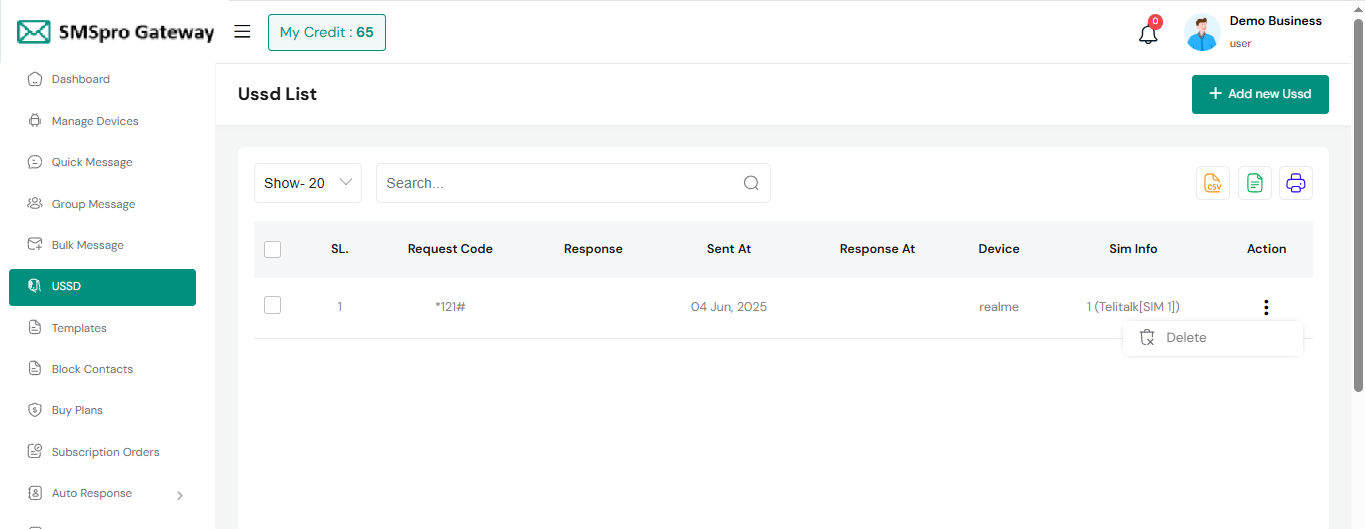
Ussd List
This table displays a list of USSD requests, including the request code, response, time, device, and SIM information. Filter and export options are also available.
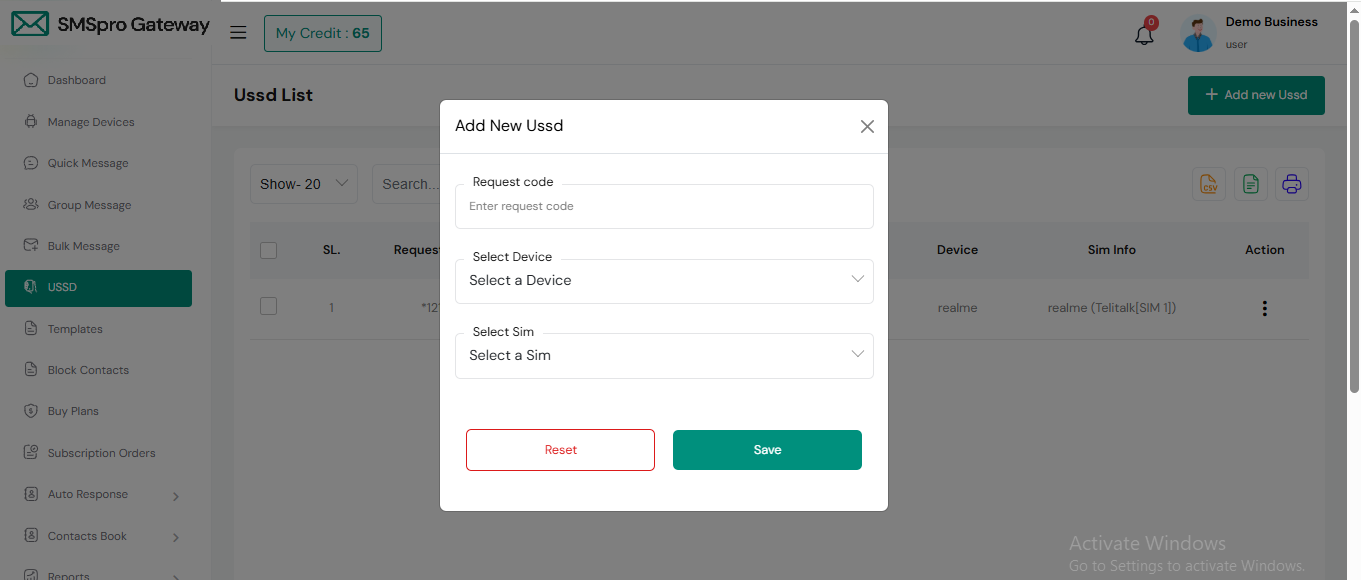
Create USSD
This "Add New USSD" form allows users to send a USSD request through a specific device and SIM. It's typically used for balance checks, data usage, or service activation using USSD codes (e.g., *121#, *111#, etc.).
Templates List
In this section, you can view a list of templates along with a search option to find specific templates easily. Additionally, options to edit and delete templates are available for managing your templates efficiently.

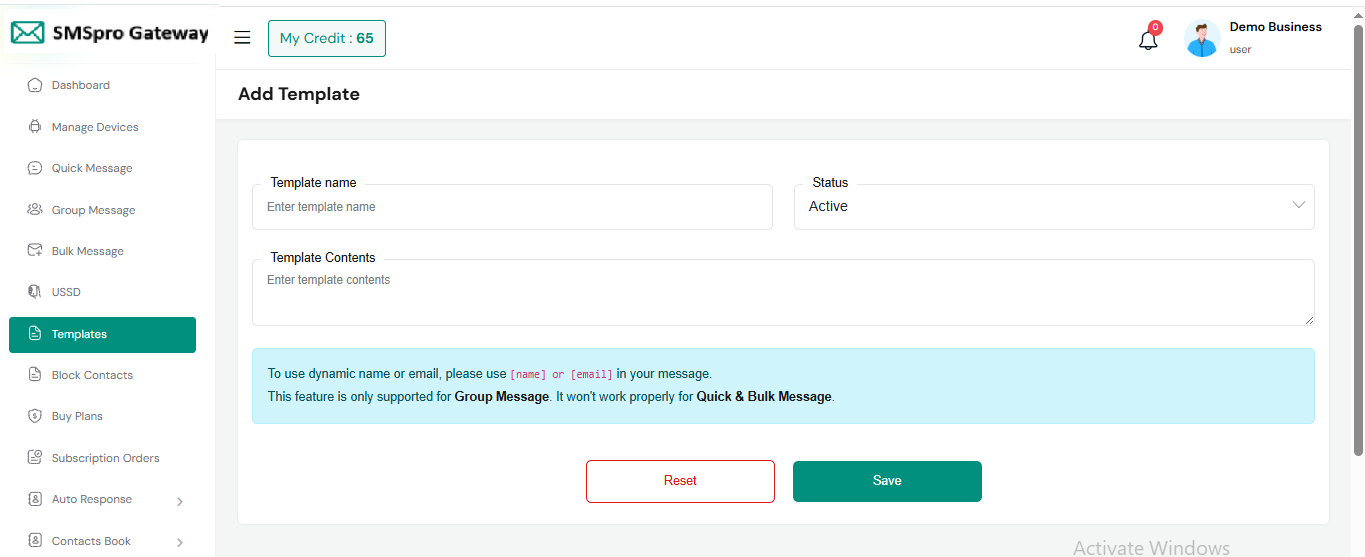
Create Template
In this section, you have the ability to create templates to meet specific requirements.
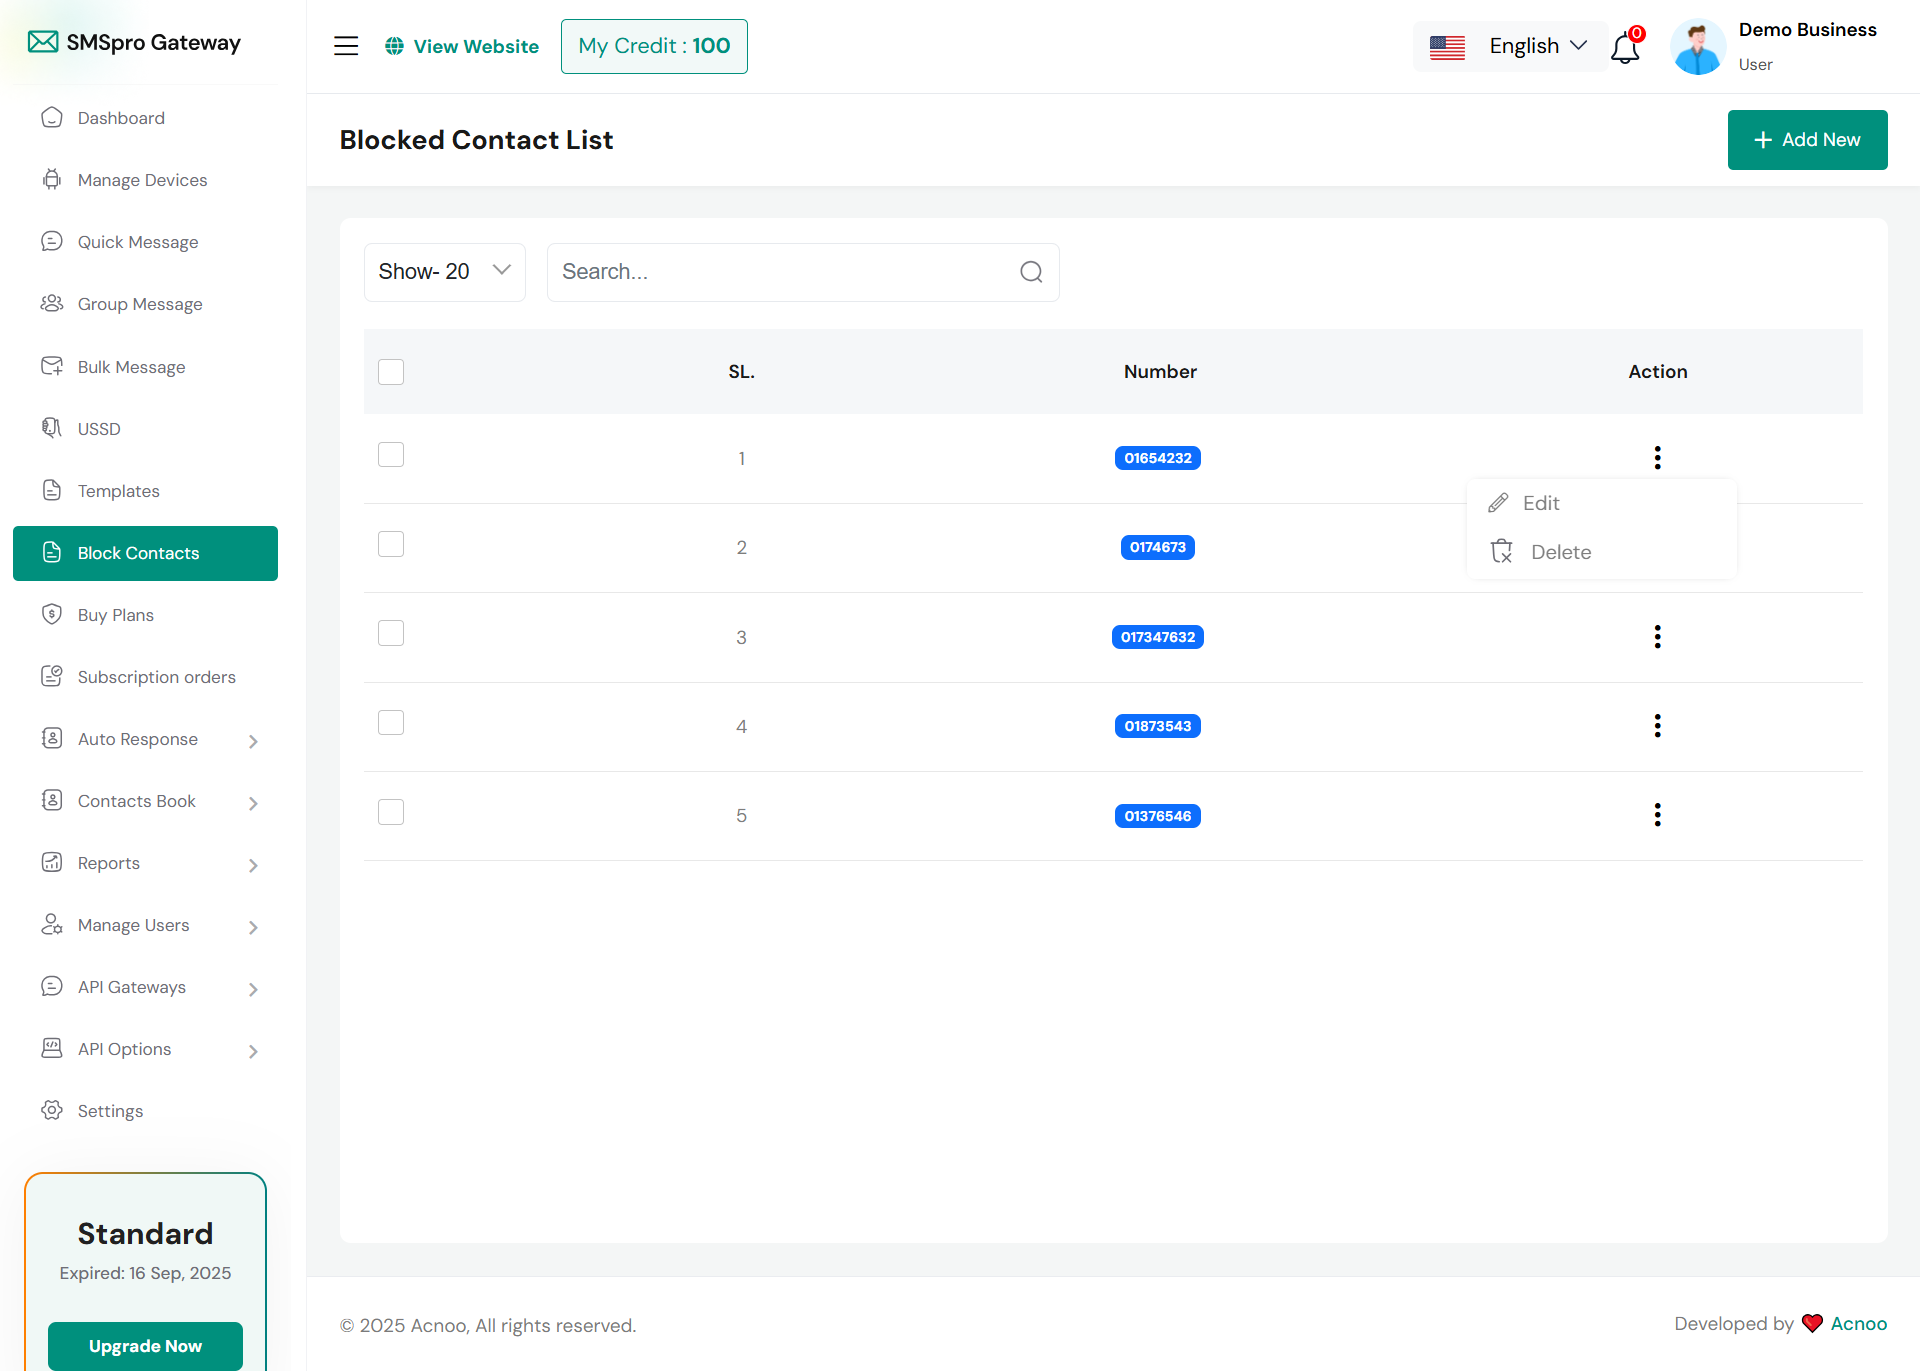
Block Contact
The blocked contact list will be displayed here, with filter options available.
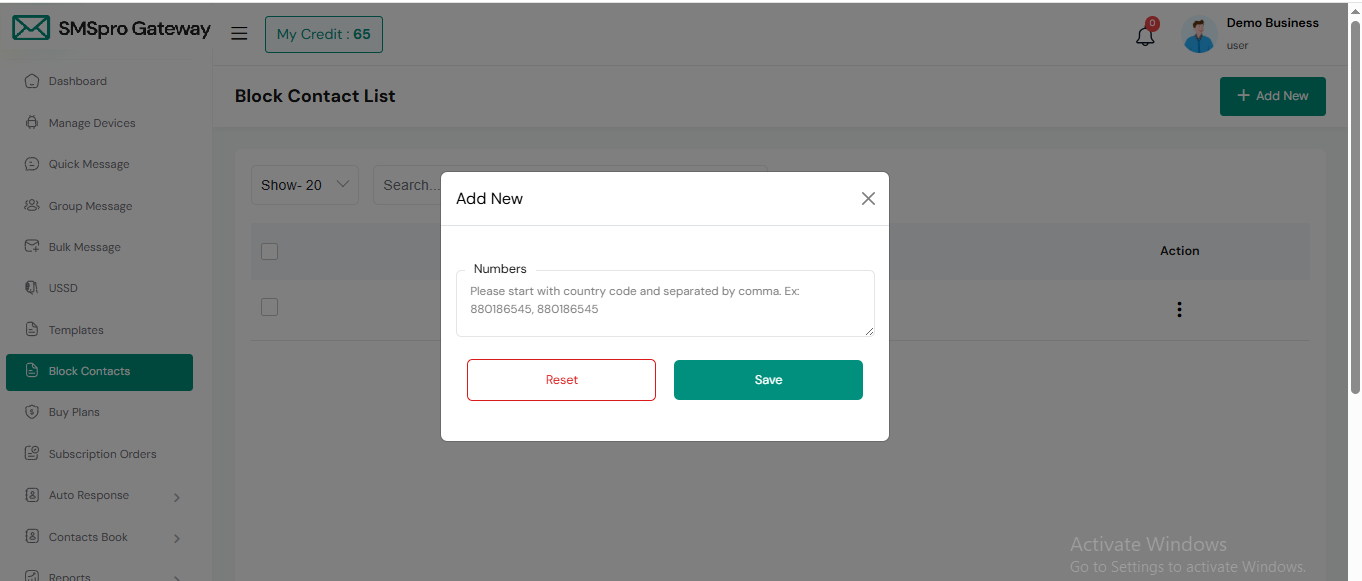
Create Block Contact
In this section, you can create a blocked contact list by adding numbers. Remember, each number should start with the country code and be separated by commas.
Buy Plan
Here, you can view your current plan status and explore all available plans. You can also upgrade your plan from this page.

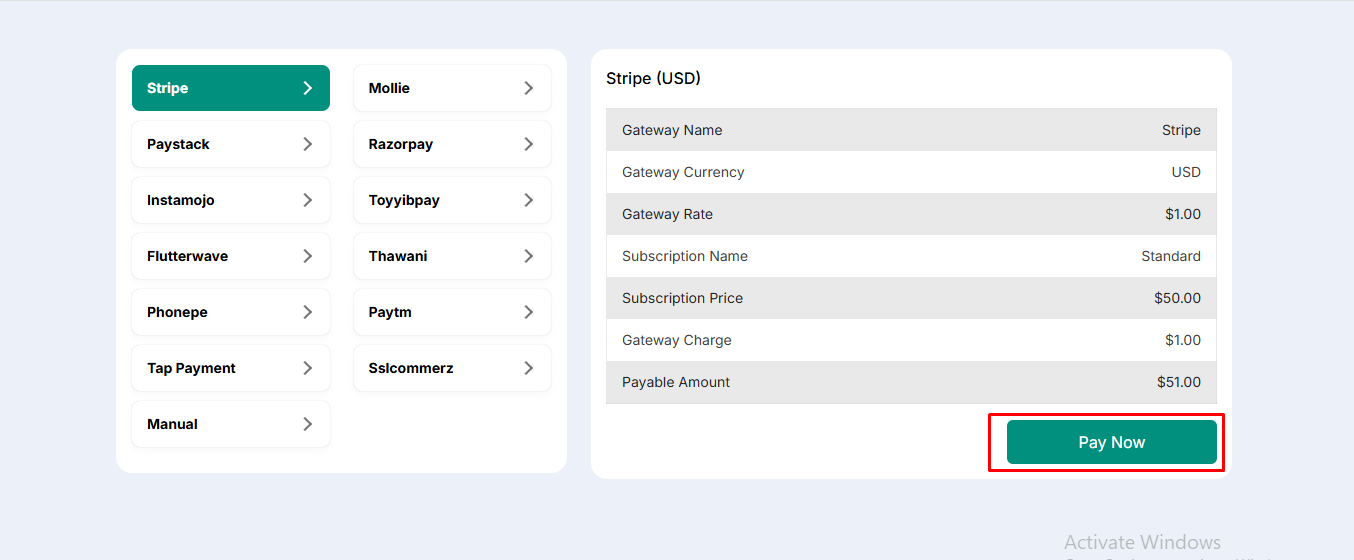
Payment
Once you've selected your desired plan, click to view the available payment options. After completing the payment, your plan will be successfully upgraded.
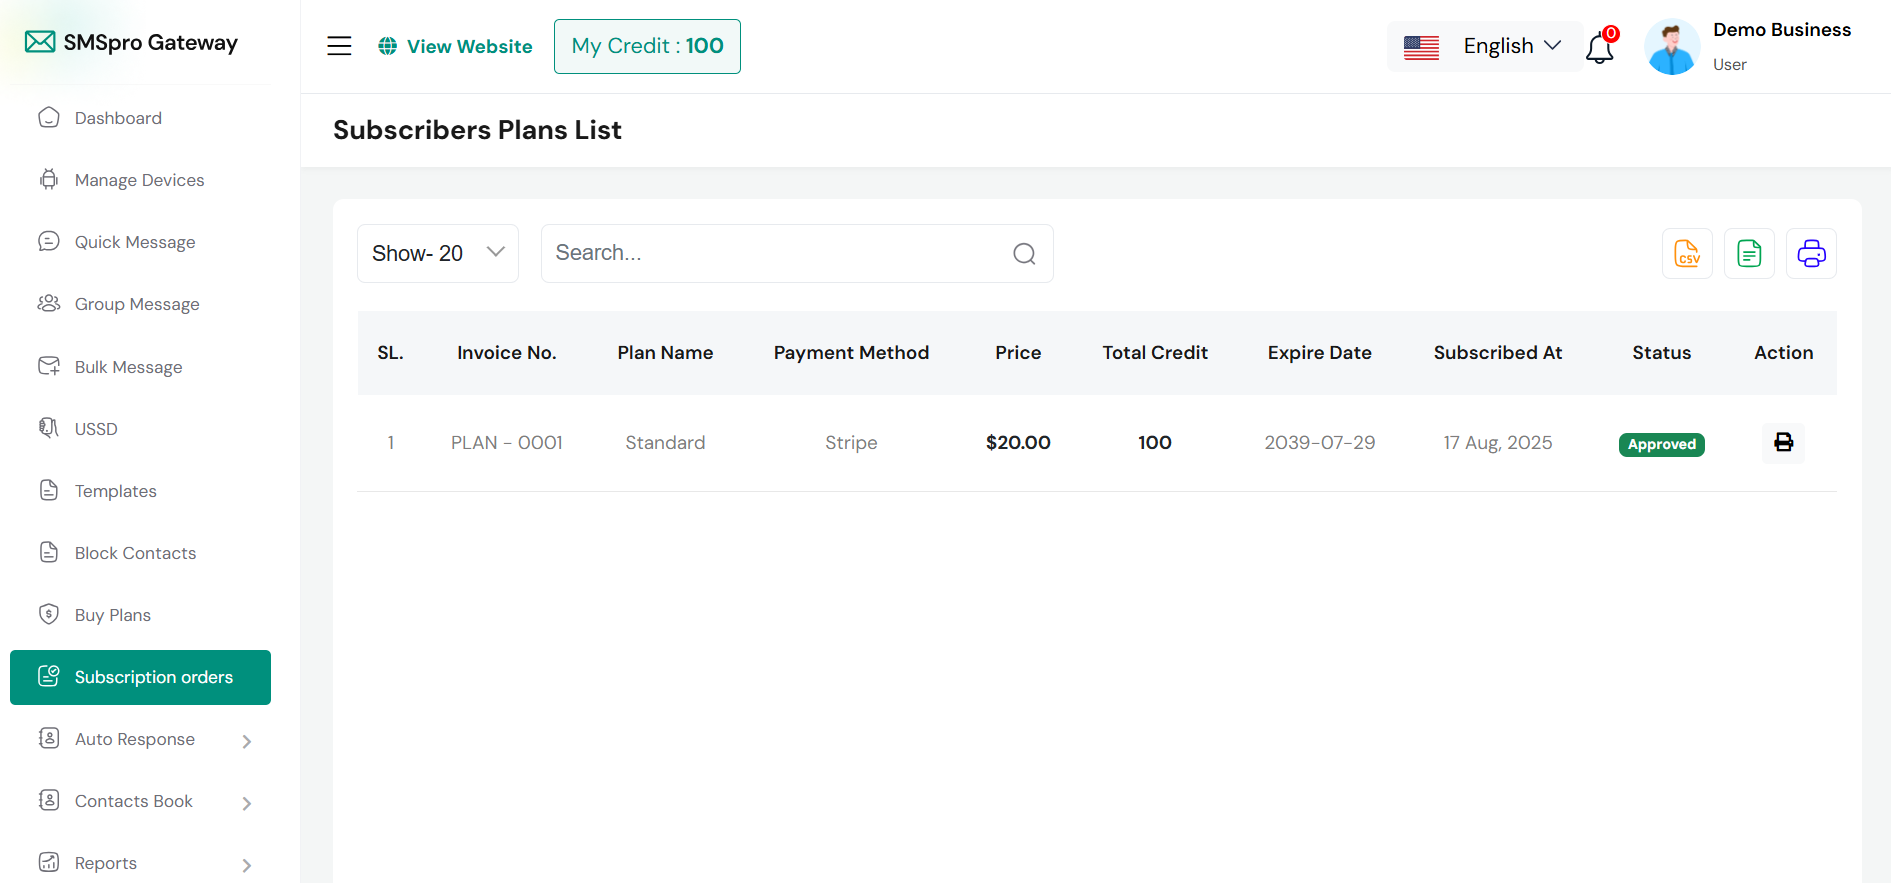
Subscription Orders
Here, you can view your subscribed orders, search through the list, and export data. Additionally, you have the option to generate and print invoices
Invoice
When click print button you see below screen. Now you are able to save or print this invoice.

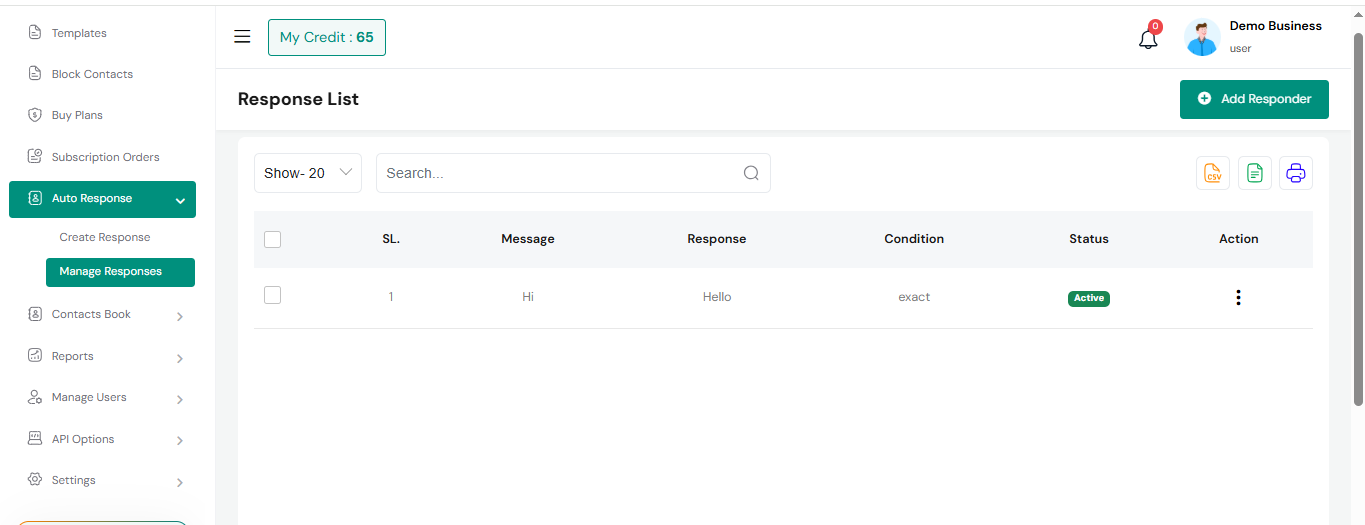
Auto Response
You can set an auto-response for incoming messages. For example, if you set the trigger as "Hi" and the response as "Hello," then whenever someone sends "Hi," they will receive "Hello" automatically. The system will match messages based on these conditions:
- Exact Match: Triggers only when the message is exactly the same as your input (ignores uppercase or lowercase).
- Message Contains Phrase: Triggers if your input appears anywhere in the message.
- Starts With Phrase: Triggers if the message begins with your input.
- Ends With Phrase: Triggers if the message ends with your input.

Manage Response
This section displays a list of auto responses based on incoming messages. You can search, filter, and export data as needed.
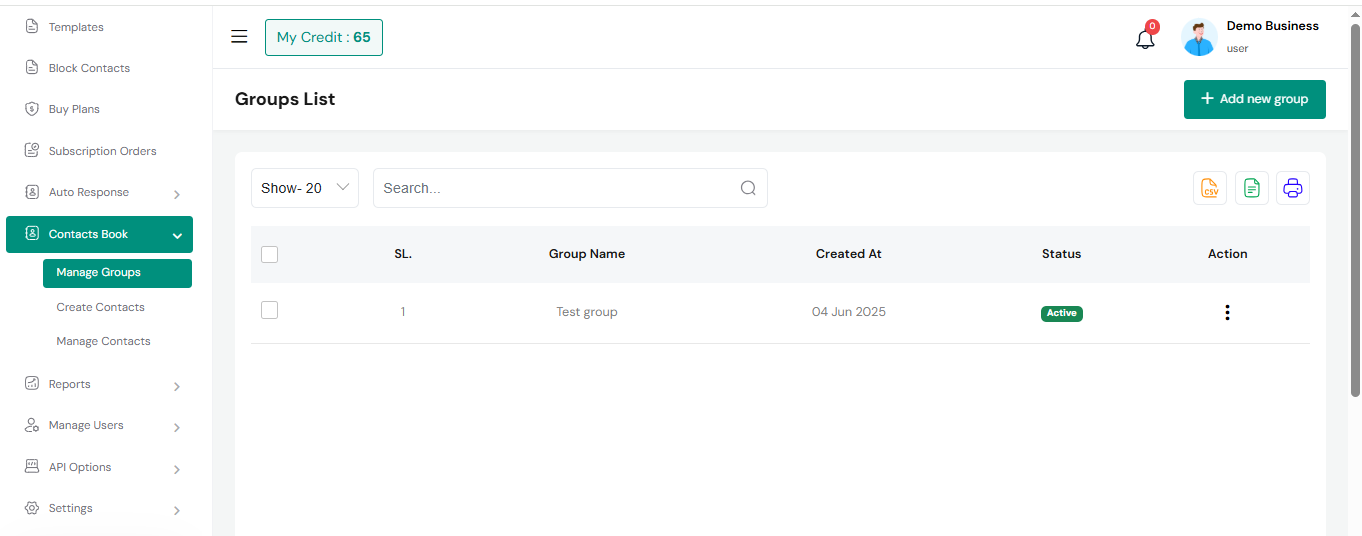
Manage Groups
Here, you can view the group list with available filter and export options.
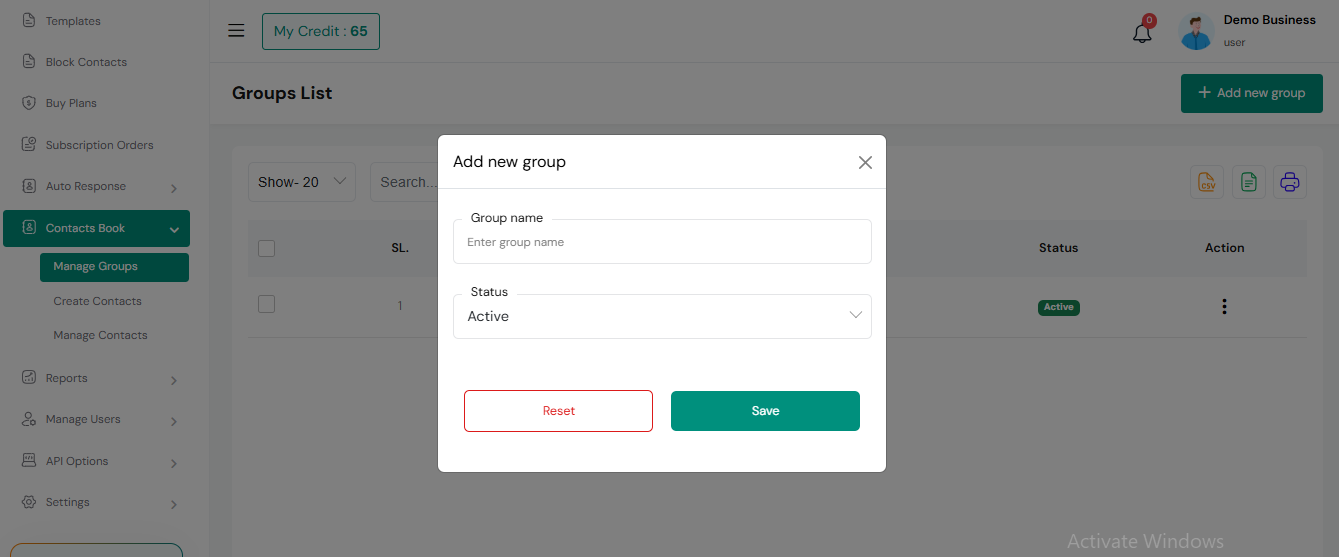
Add Group
Here, you can add a group by filling out the required fields.
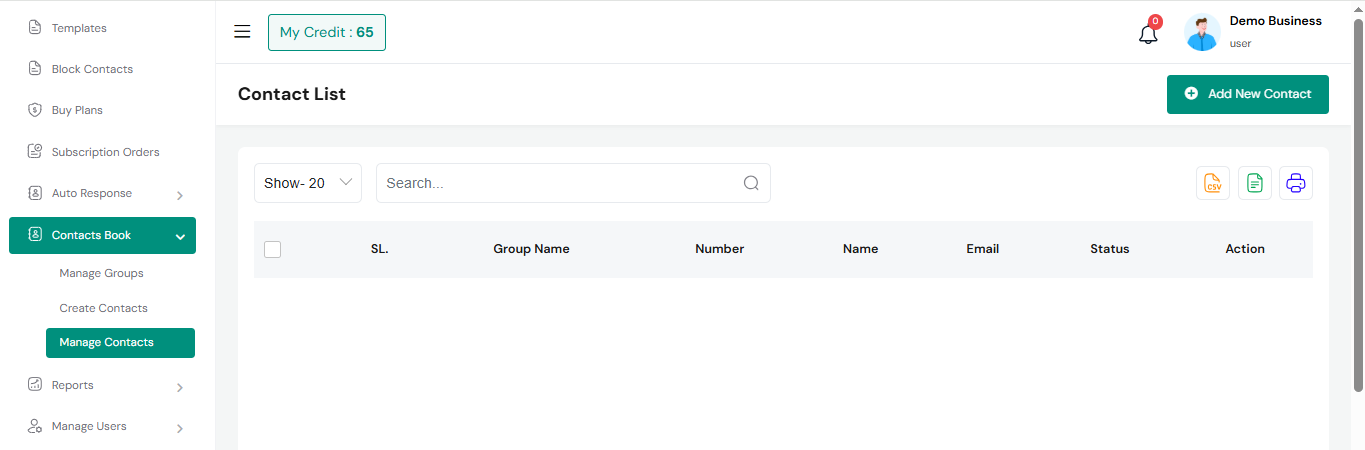
Manage Contacts
In this section, you can view a list of contacts, and there is an option to filter the list using a search function. Additionally, you can edit or delete contacts as needed.
Create Contact
Now you can create a contact by filling in the required fields.

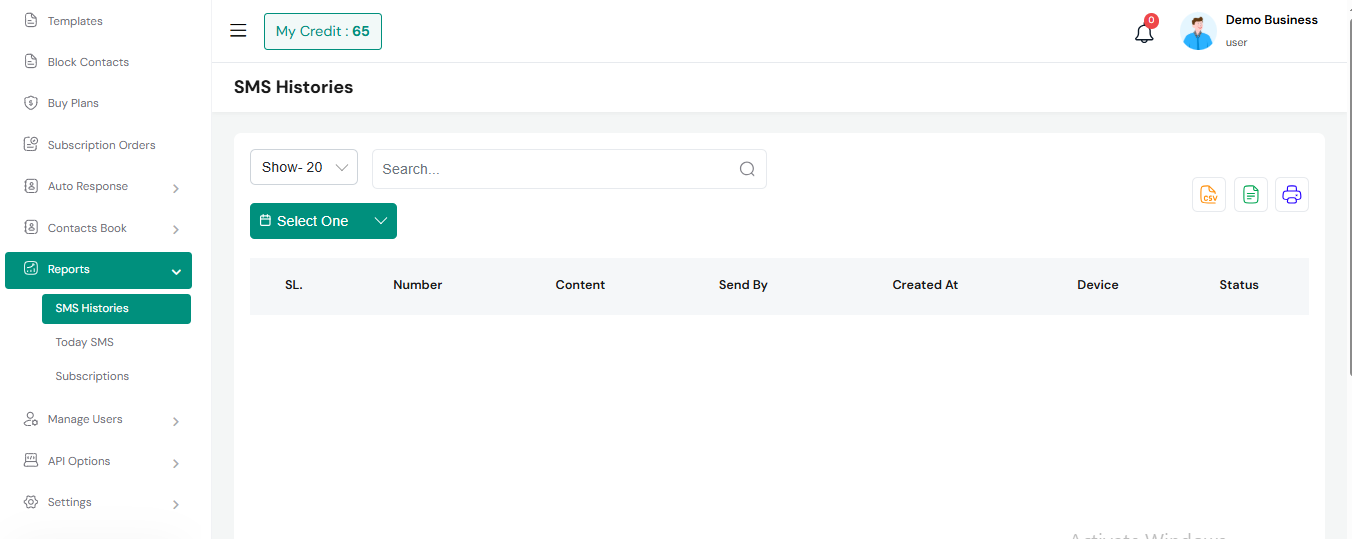
Reports
Here, you can access various reports with search filters and export options.
SMS Histories
Today SMS
Subscriptions
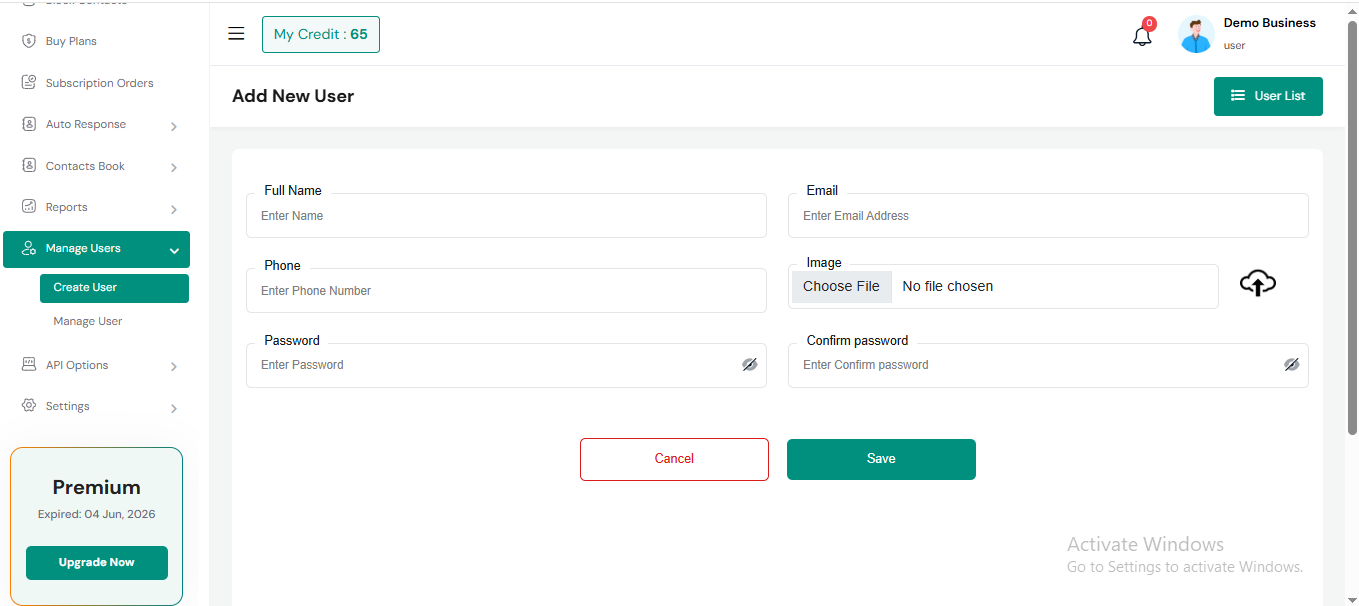
Create User
Here, you can create a user by filling out the required fields. Remember to use a strong password and store it securely.
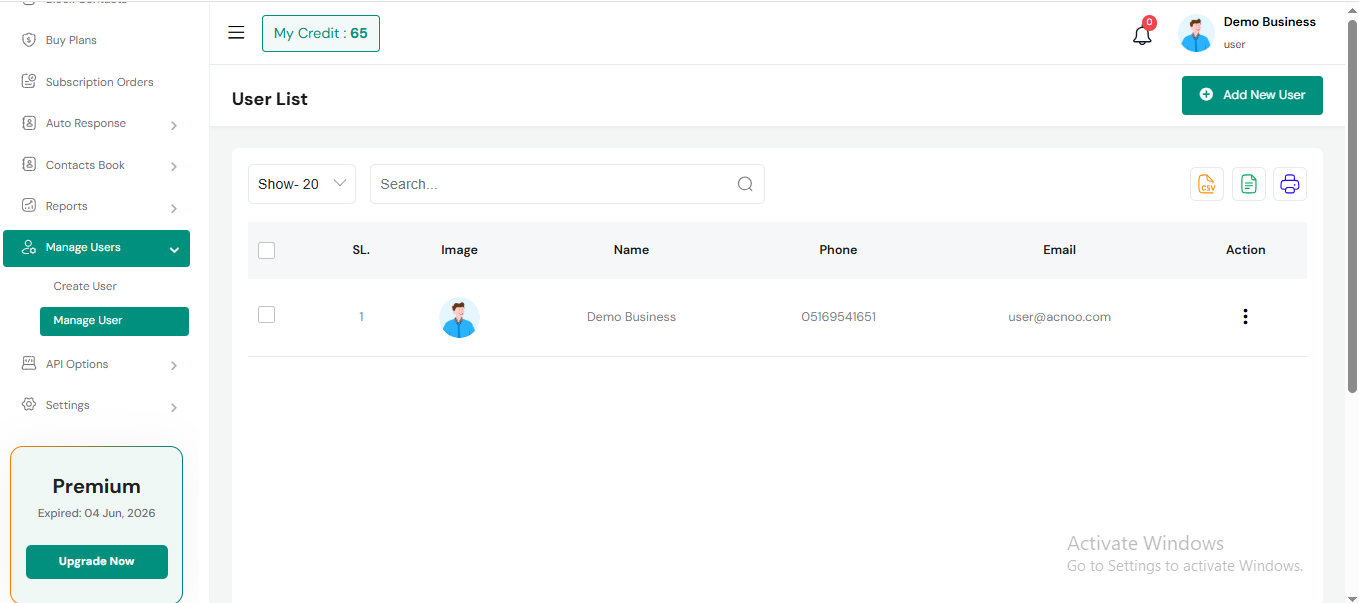
Manage User
Here, you can view the user list, update user details, and use available search filters and export options.
Add New Gateway
Here, you can create a gateway by filling out the required fields.

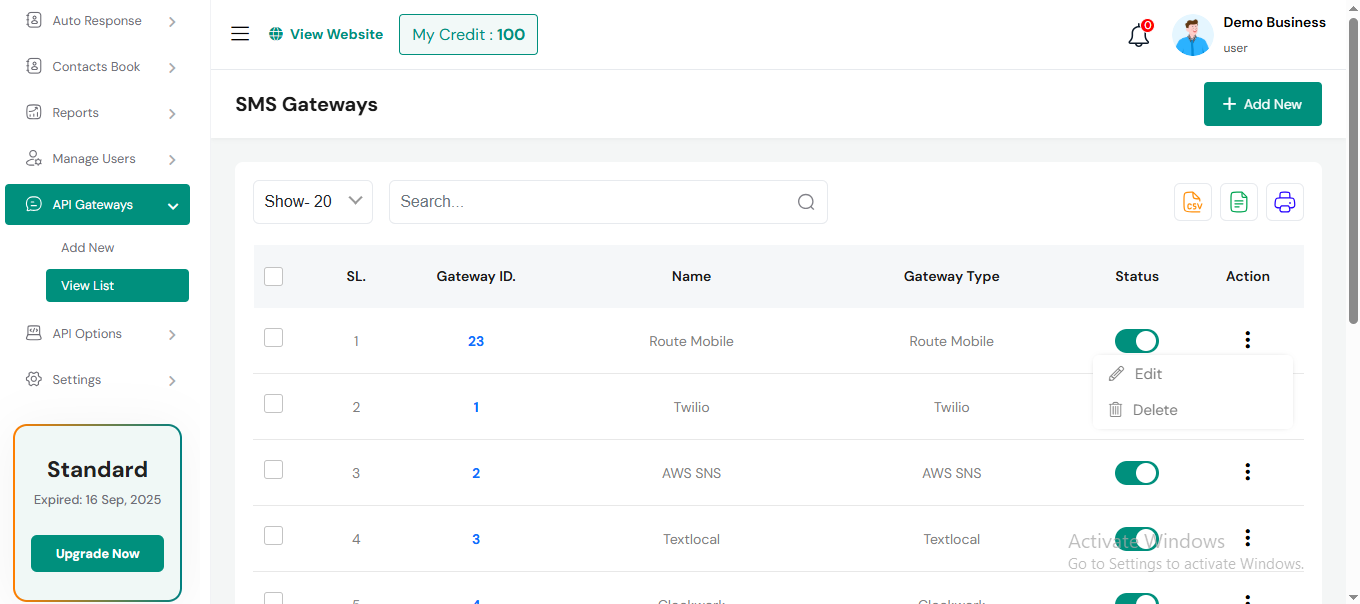
Manage User
Here, you can view the gateway list, update user details, and use available search filters and export options.
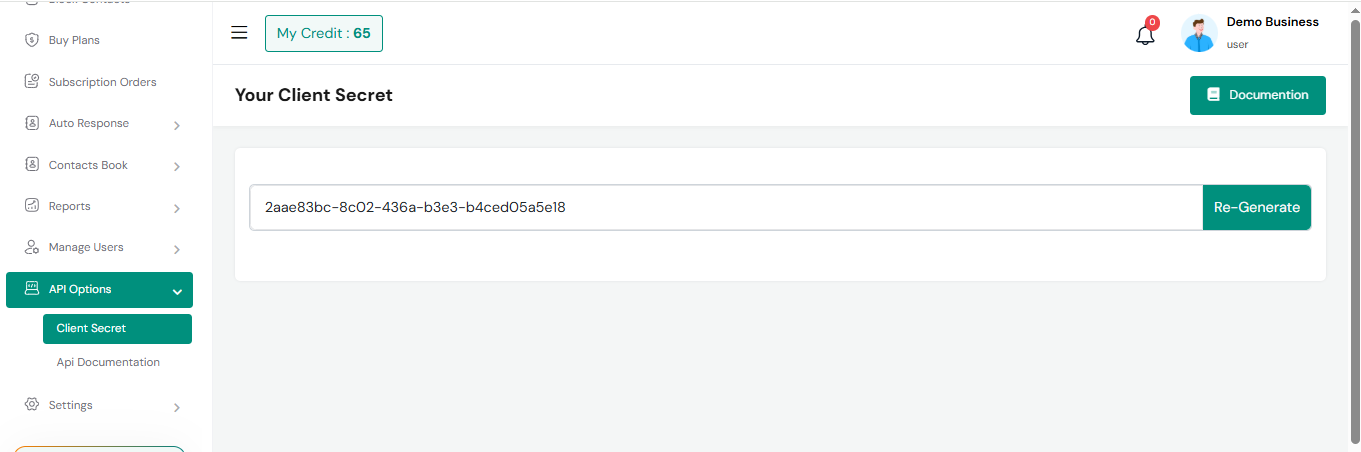
Client Secret
From here you can regenerate your client Secret.
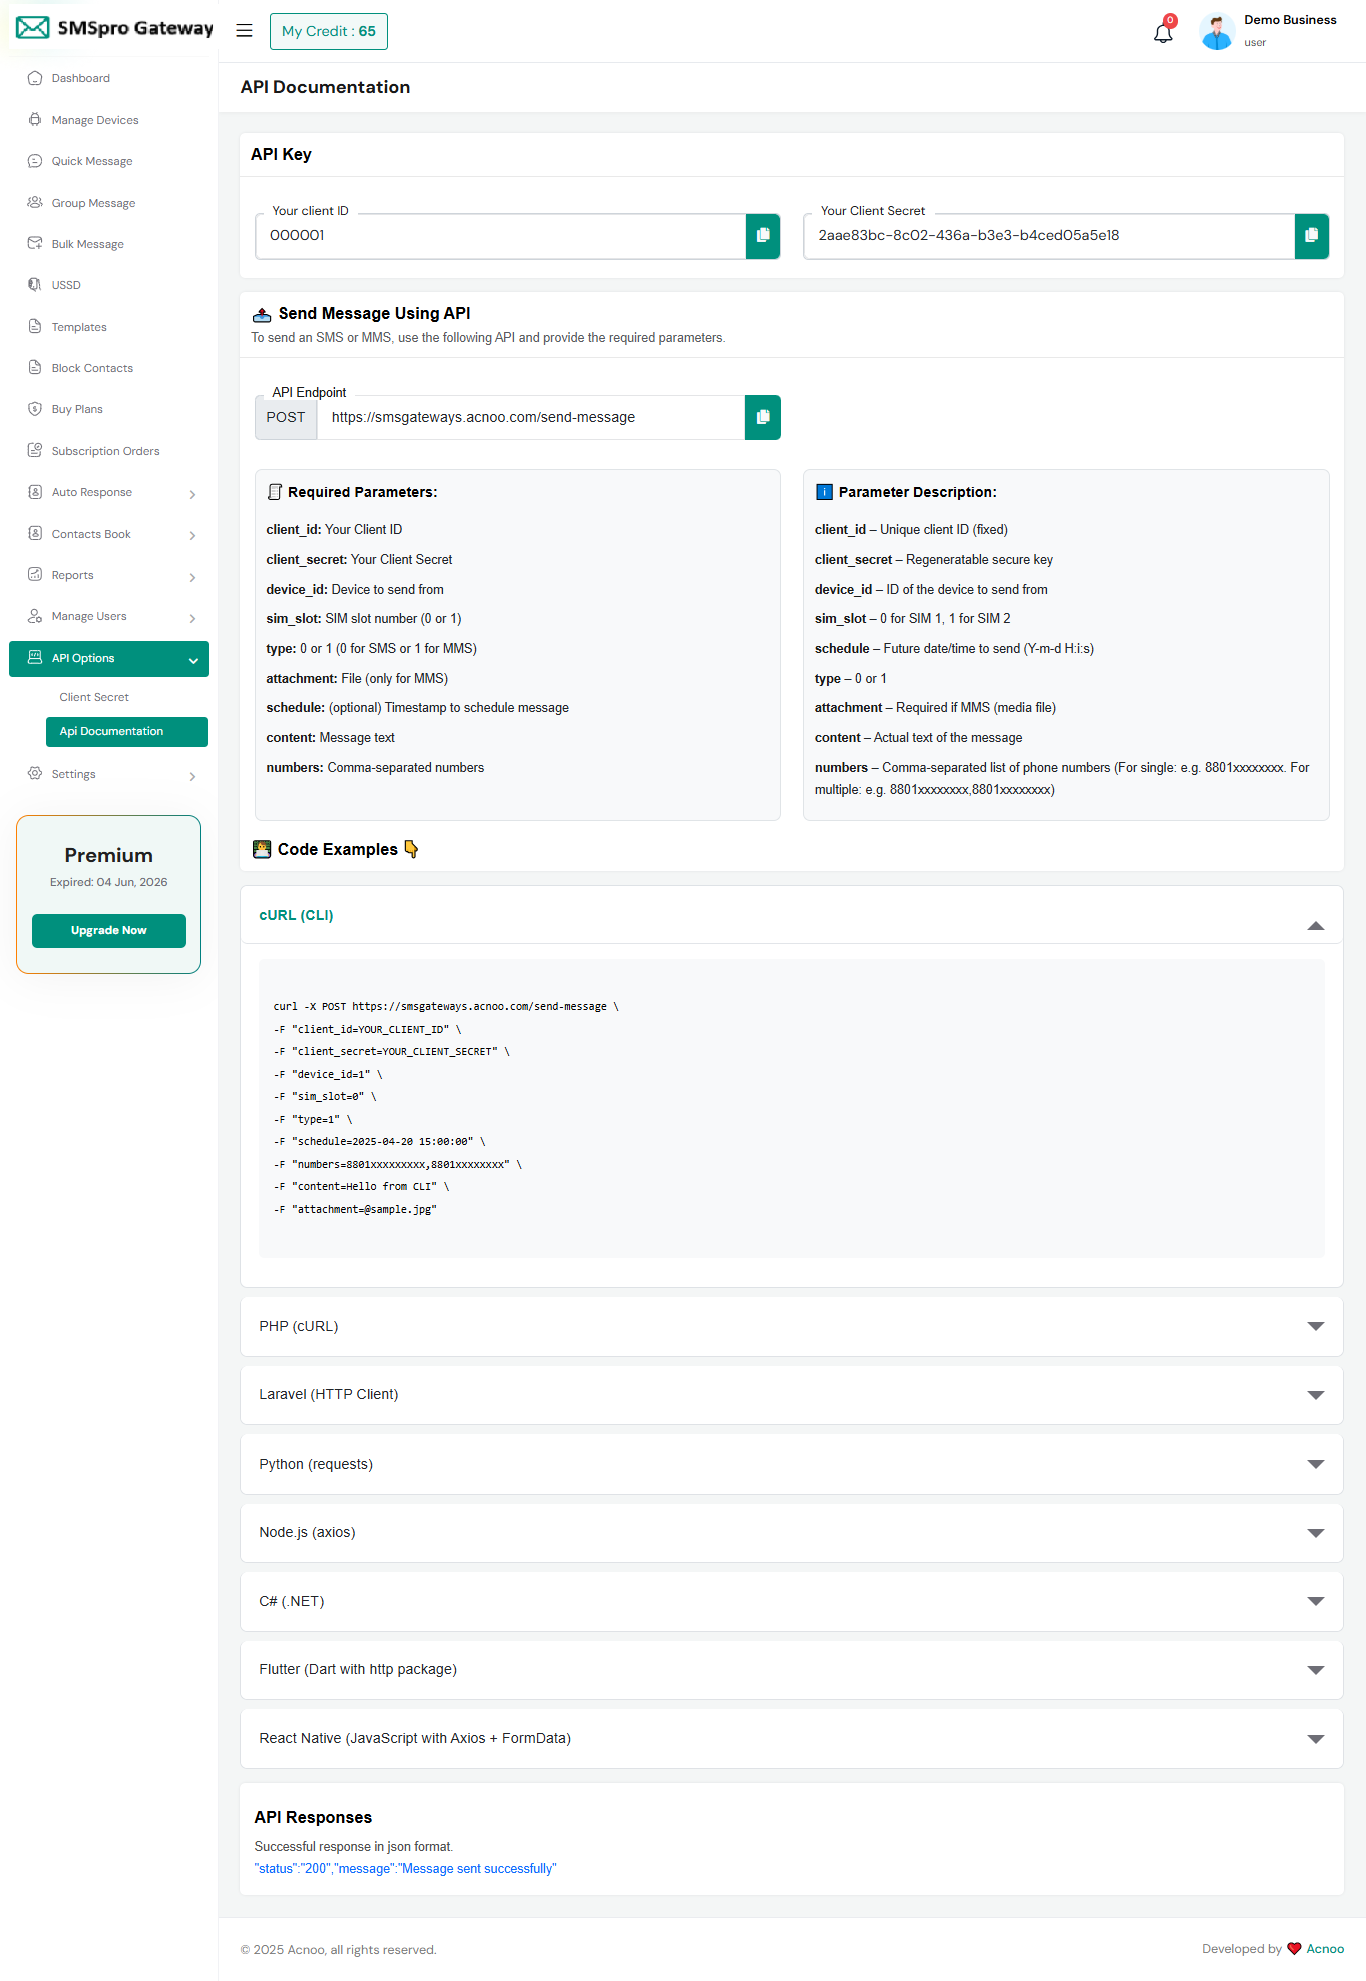
Api Documentation
To use this system, you need an API. You can update the API settings from here.
Settings
Here, you can update gateway settings, manage your user profile and view various notifications.
SMSpro Gateway
Here, you can update your SMSpro Gateway.
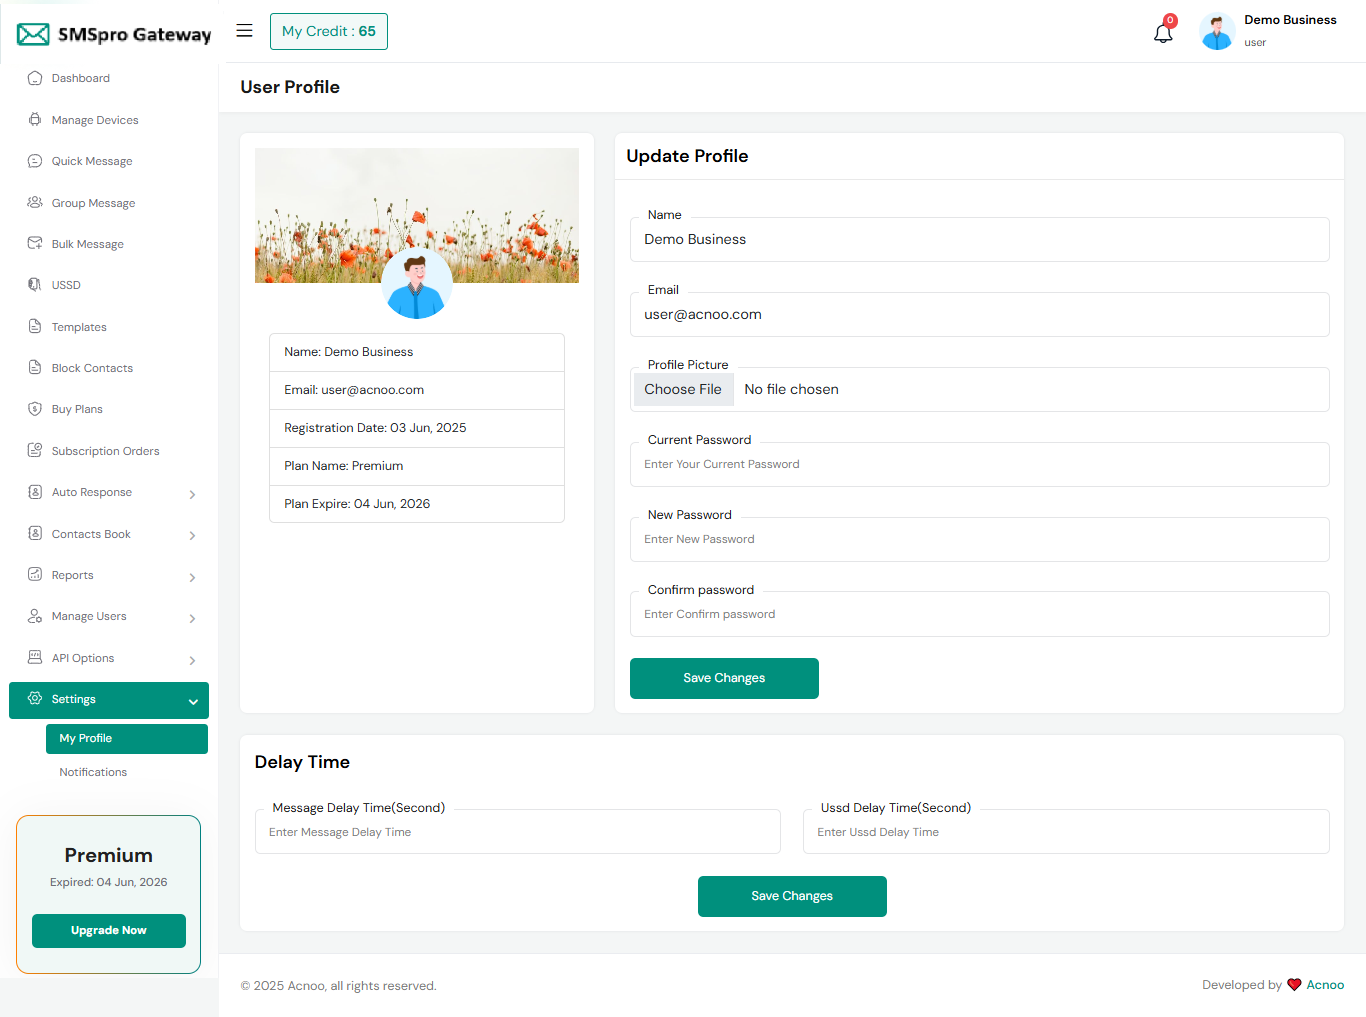
My Profile
You can update your profile information here. If you change your password, make sure to remember it. You can also view your plan details and update your delay message time and USSD delay time (in seconds).
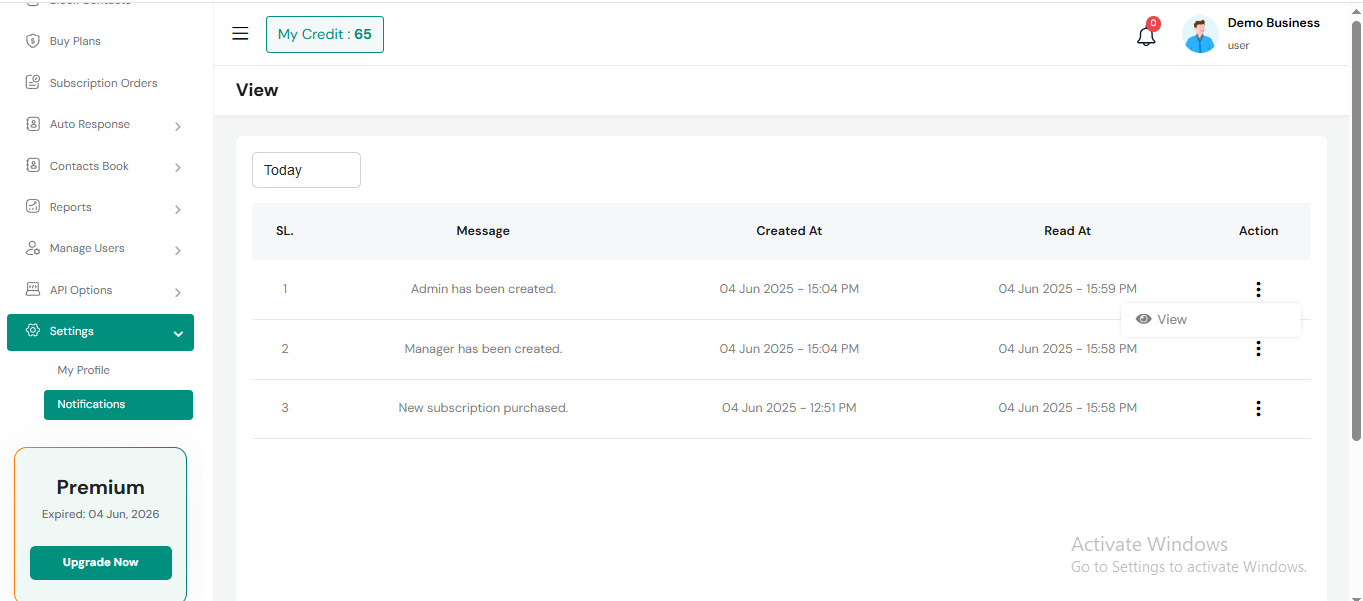
Notifications
Here, you can view a list of various notifications. You also have the option to filter these notifications based on available criteria.In each list, clicking the "View" button allows you to see detailed information.
HELP & SUPPORT
Free support policy includes troubleshooting, technical assistance with the product only. It does not include any customization, additional features integration or concerns about third- party plugins compatibility. But, support is applied to plugin(s) we have developed and integrated ourselves. We appreciate your understanding!
If you need assistance and information on purchased product that is not covered in documentation, mail them on our support at
You can expect answer within 24-48 hours, usually as soon as possible in the order they were received.
Additionally, if any email has no response from the item owner for more than 7 days, that support email will be archived by default. However, if you need further assistance, you can mail us again.